|
Kandao Meeting Pro is a video conferencing camera equipped with android operation system,360 degree lens omni-directional microphone, and Hi-Fi speaker for meeting perfection. Having two working mode which is the Pro mode and the USB mode.
PRO MODE
(What's need: Meeting Pro, Adapter, Controller, Displayer, HDMI Cable)
Step 1. Cable Connction
Plug in the power, use the HDMI cable to connect Meeting Pro and the displayer.
Step 2. Power On
Long press the power button on Kandao Meeting Pro for about 3 seconds until light up.
Once success, the displayer will go to the connection page with signal light in standing green. If the displayer does not support 1080 30HZ, long-press the VOL+ and VOL- buttons at the same for about three seconds to switch the HDMI output resolution to 720 60HZ.
Step 3. Controller Pairing
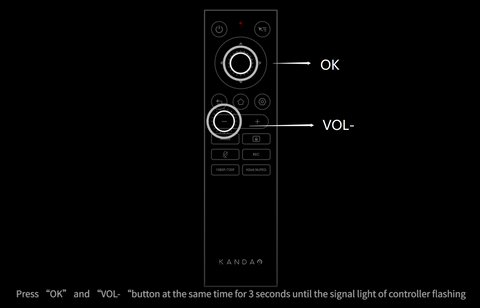
Press "OK" and "VOL-" button at the same time for 3 seconds until the signal light of controller flashing. The displayer will show "Controller Connected". The controller can be also used as a mouse by pressing the "mouse" button on the upper right of it. After the first pairing, the controller can be activated by pressing any button on the controller. Wired/wireless mouse and keyboard are allowed to be connected through USB.
Step 4. language and Time Zone Setting and Network Connection
After selecting the language and time zone, Wi-Fi can be connected in the network setting page. Wired network is also available through LAN.
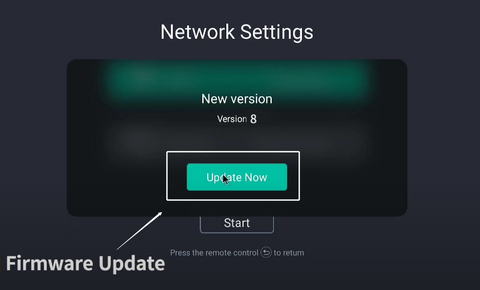
Step 5. Firmware Update
After a successful network connection, if it pops up firmware update notification, please download the latest firmware. Once succeed, Meeting Pro will restart automatically to achieve updating. It will take almost 3 minutes to update. Please wait until the green light keeps on before your next step.
Step 6. Download Conferencing Software
Meeting Pro operation system has three pages: Main Page, App Store Page, and System Introduction Page. Please go to APP Store Page to download conferencing software when first-time using it.
Step 7. Start Conferencing
Choose a conferencing software on the Main Page to start your meeting.
Step 8. Conferencing Management
Manage your meeting conveniently with controller. Adjust volume with the volume button. Switch mode with the mode btton, such as the disscussion mode, presentation mode, patrol mode, global mode, and custom mode. With Meeting Recognition 2.0, the picture will always track and highlight the speaking person under every meeting mode except the global mode. View locking and zoom function (except global mode). If you want to fix the conferencing pictrure, Meeting Pro allow you to lock view, adjust view, and zoom in/out. Foe example, "discussion mode".
Long press the "Mode" button on Meeting Pro or the "Lock" button on the remote controller, and turn off the mouse button, it will enter view locking with a lock symbol at the bottom right corner of the screen.

The left and the right button can be used to choose the separated screen. The one you choose will show in the blue frame. Press the "OK" button on the controller to select the one you want to adjust, while the blue frame will become white. Press the "Direction" button to adjust the view for it. Press volume up/down to zoom in/out, while press the "OK" button again to finish.
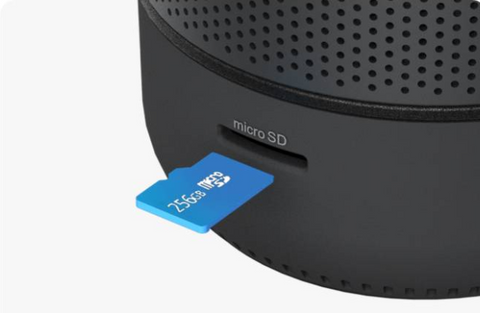
Step 9. Conferencing Recording
Insert SD card (FAT 32 only) into Meeting Pro, while pressing the record button on the controller or long-press the mute button on the camera. Camera tool will be started to record local video automatically. While pressing the same button again to end the recording. Pull out the SD card, and get the conference video from DCIM file. Long press the power button on the controller or Meeting Pro to switch off.
USB MODE - HOW TO SET UP
(Meeting Pro, Adapter, Controller, Computer, USB Cable)
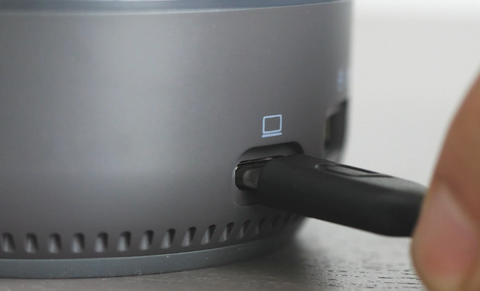
Plugin the power, connect Meeting Pro and computer through USB cable (Please caution to the power and computer symbol when connect).
Long press the power button on Meeting Pro to start. When success, the signal light will show standing screen. Make sure the computer is connected to the network. A meeting can be raised after starting an installed conferencing software on the computer.
Generally, Meeting Pro can be recognized as the video/audio source automatically by conferencing software. If it is not recognized, choose "Kandao Meeting" as the video/audio source in the setting page of conferencing software, such as Tencent meeting. Press "OK" and "VOL-" button at the same time for 3 seconds to pair the controller. It is also available for USB mode to use the controller to switch mode, lock the view, zoom in/out, switch resolution, and so on. For example, use the controller to switch 720P/1080P for matching with more conferencing software.
Kandao Meeting Pro - a 360 degree conferencing camera for meeting perfection.
|


