


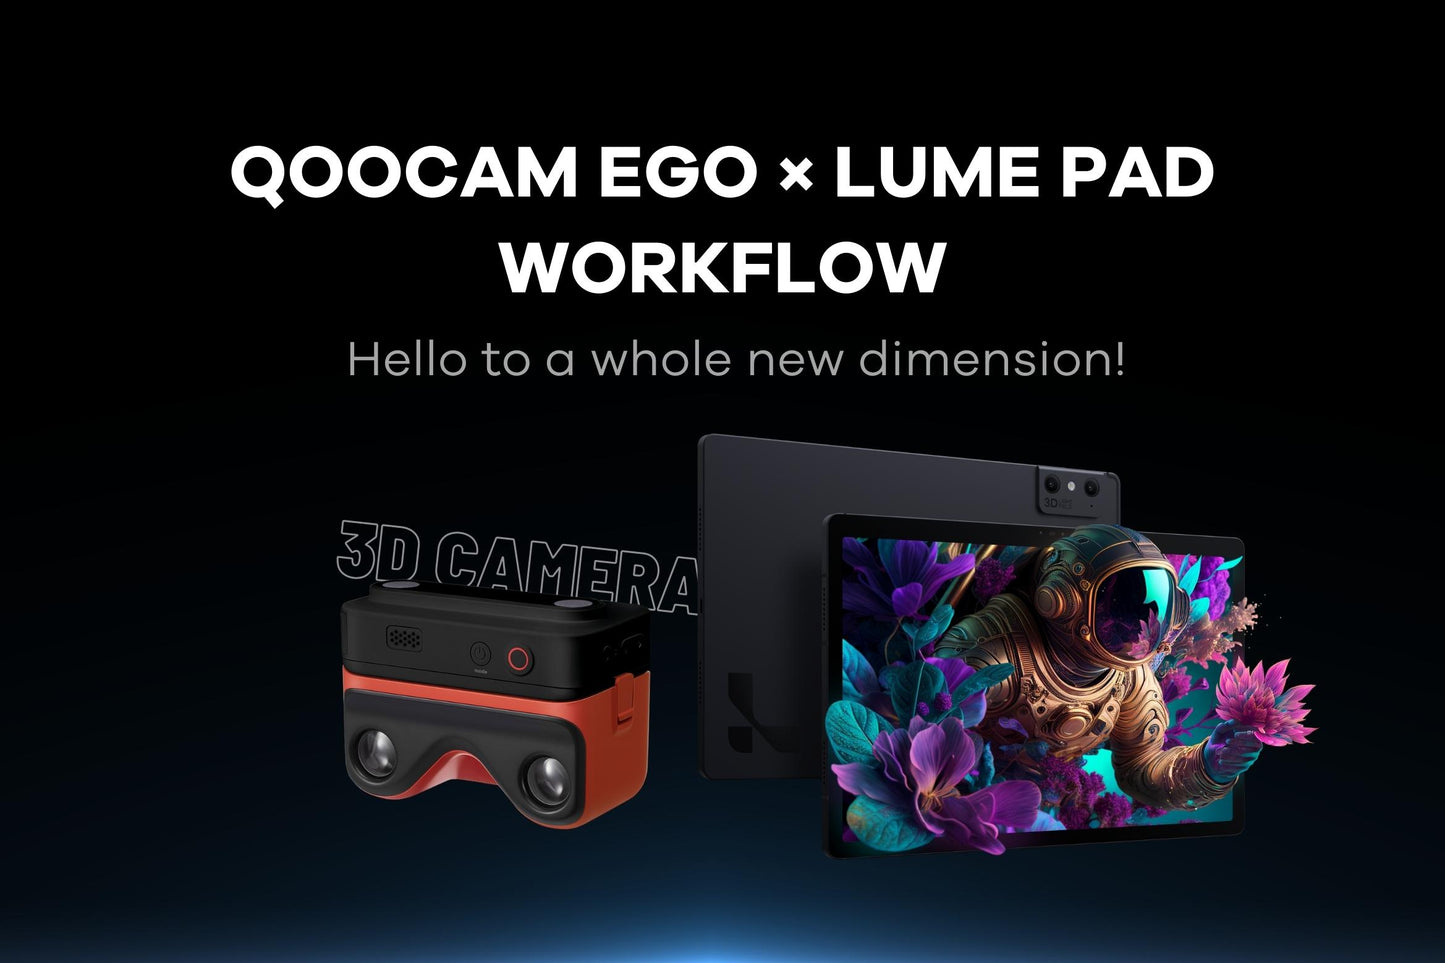
QooCam EGO Part
1. Shooting
QooCam EGO is set as auto focus as default. Tap the aimed object on the screen.
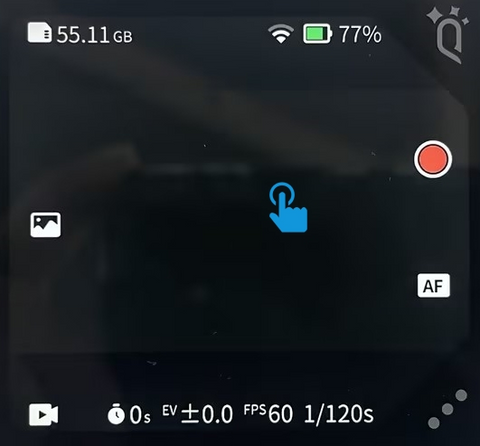
Click the shooting button after the green square appears.
2. Connect to Wi-Fi
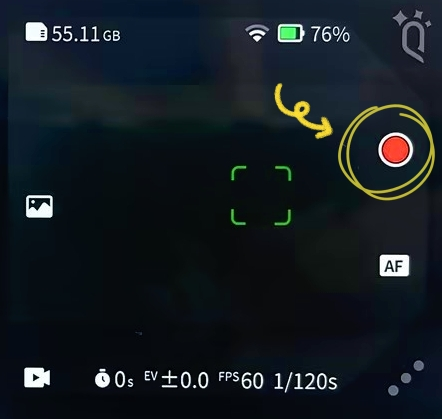
Drag the setting panel from the top of the screen. Turn on the “Wi-Fi” and then click the “more setting”icon.
Click the “Wi-Fi” and input the password of the Wi-Fi. Click the Accout after the Wi-Fi Connection succeeds.

3. Login the QooCam Account
Input the username and password.
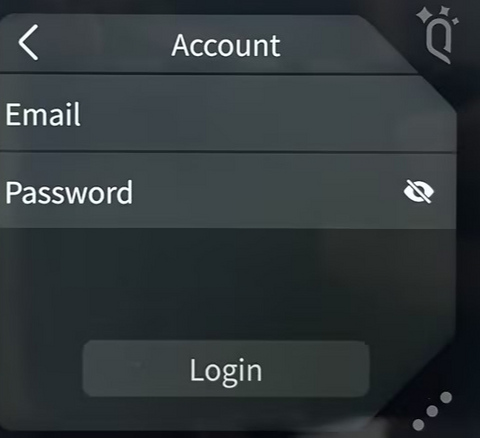
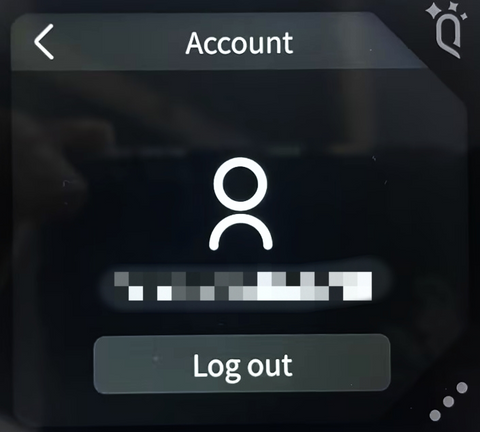
Log in successfully.
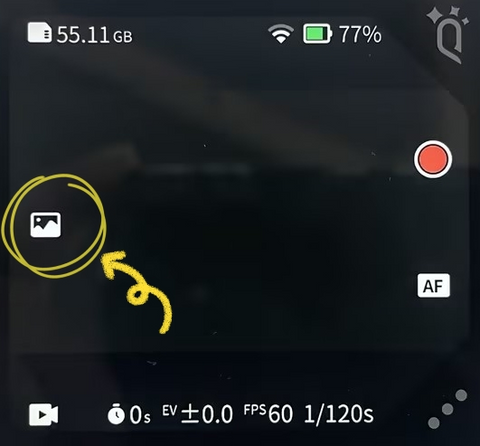
4. Enter the Album
Click the “Album” icon to enter the Album.
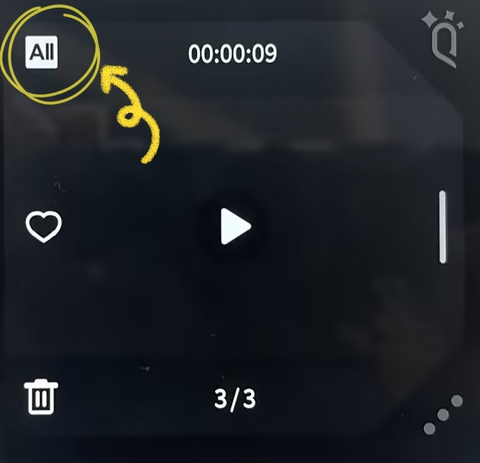
Click the icon on the left-top to enter the file list.
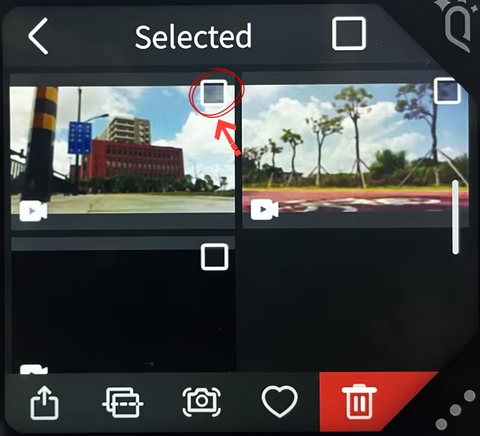
5. Multi-Select Files
Click the upper-right icon to enter the multi-select status.
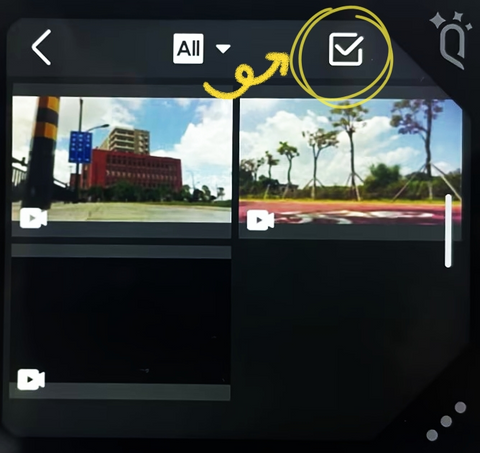
Click the checkbox to select files.
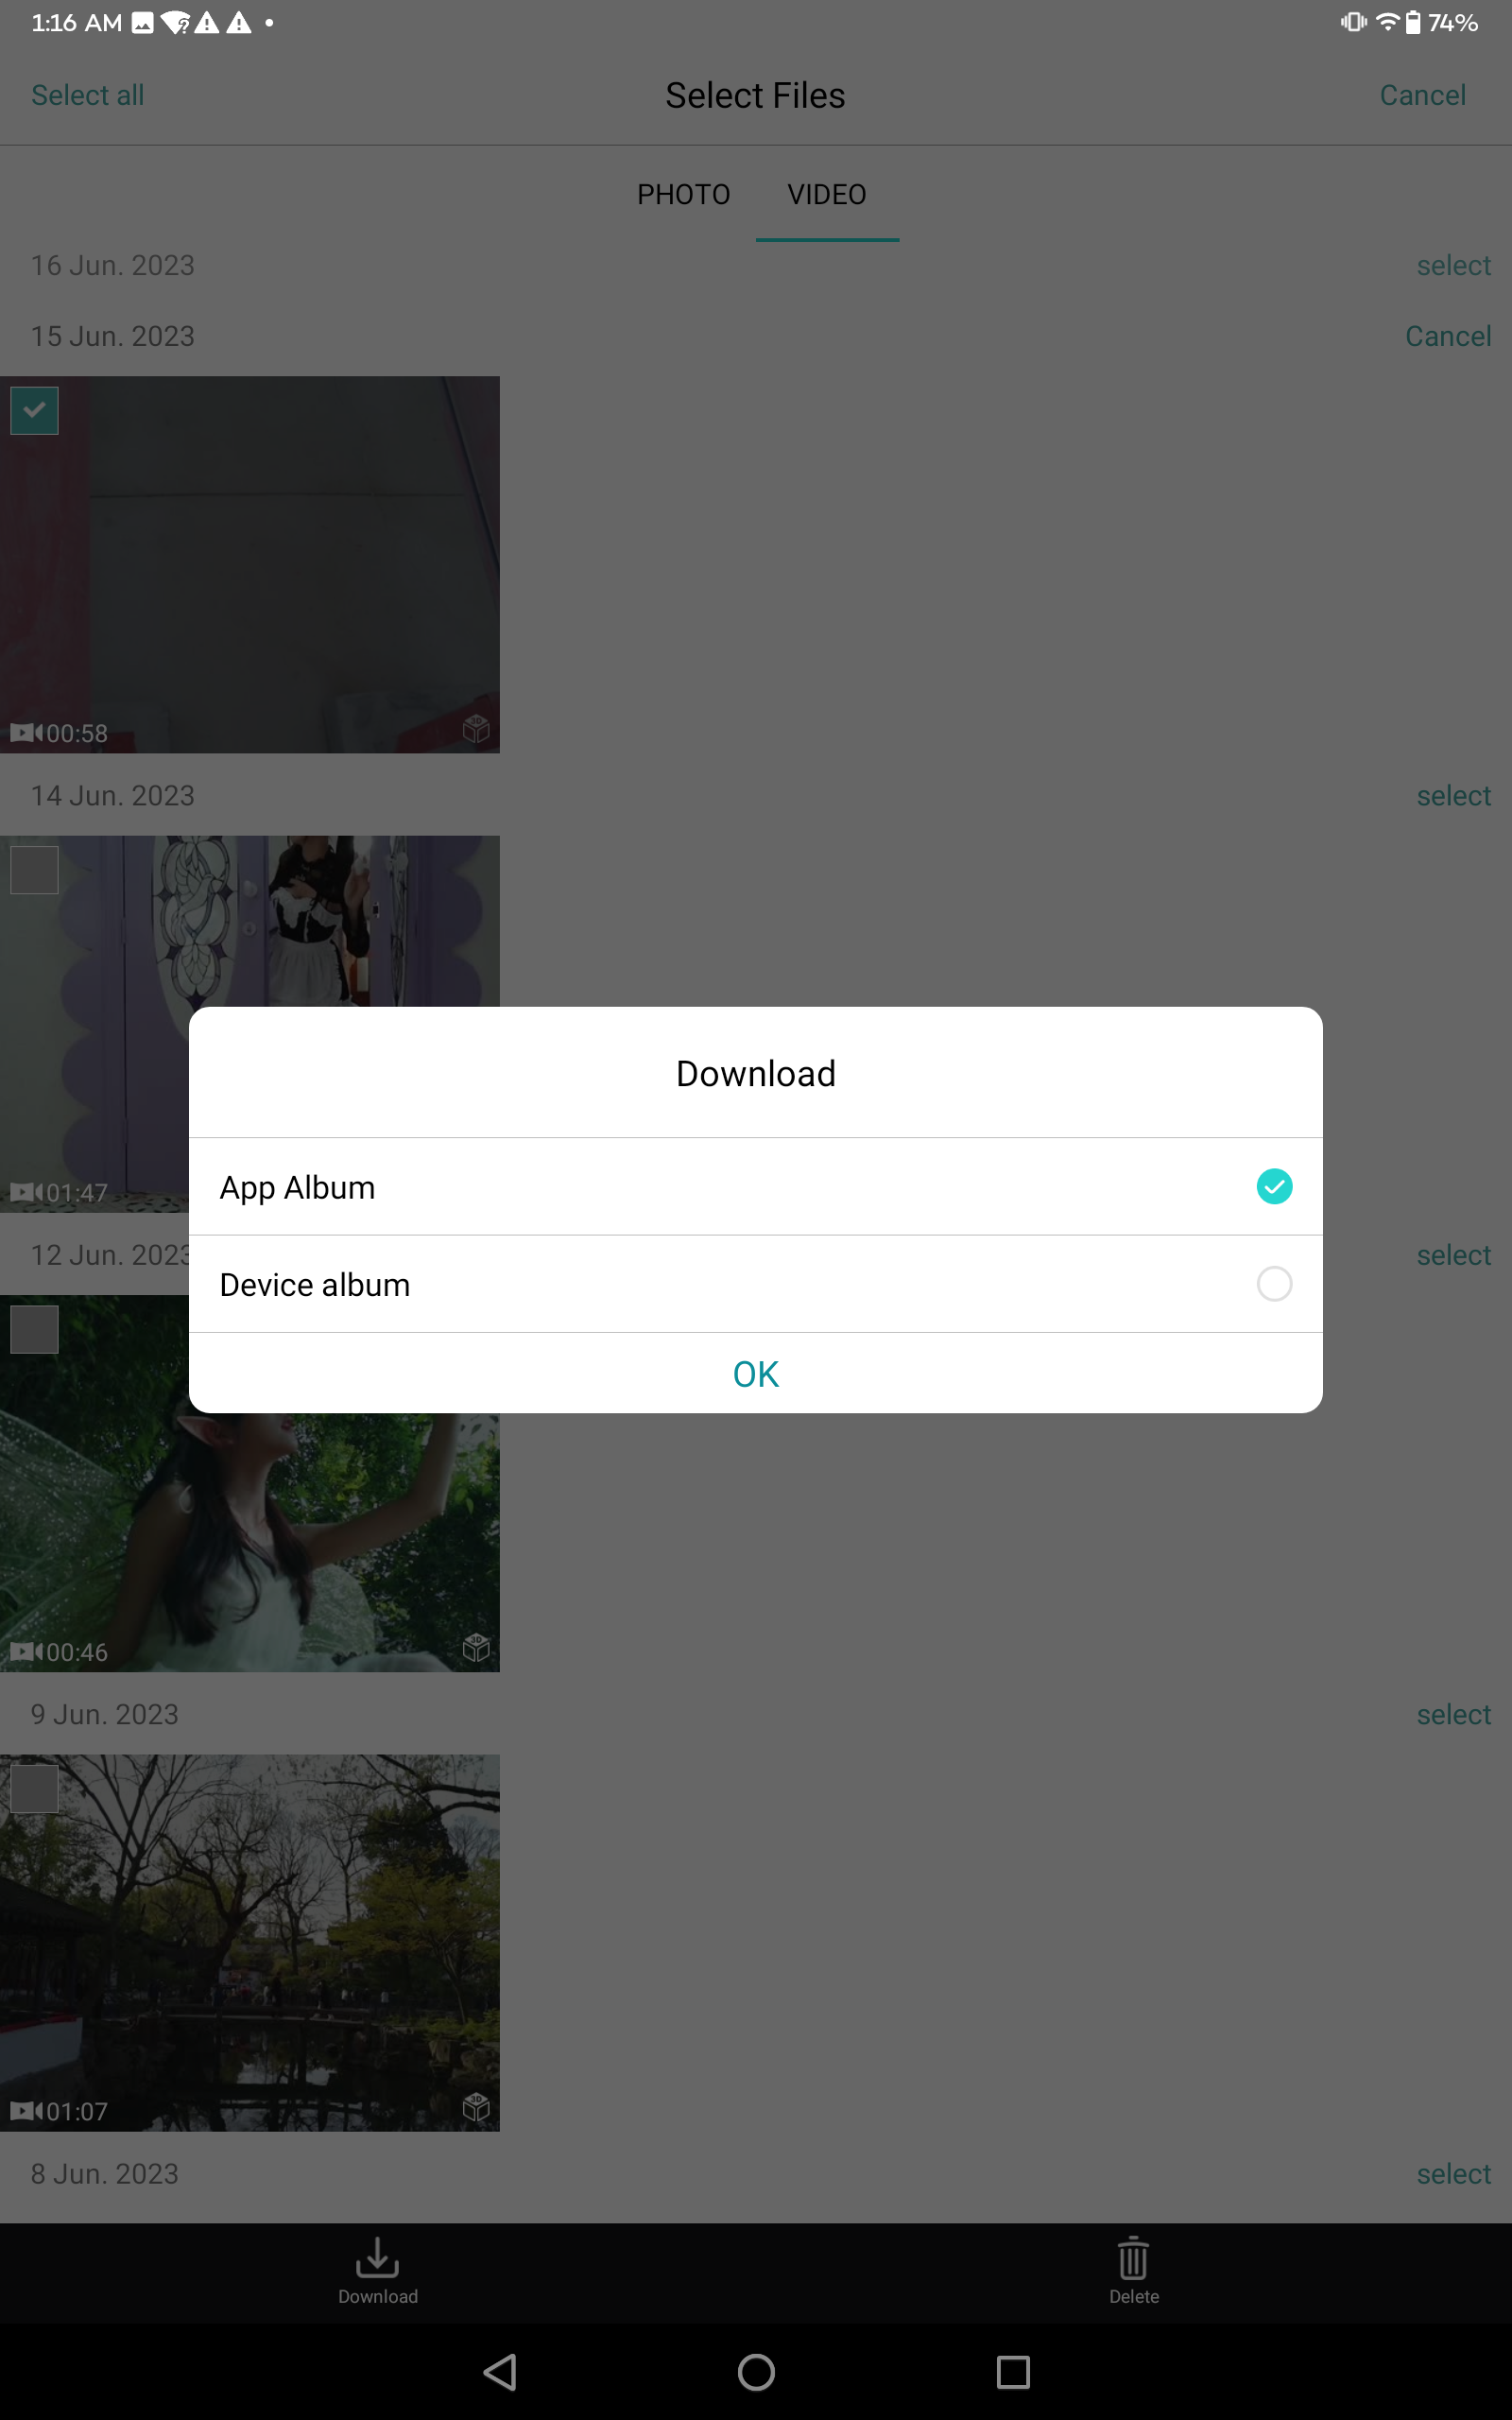
6. Upload Files
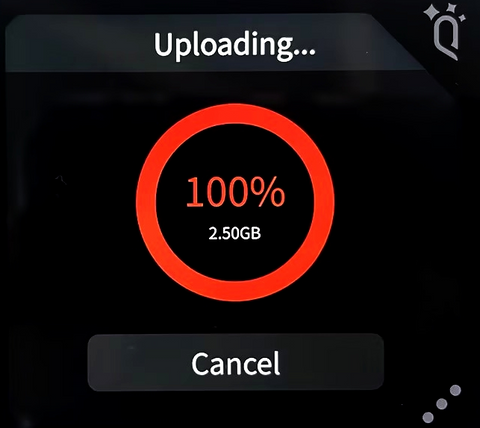
Click the “upload” button after selecting the files.
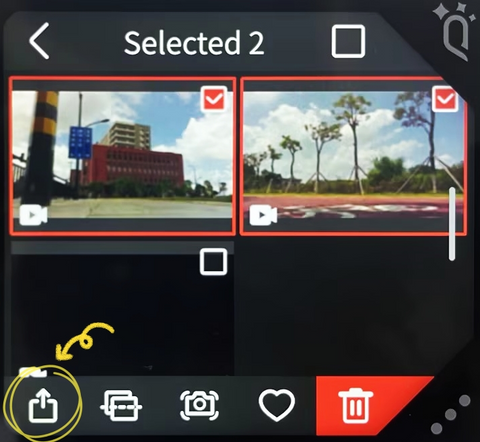
Uploading begins. Please wait till it completes.
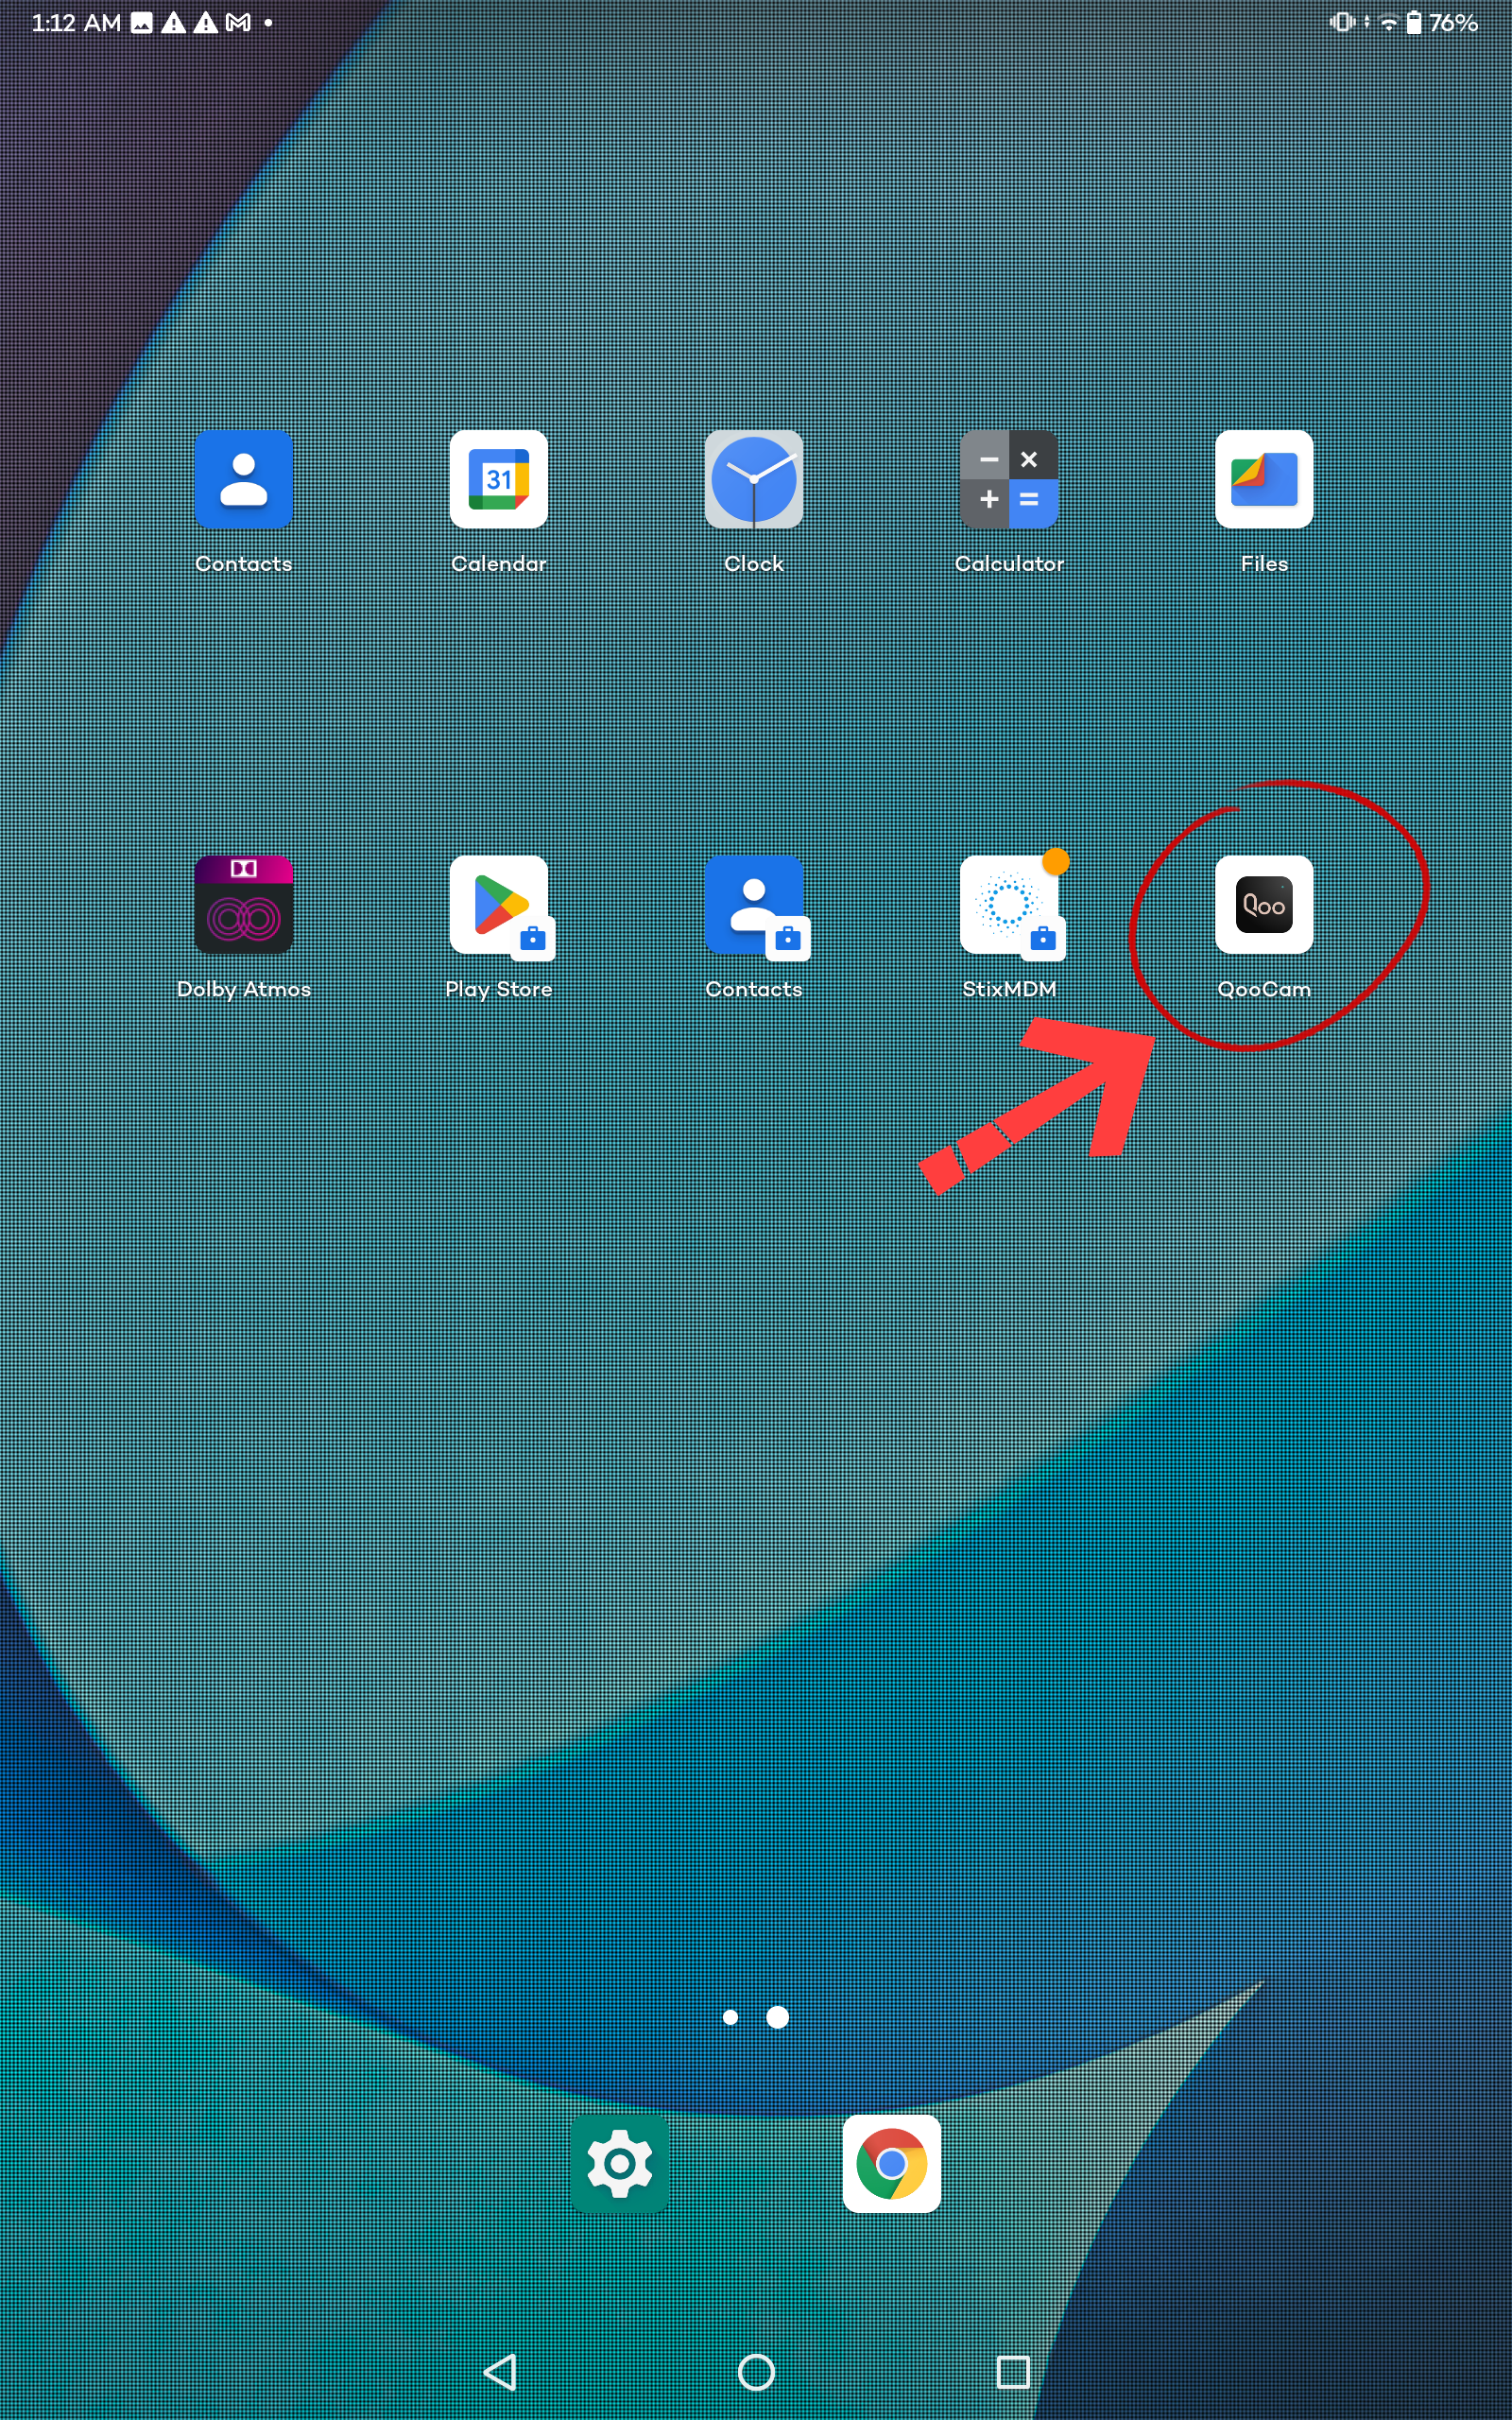
Lume Pad QooCam App Part
1. Install and Open QooCam App on the Lume Pad.
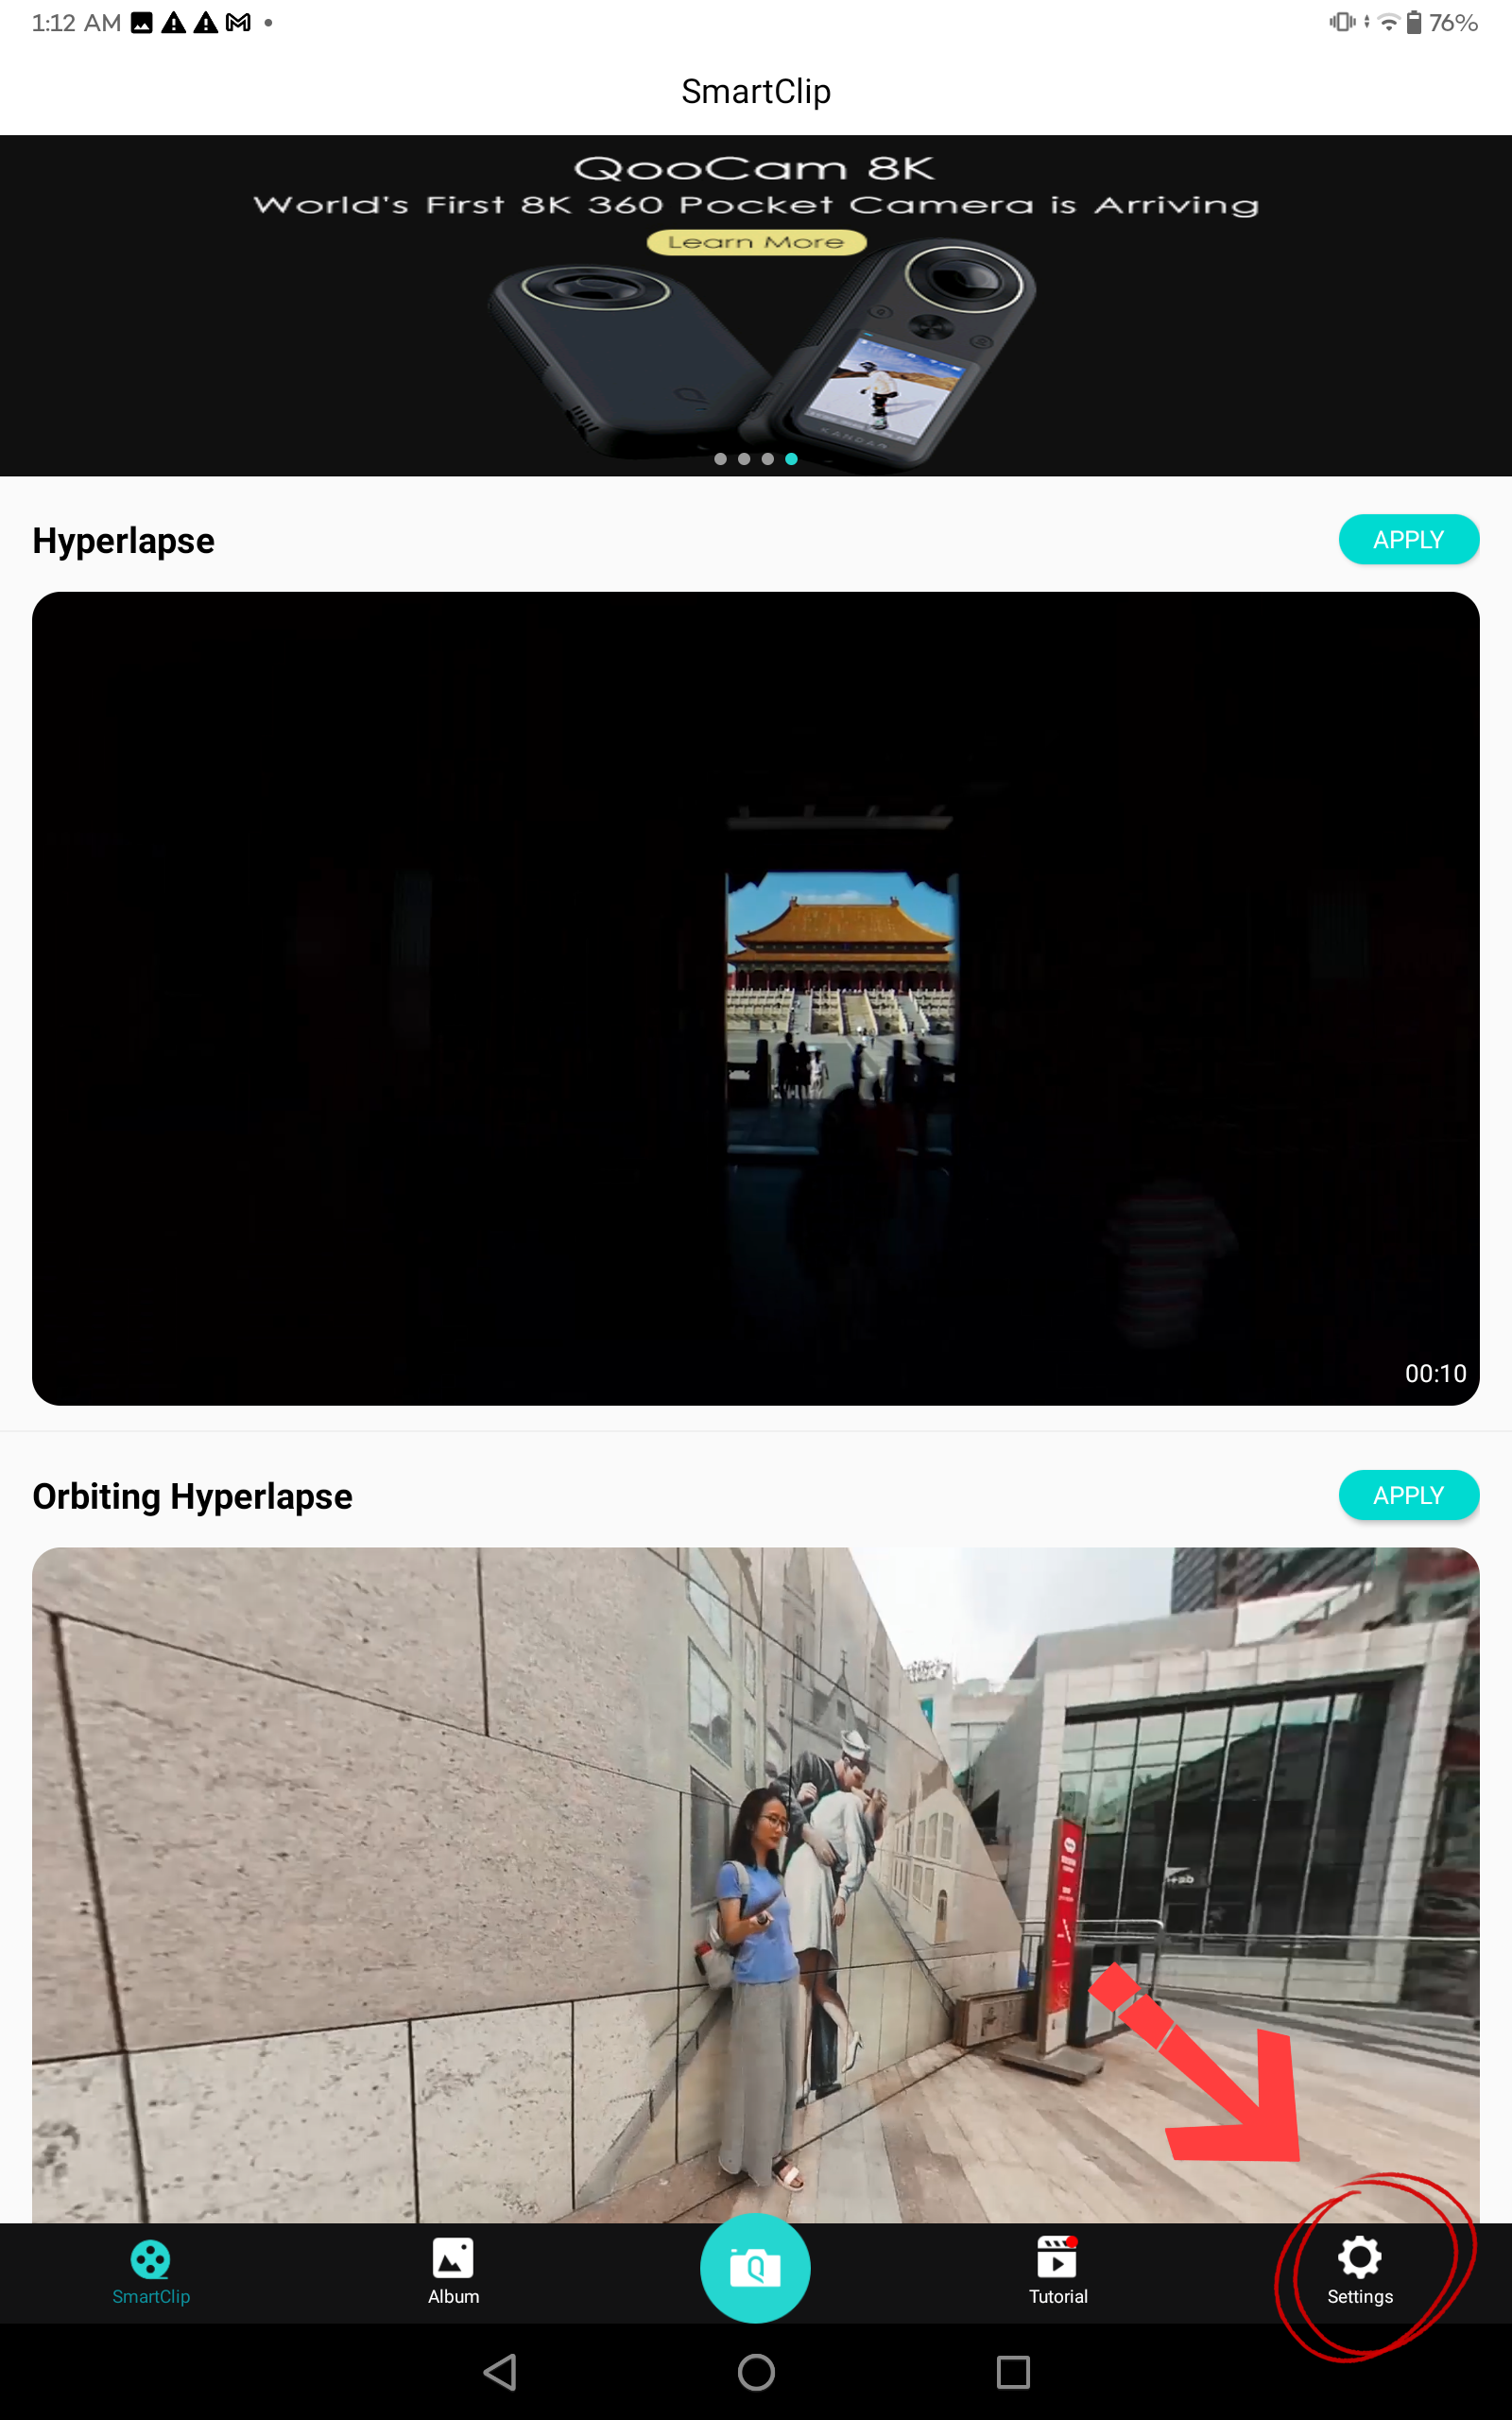
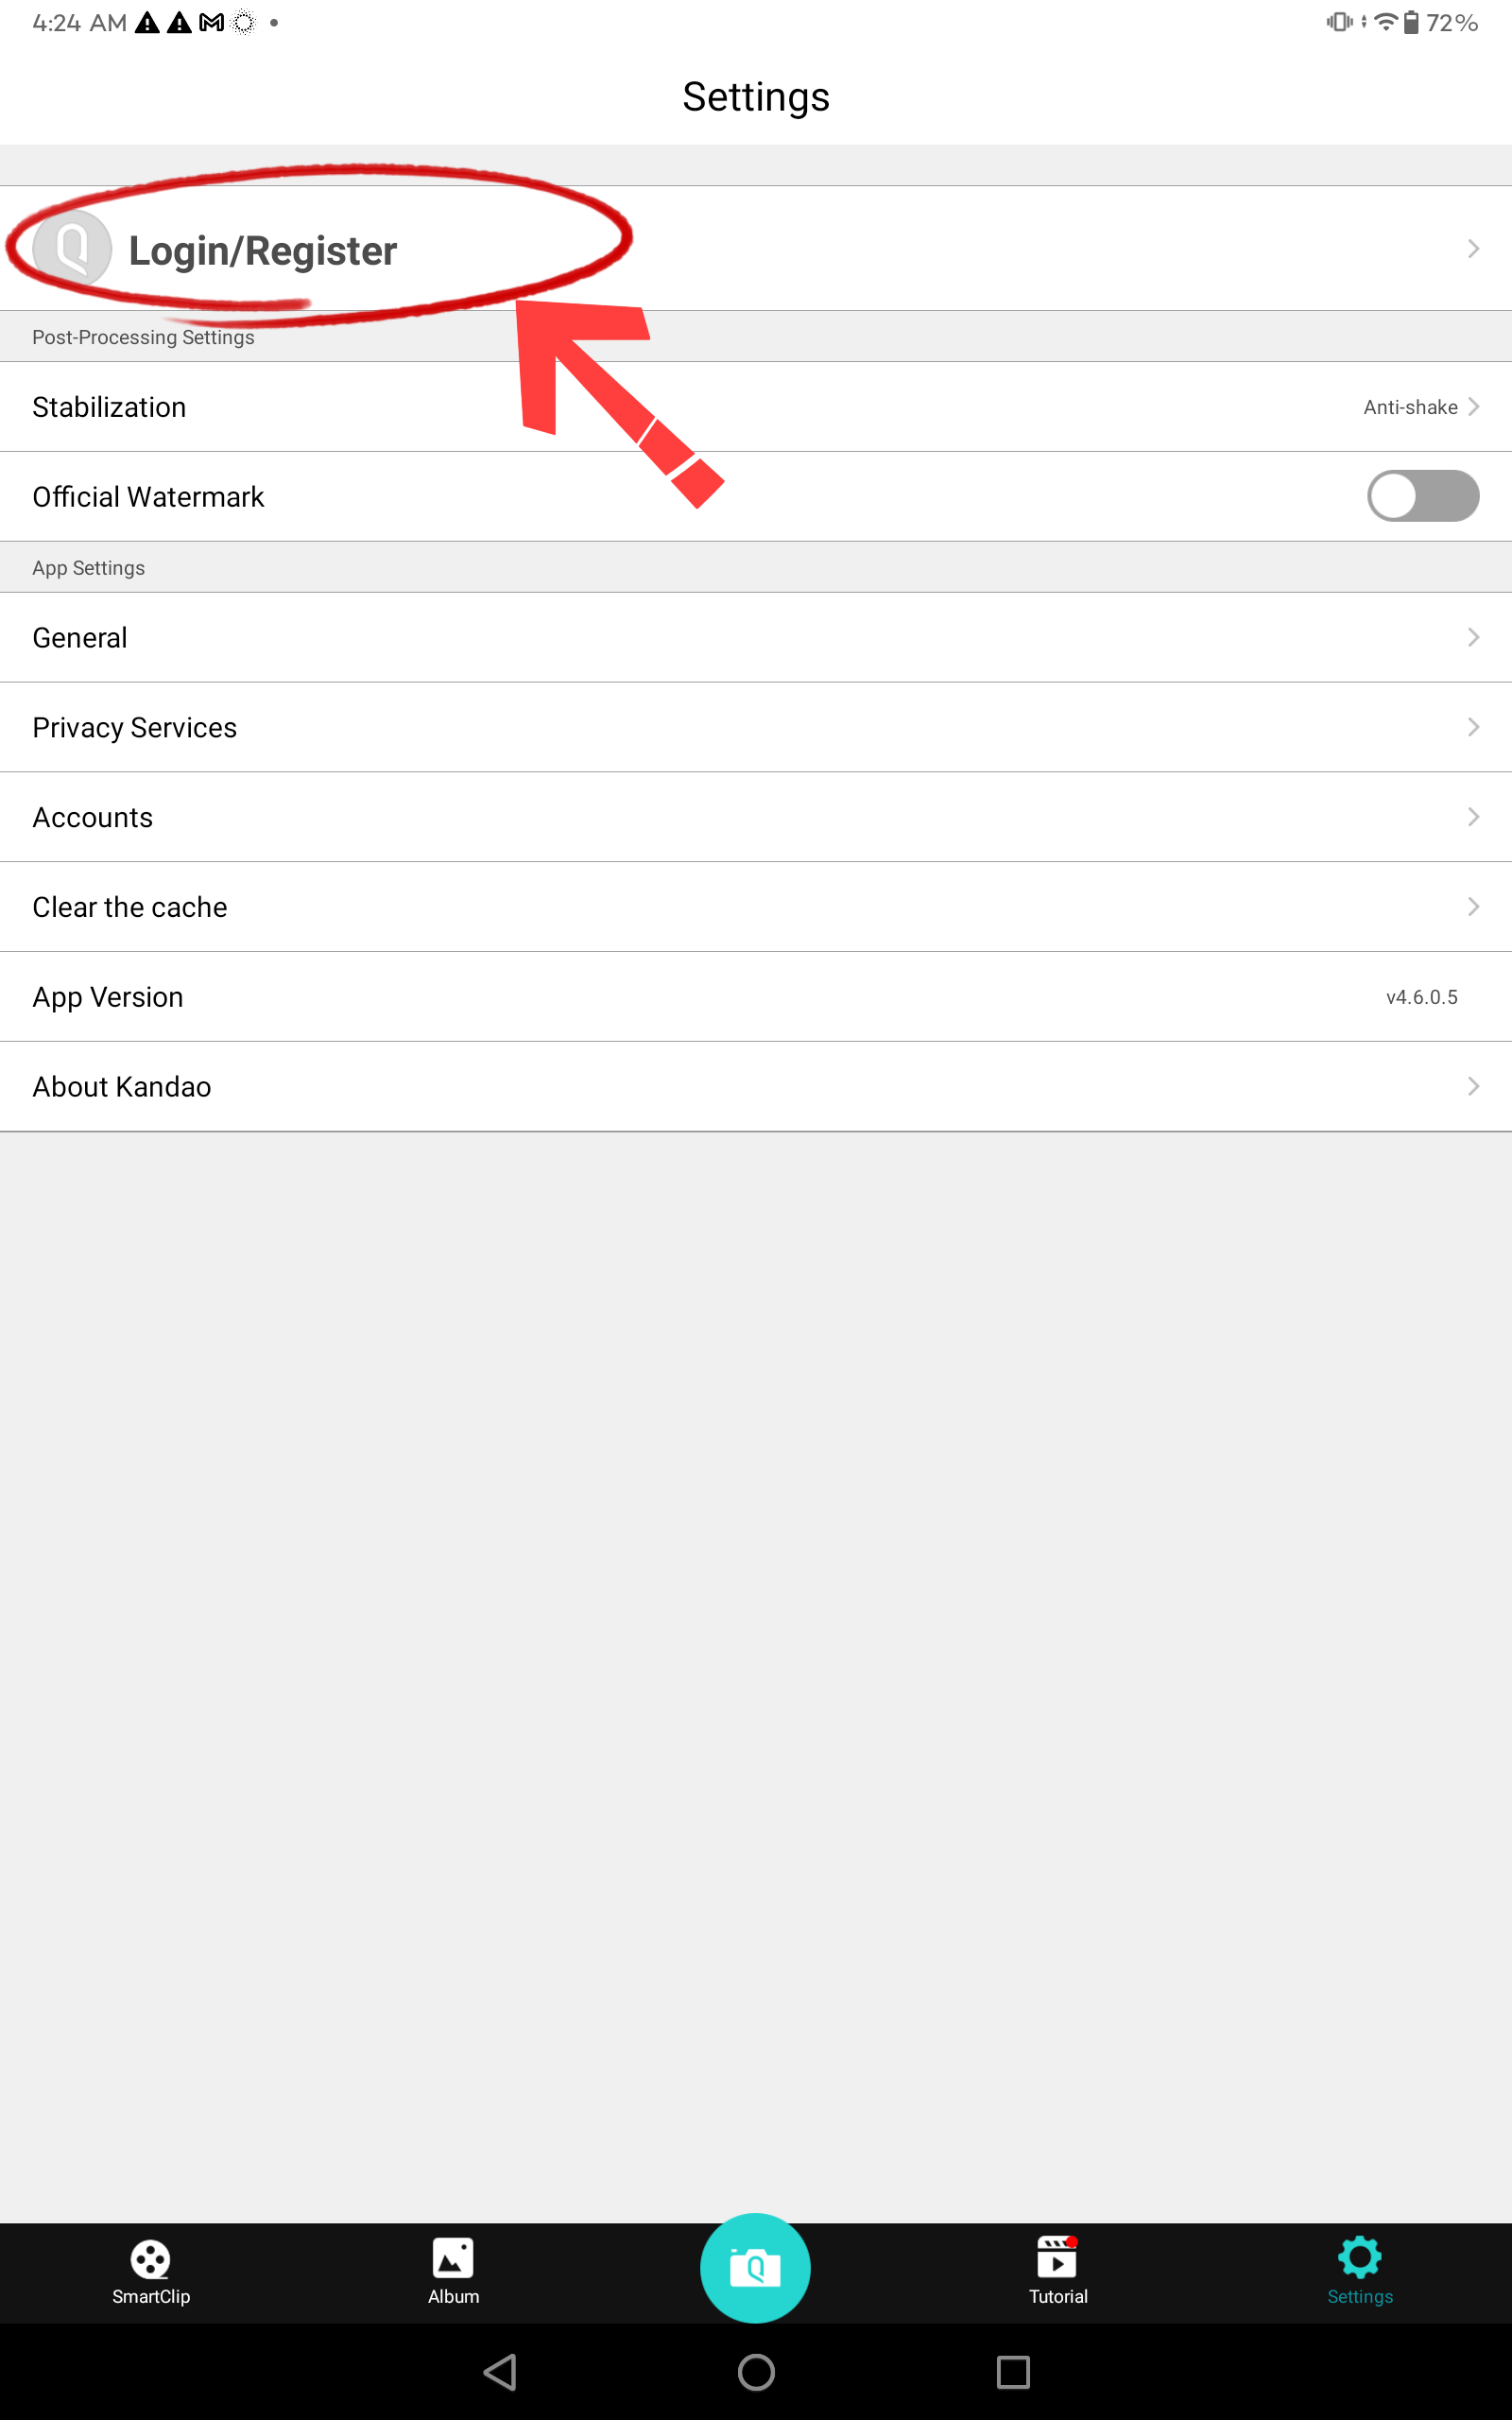
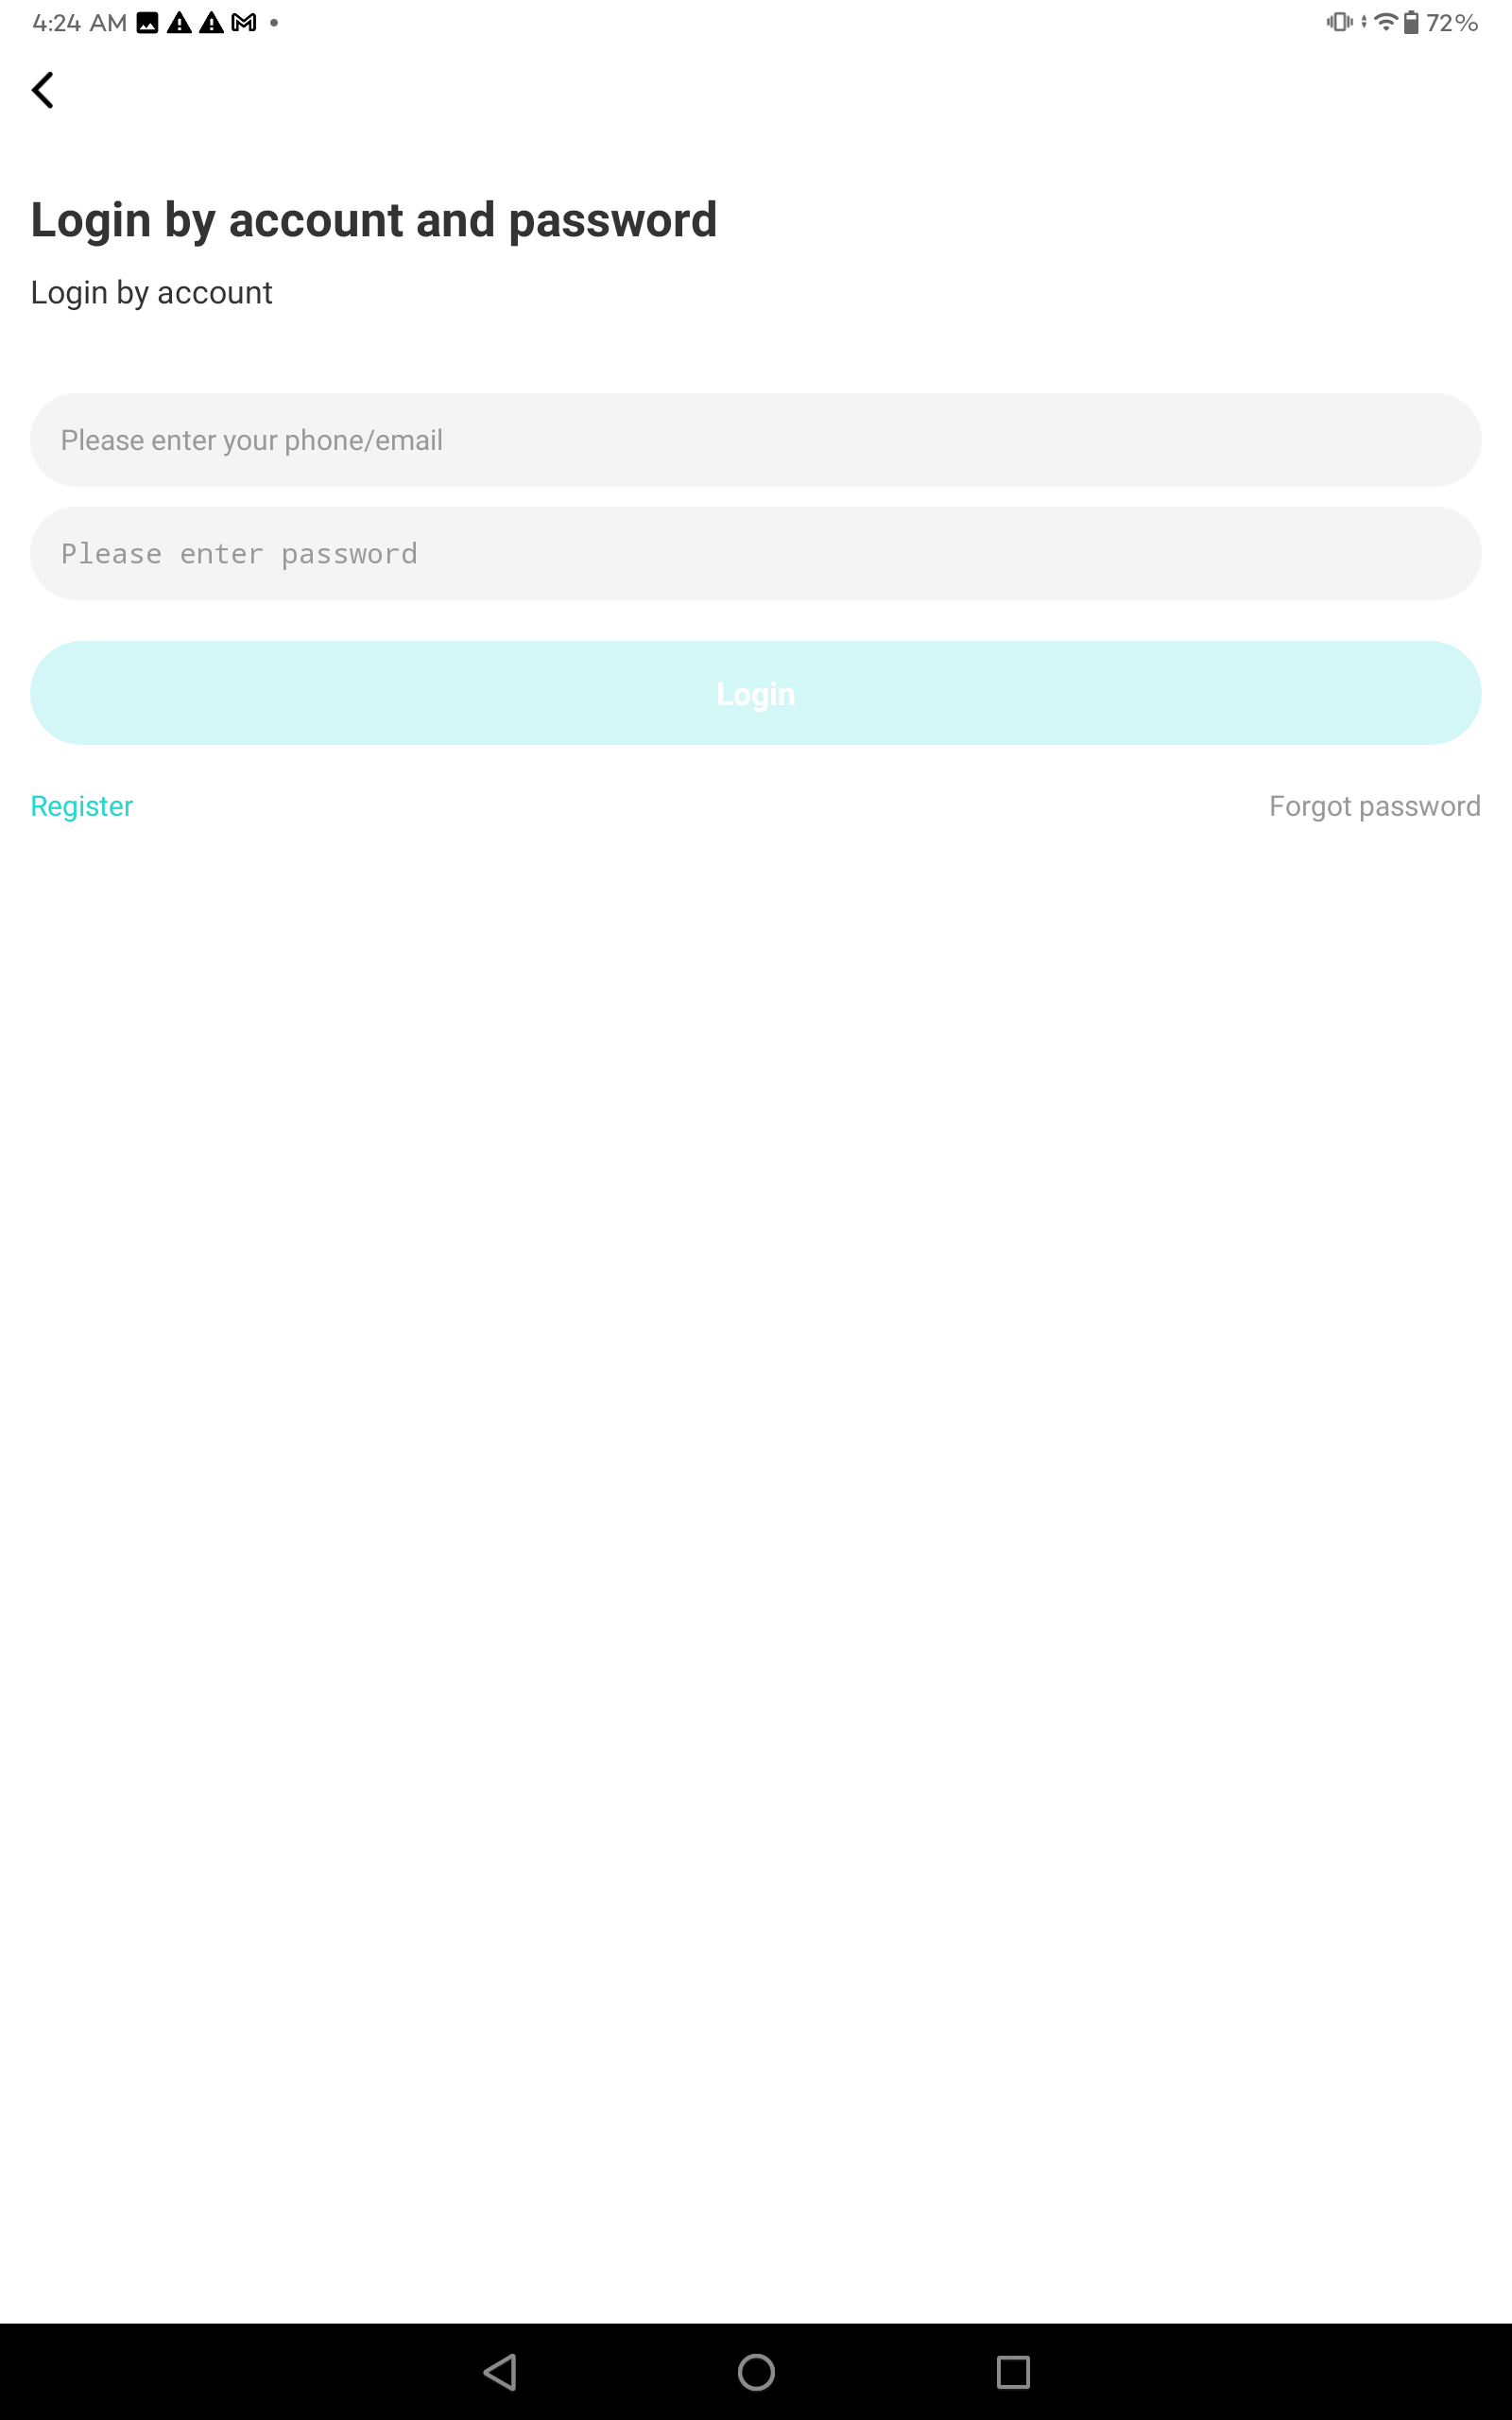
2. Click "Setting"-"Login/Register", input the username and password to login.
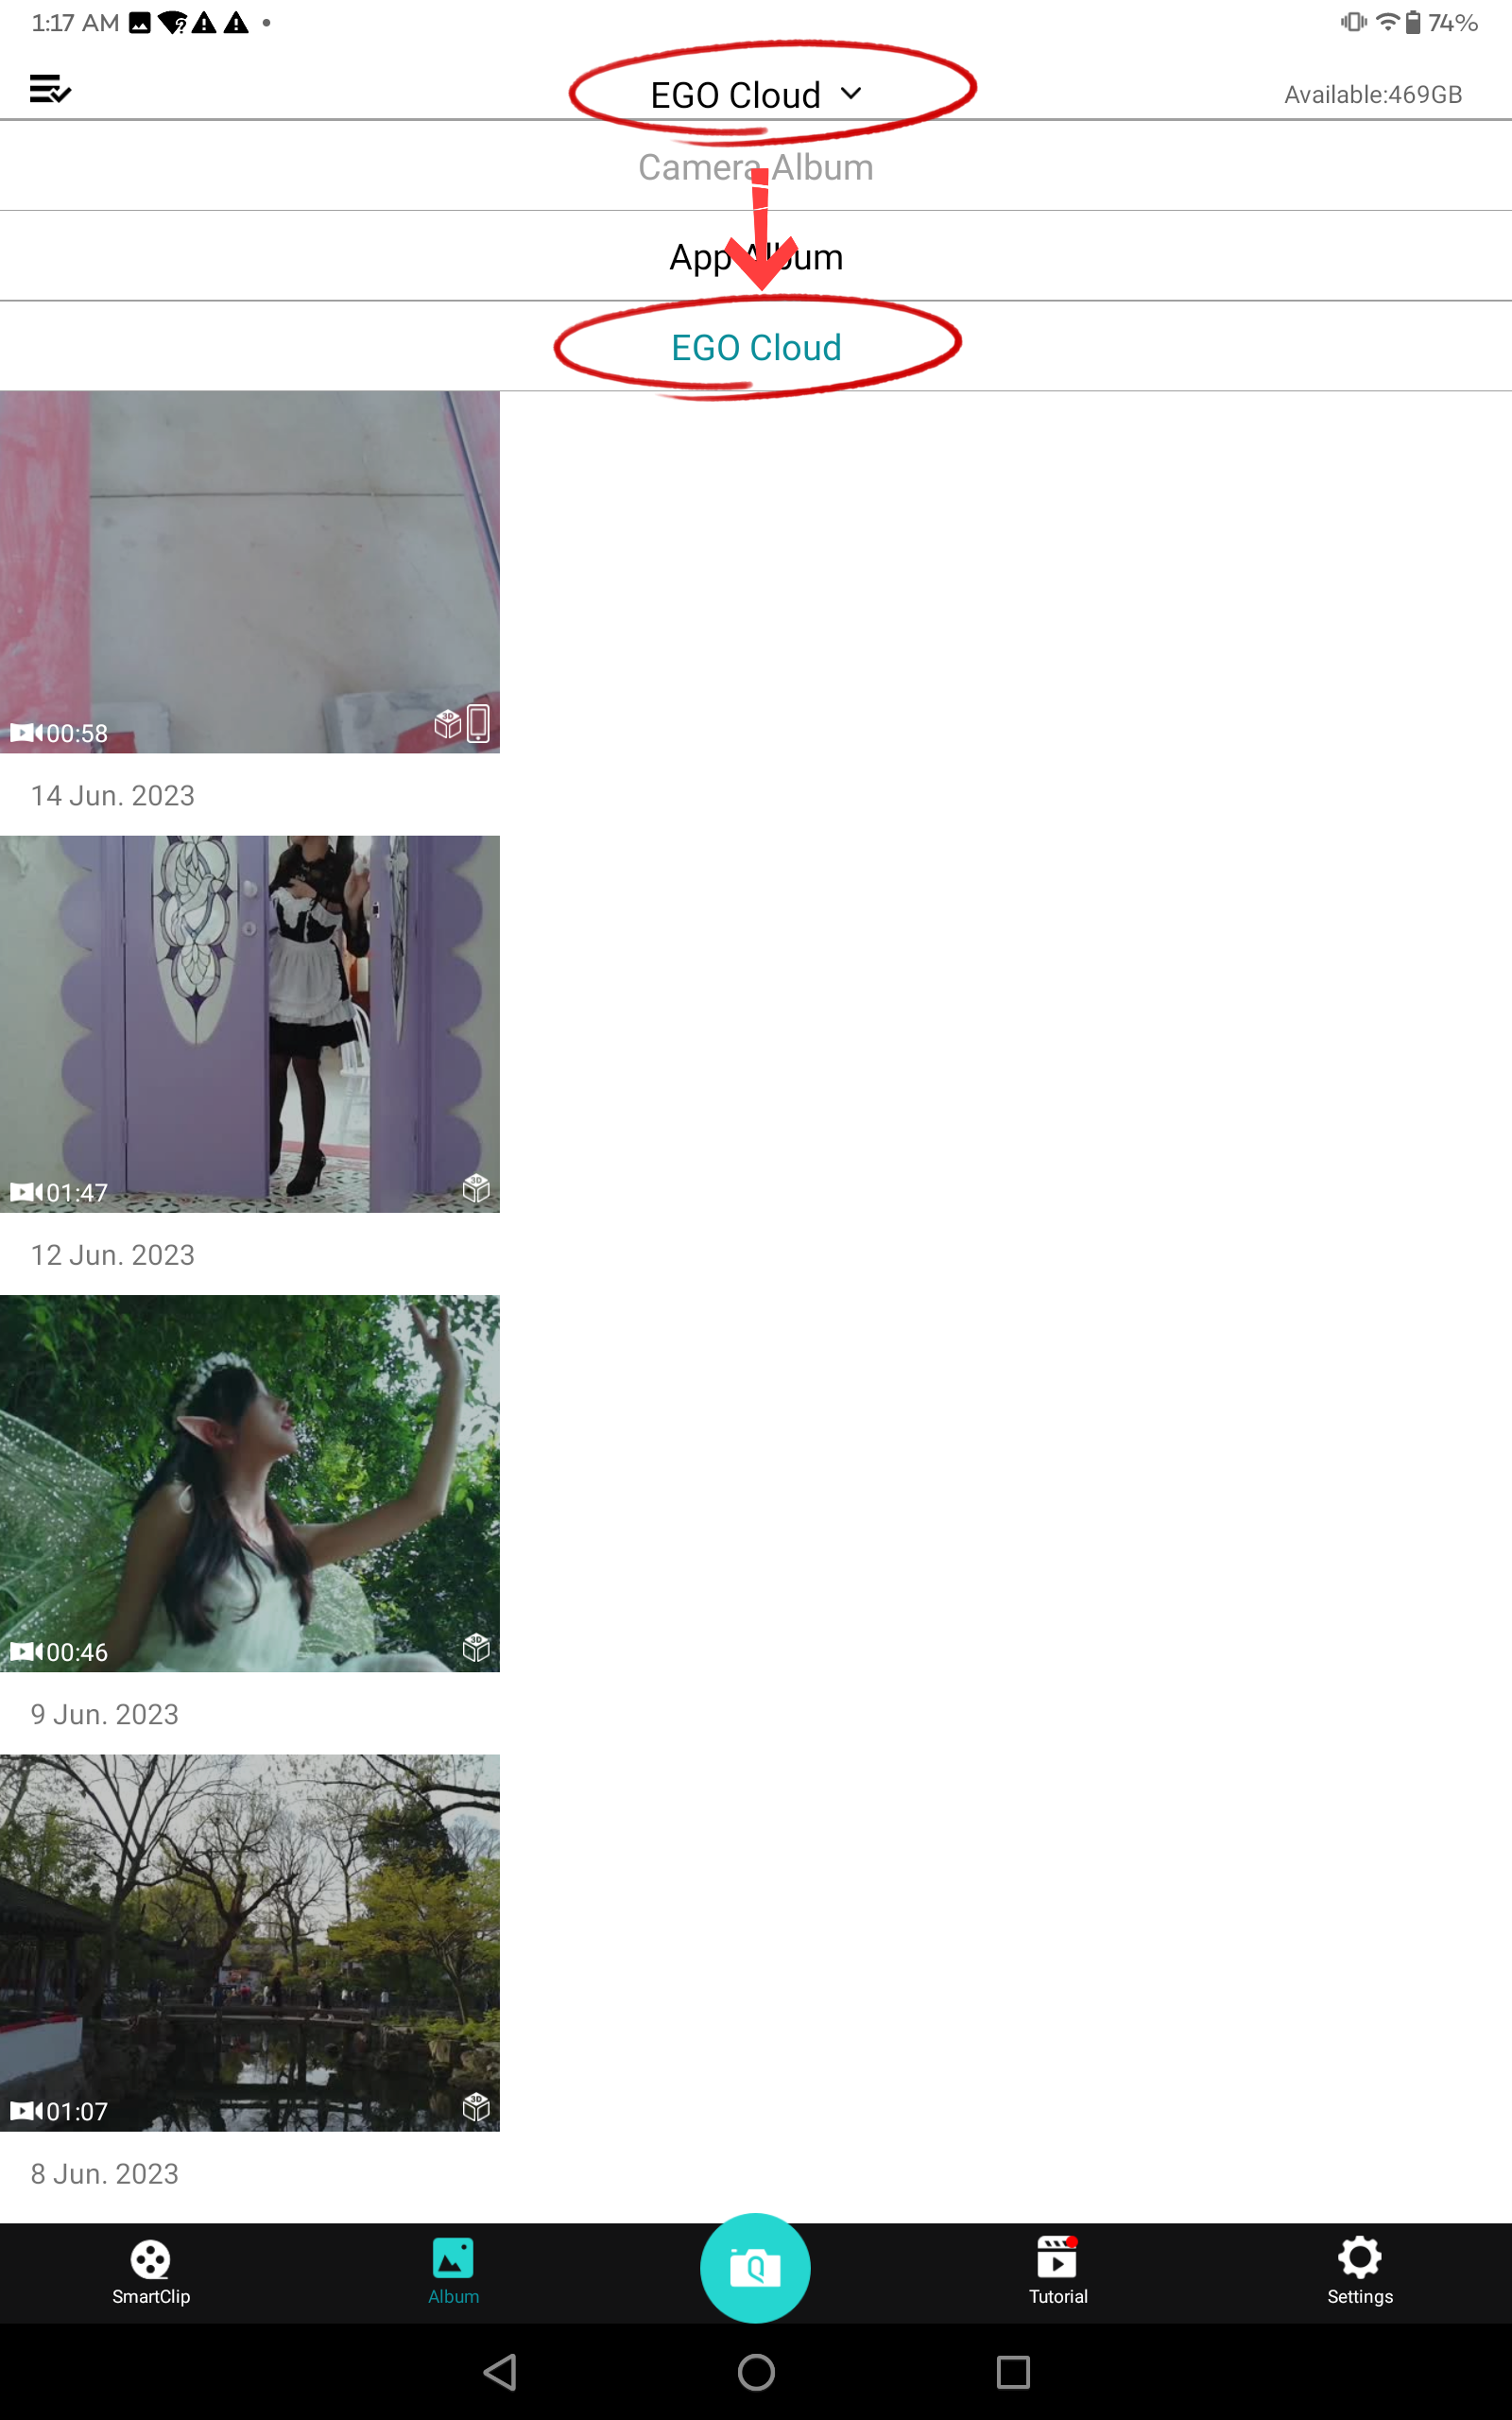
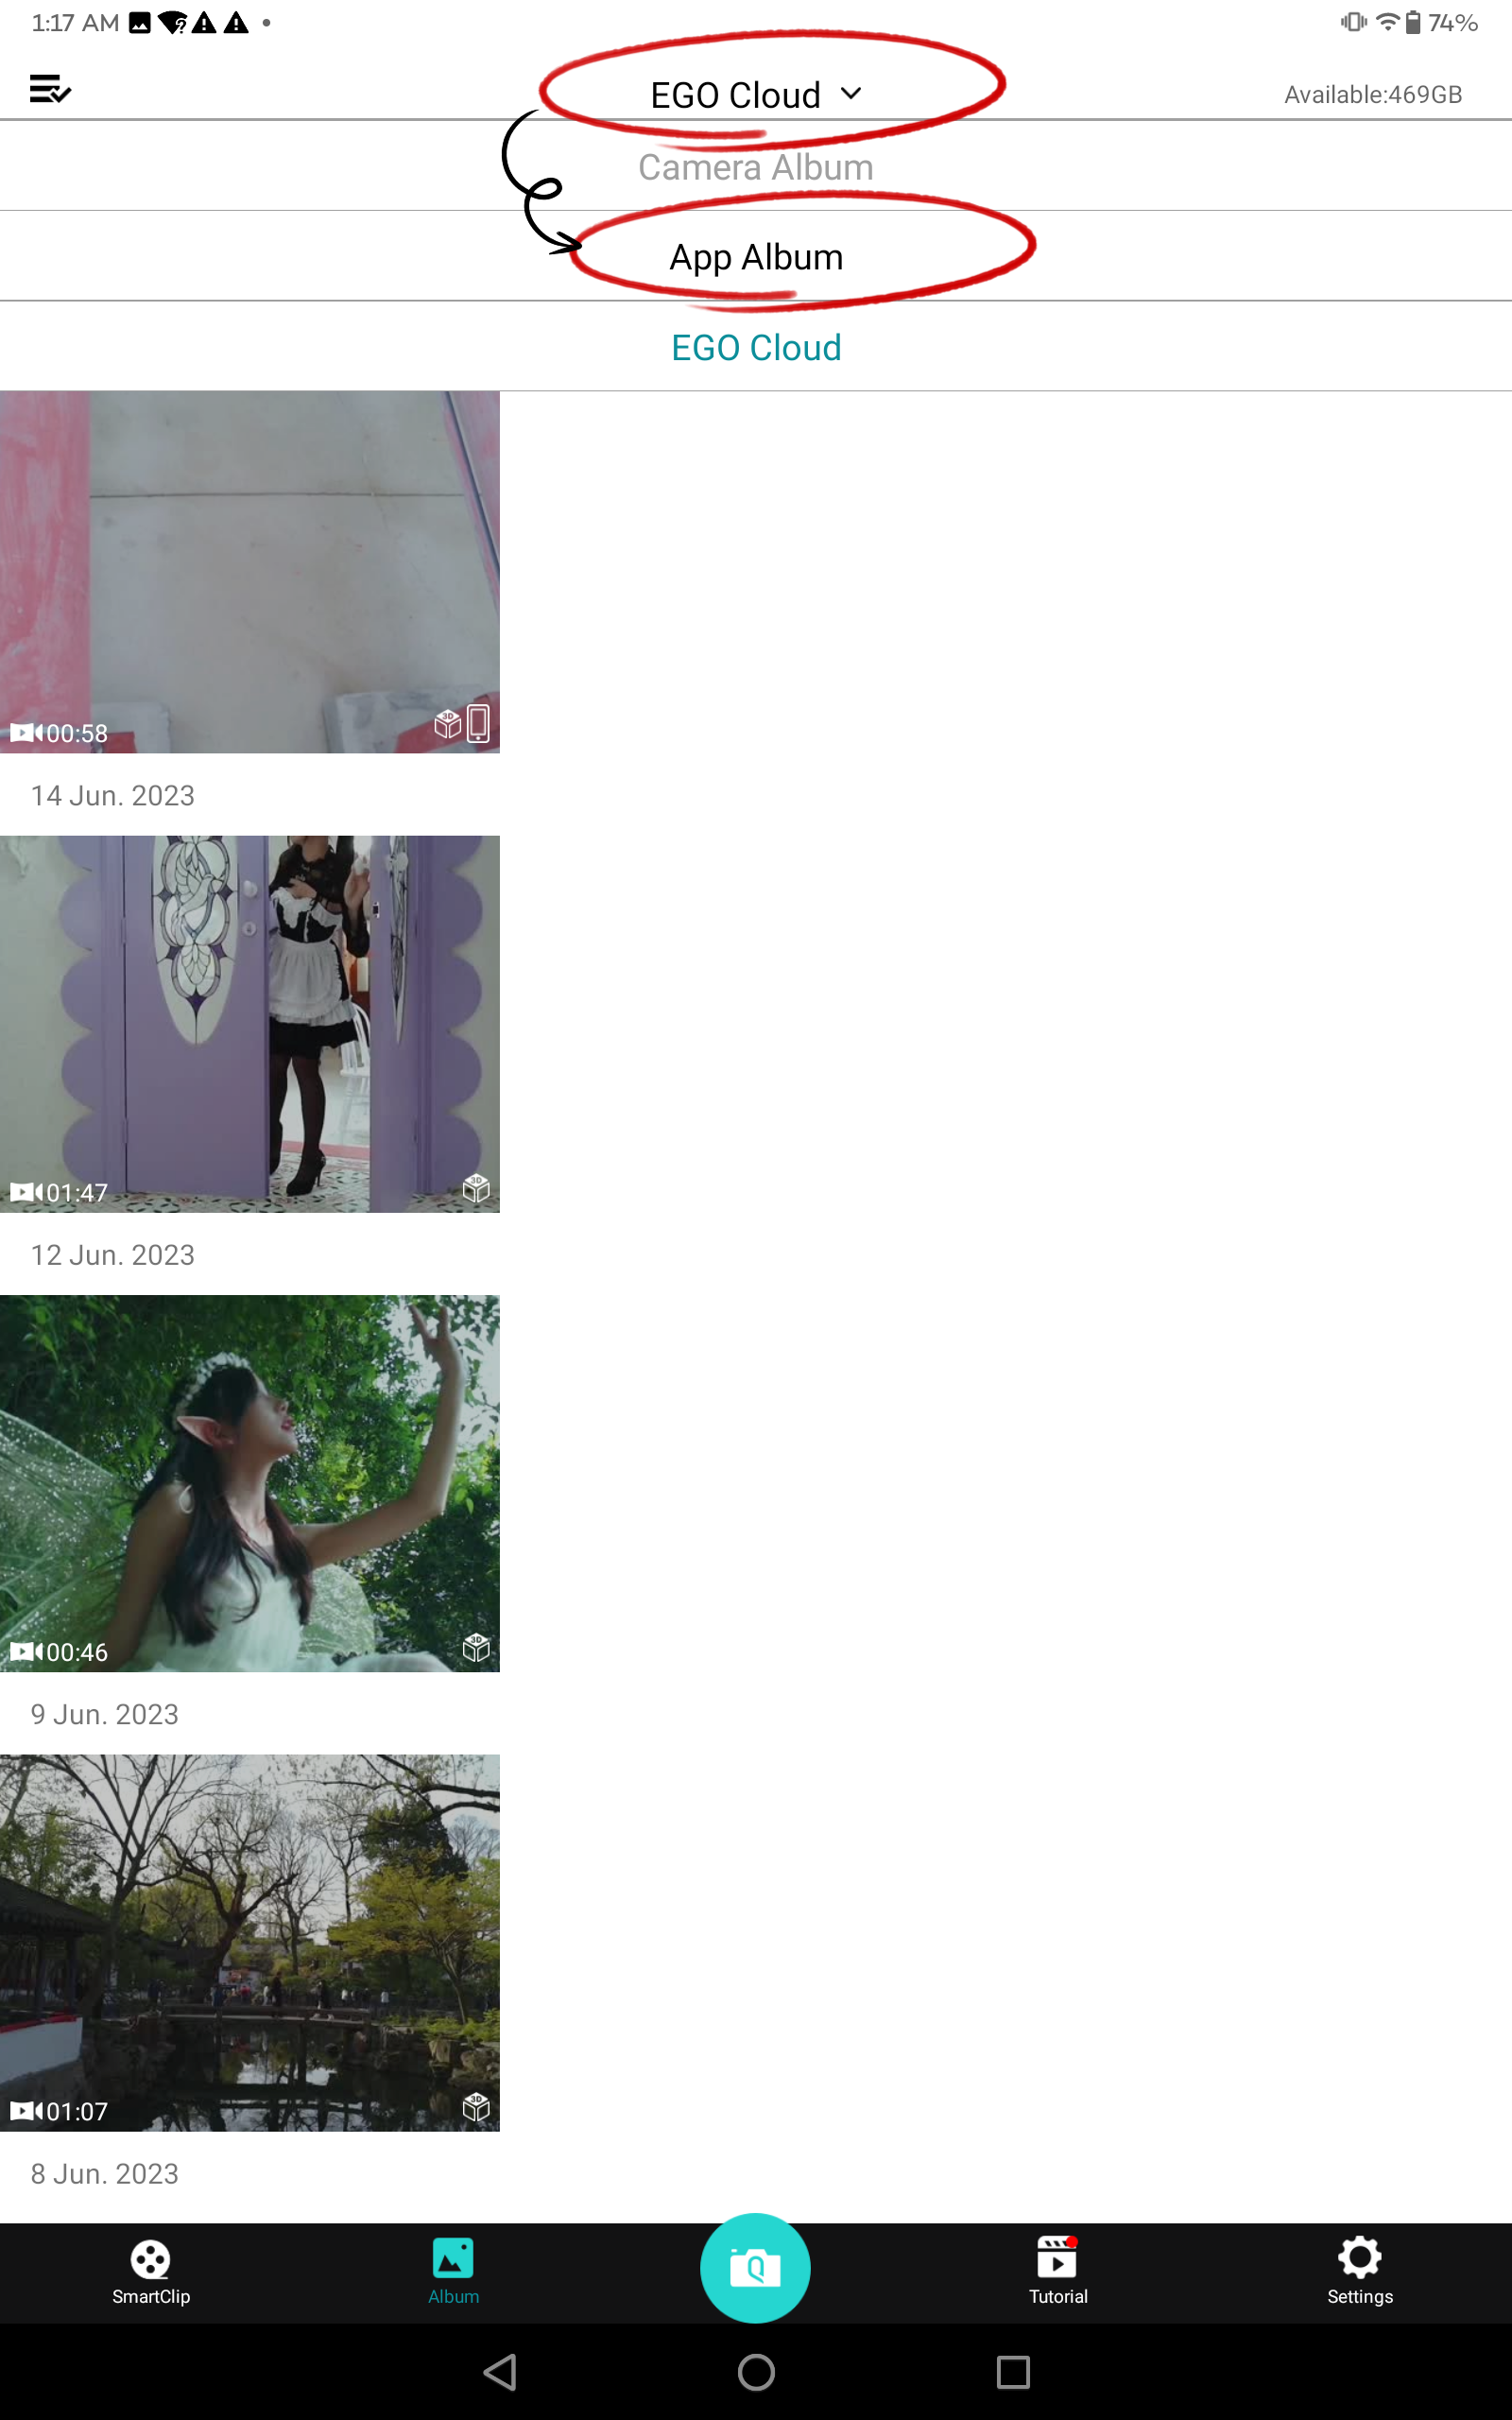
3. Click "Album"-"EGO Cloud".

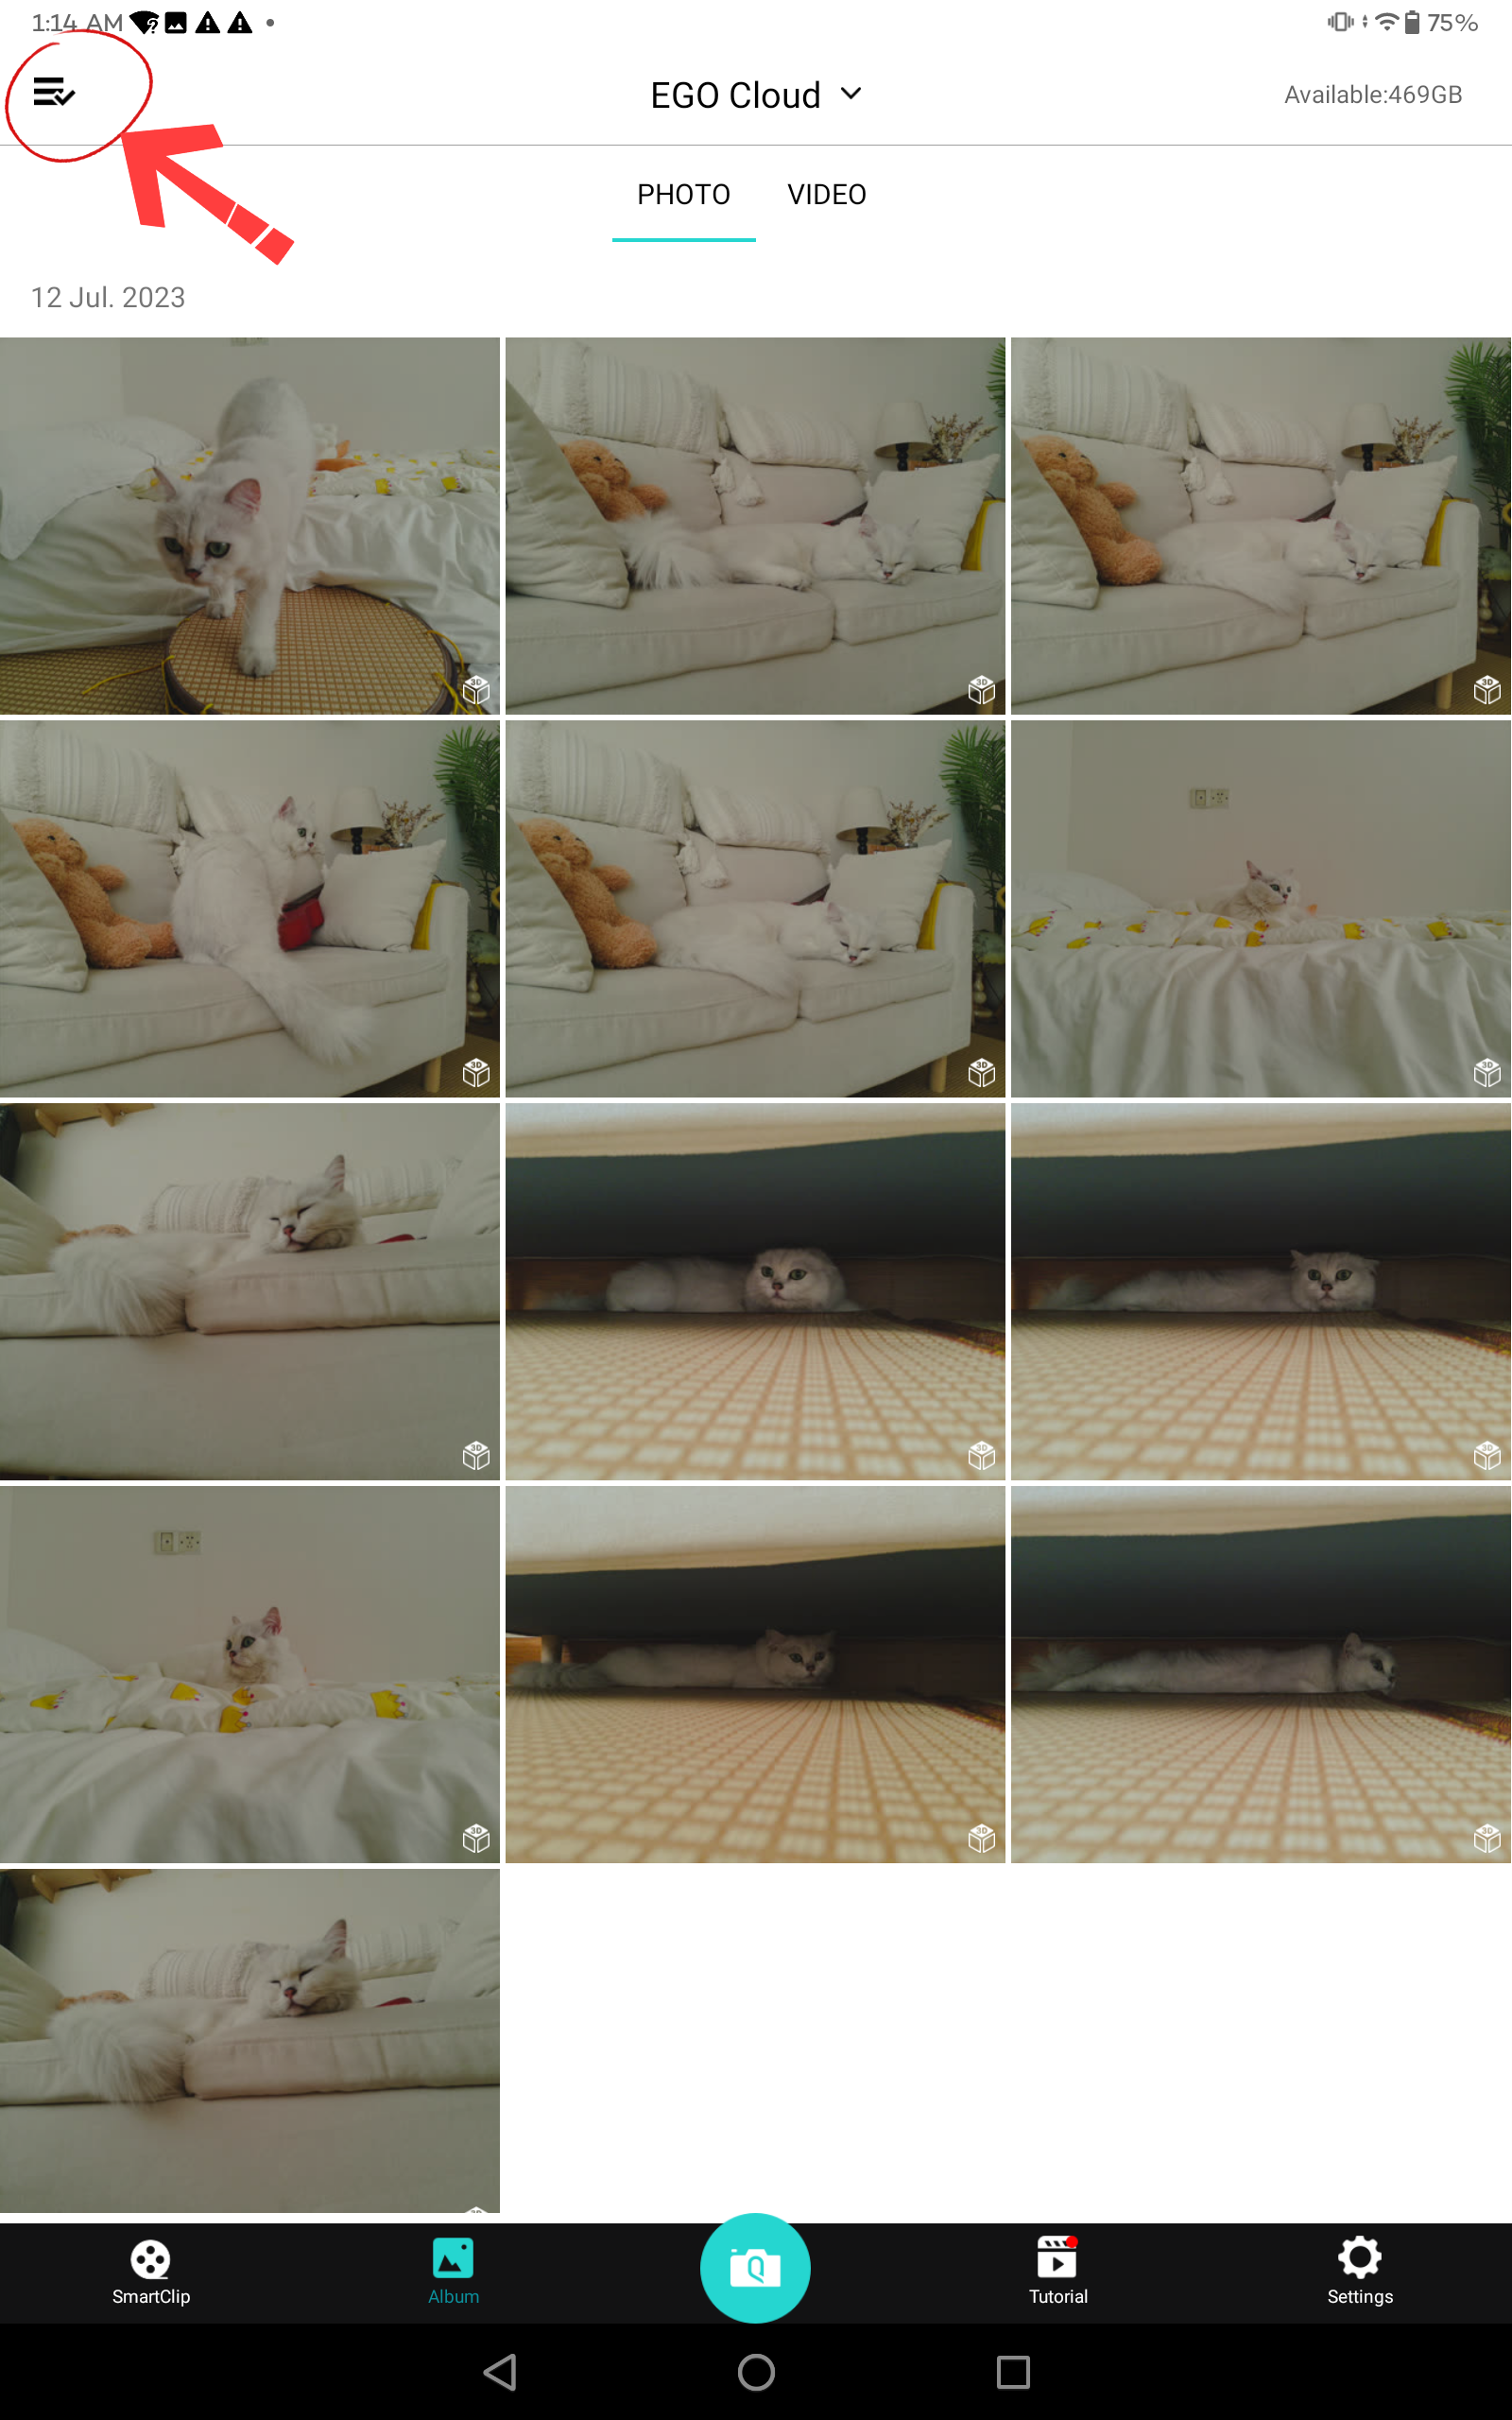
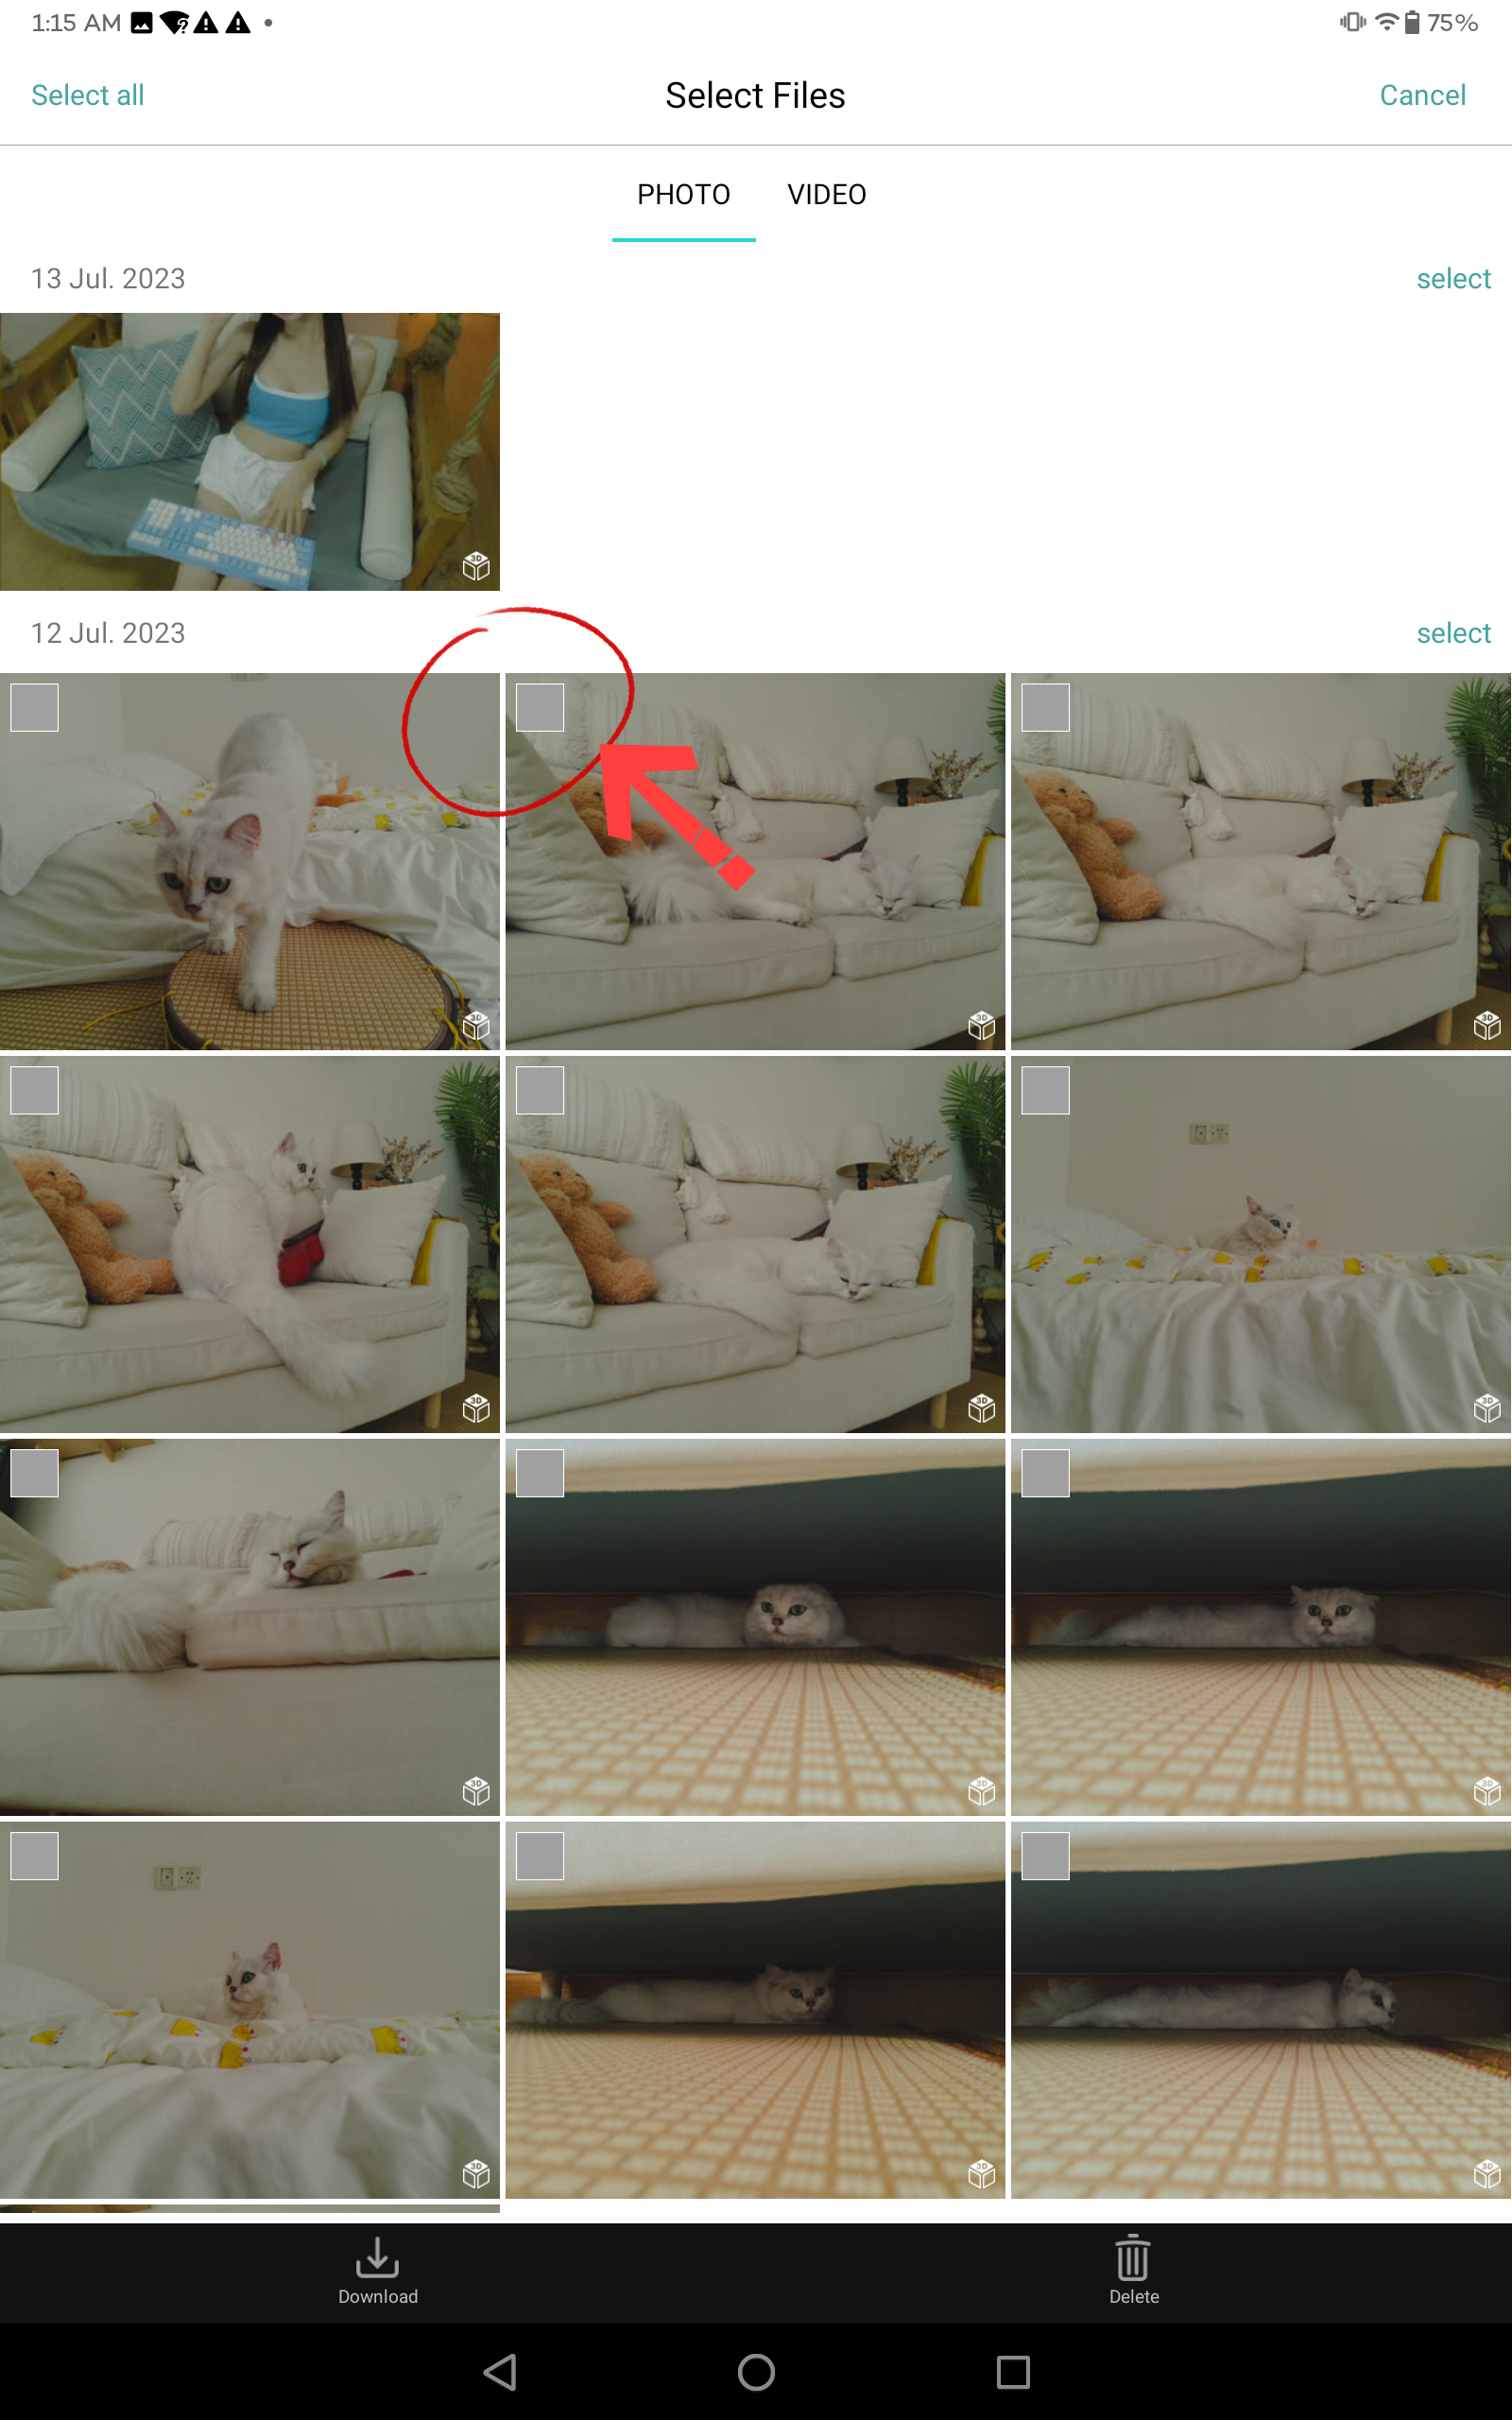
4. Click the upper-left icon to enter the multi-select status.Click the checkbox to select files.
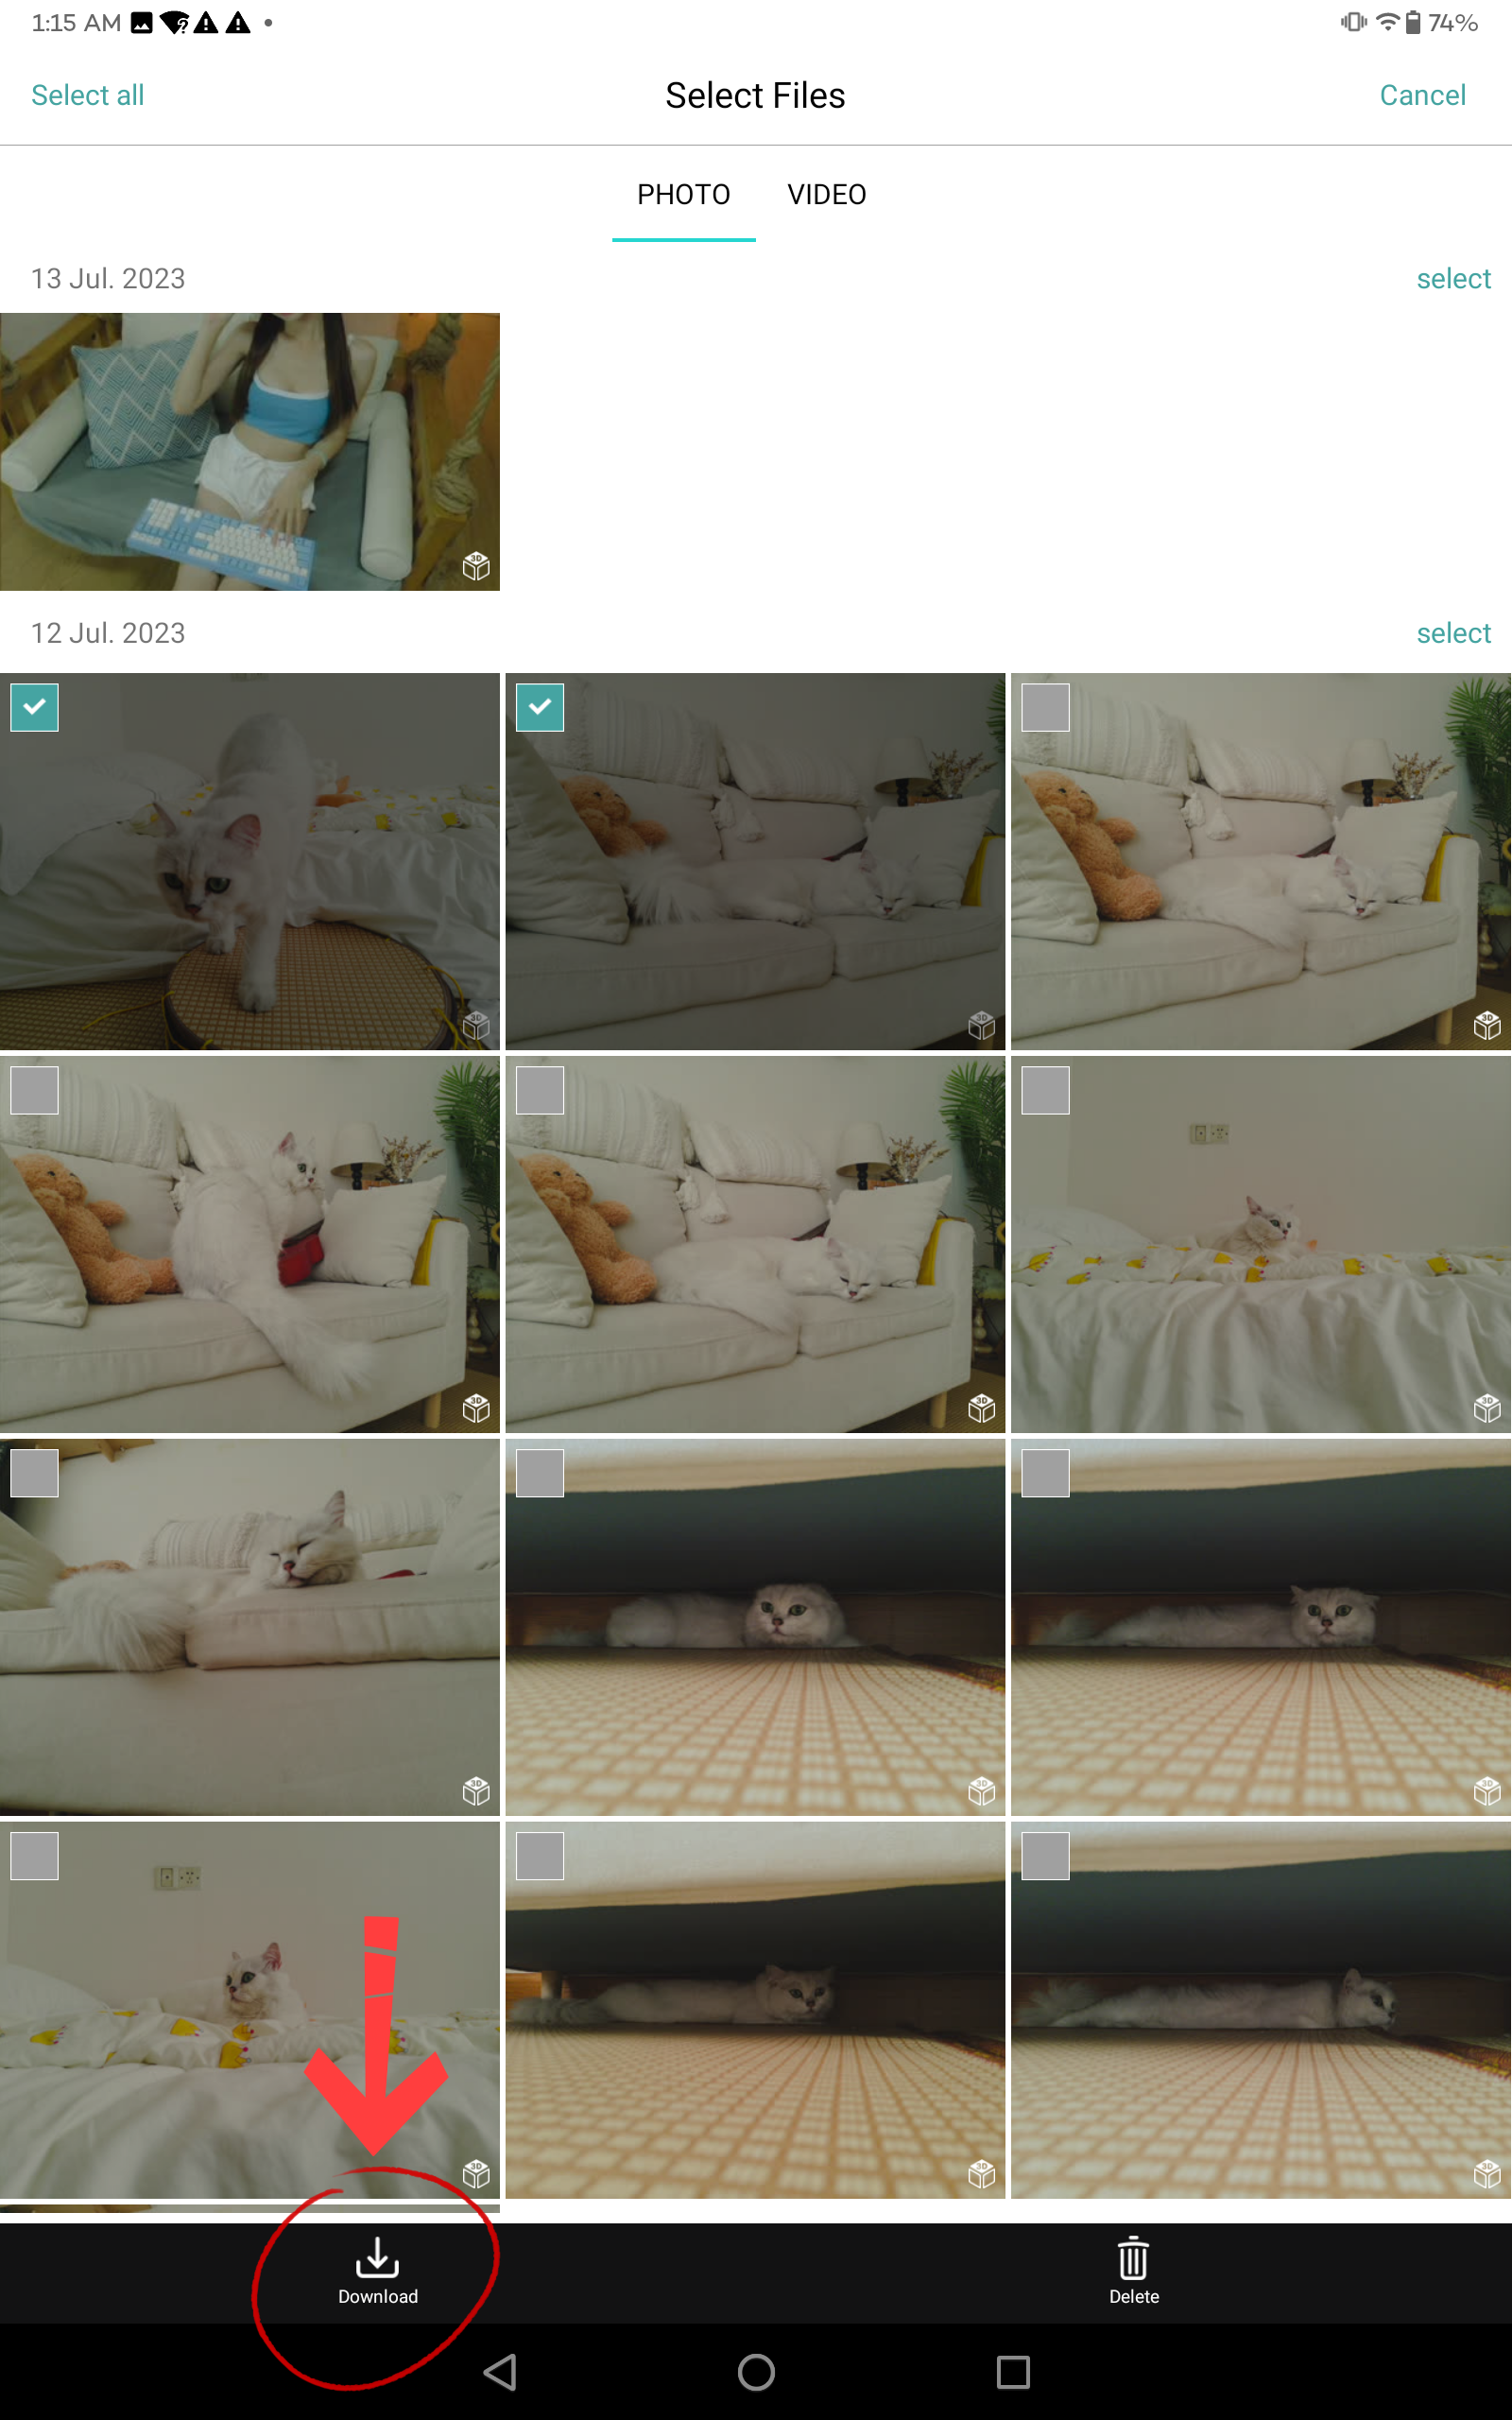
5. Download the selected files to "App Album".
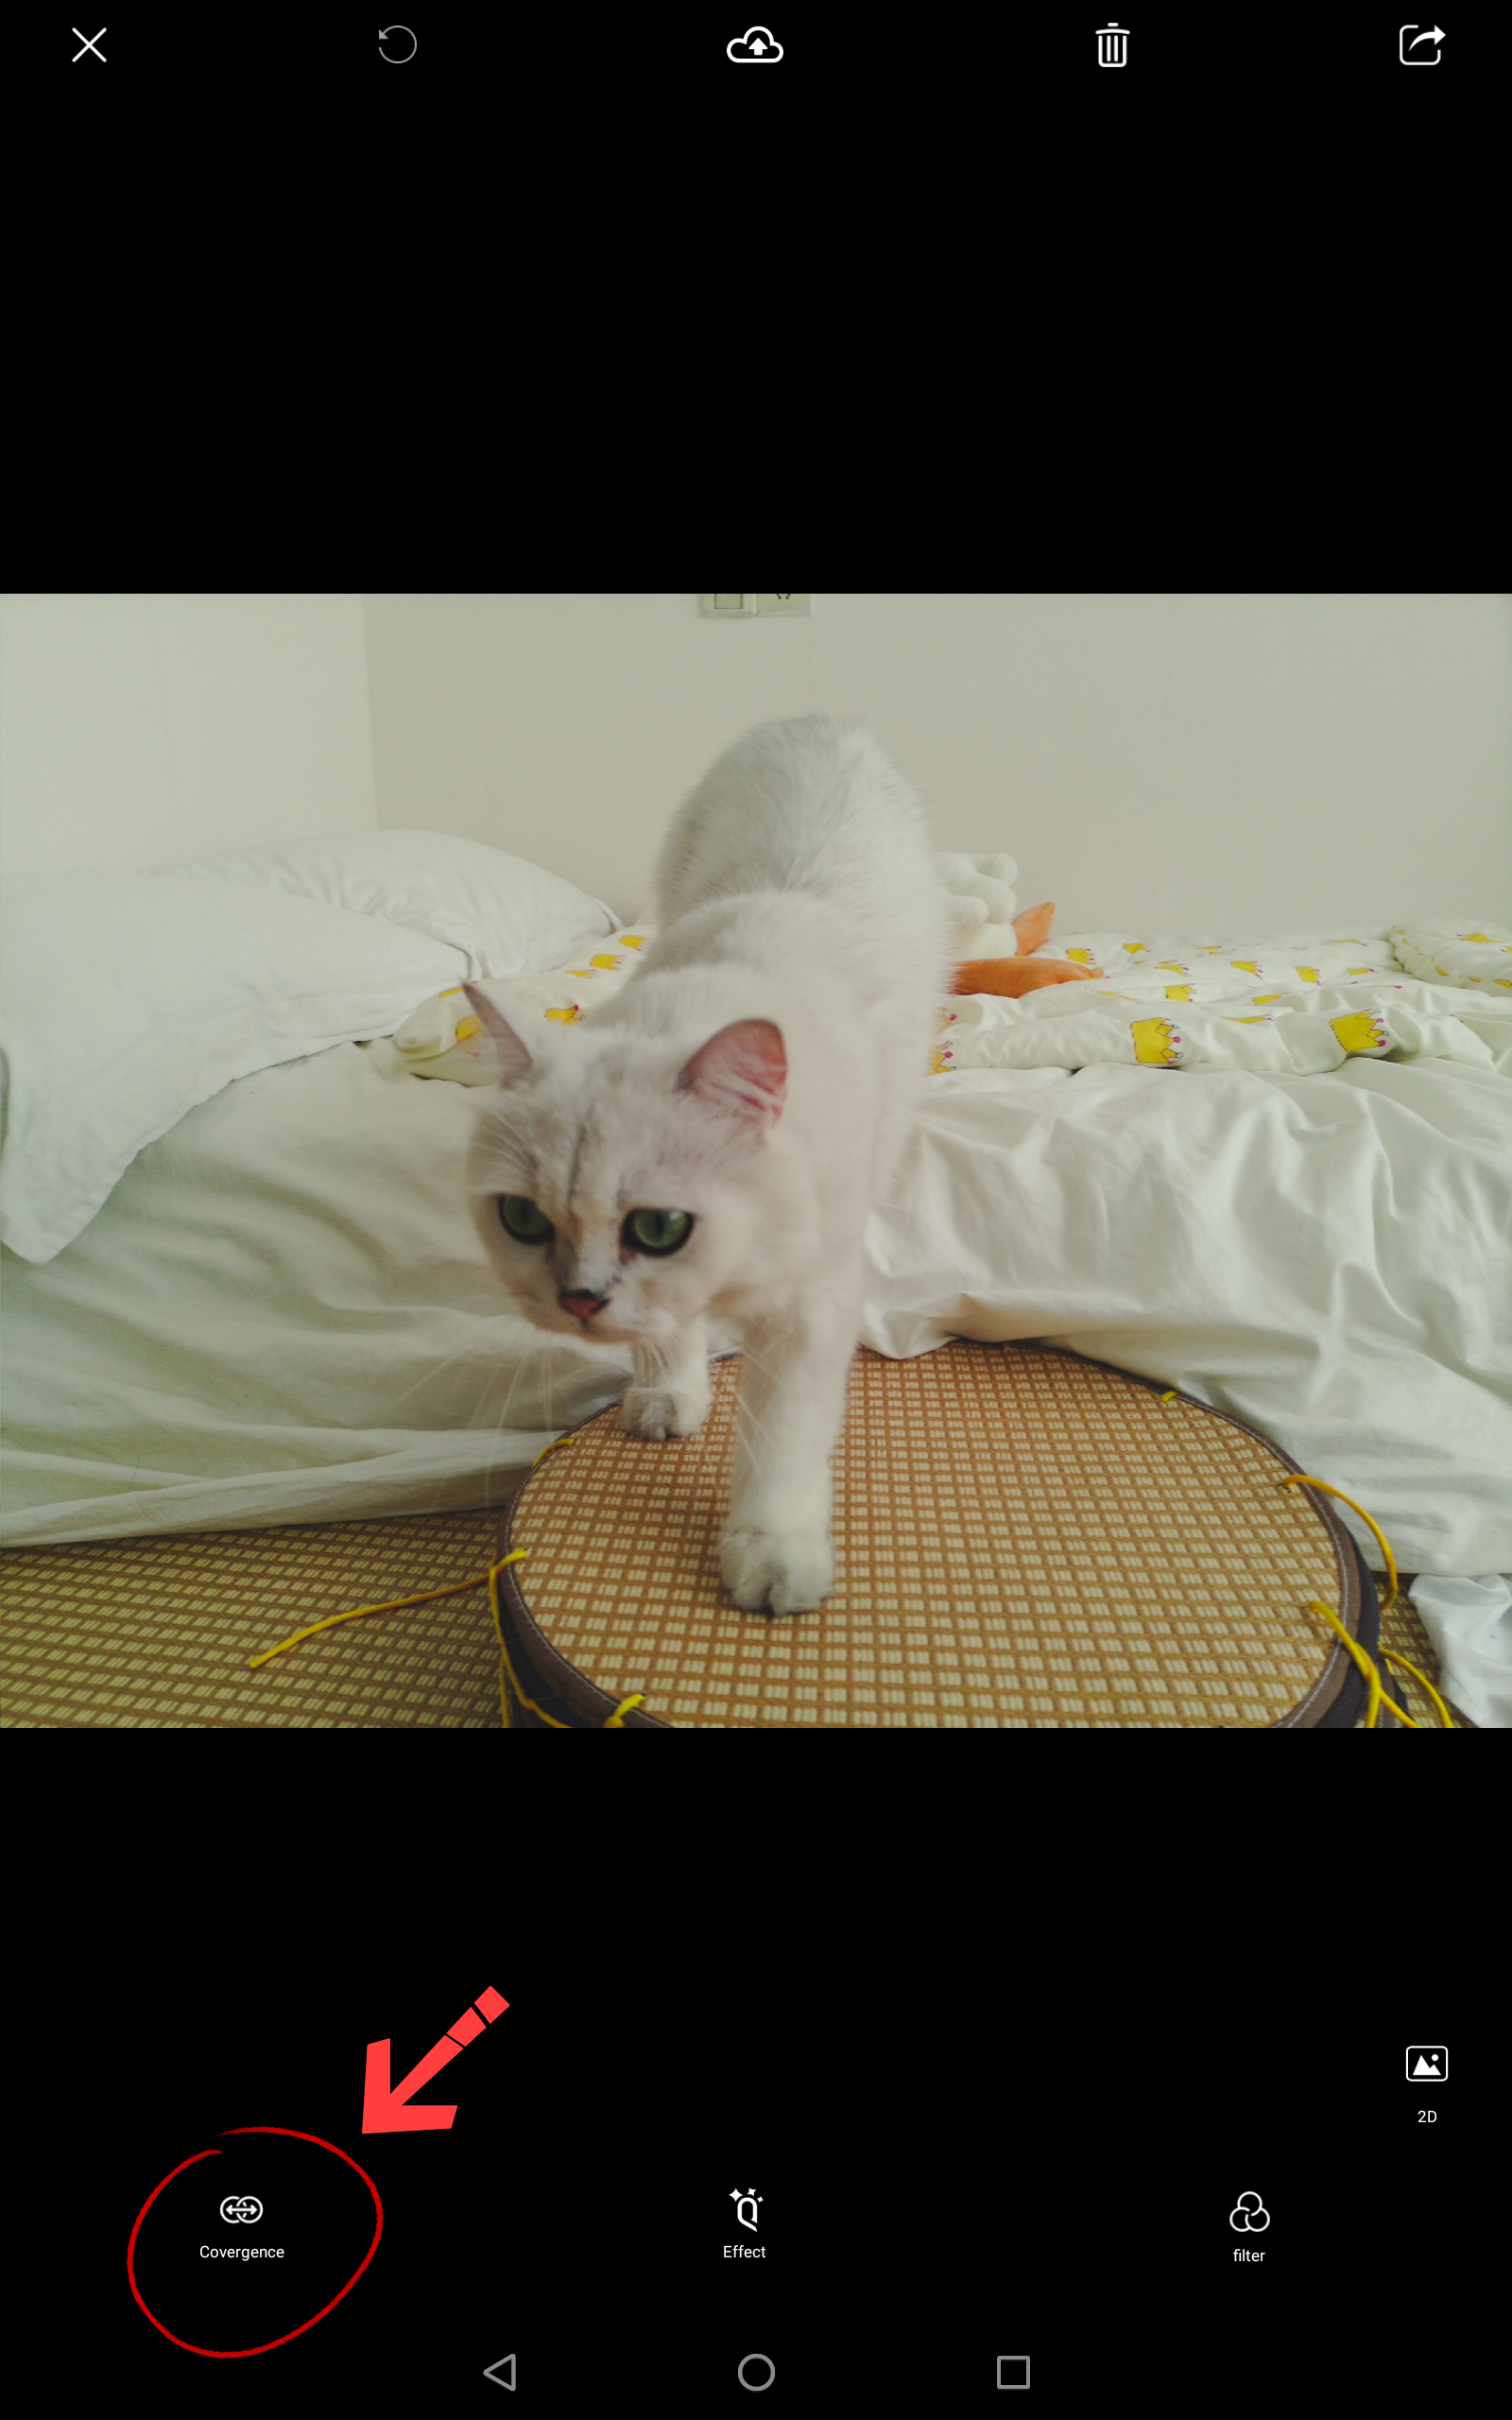
6. Go to "App Album" to edit the downloaded files.

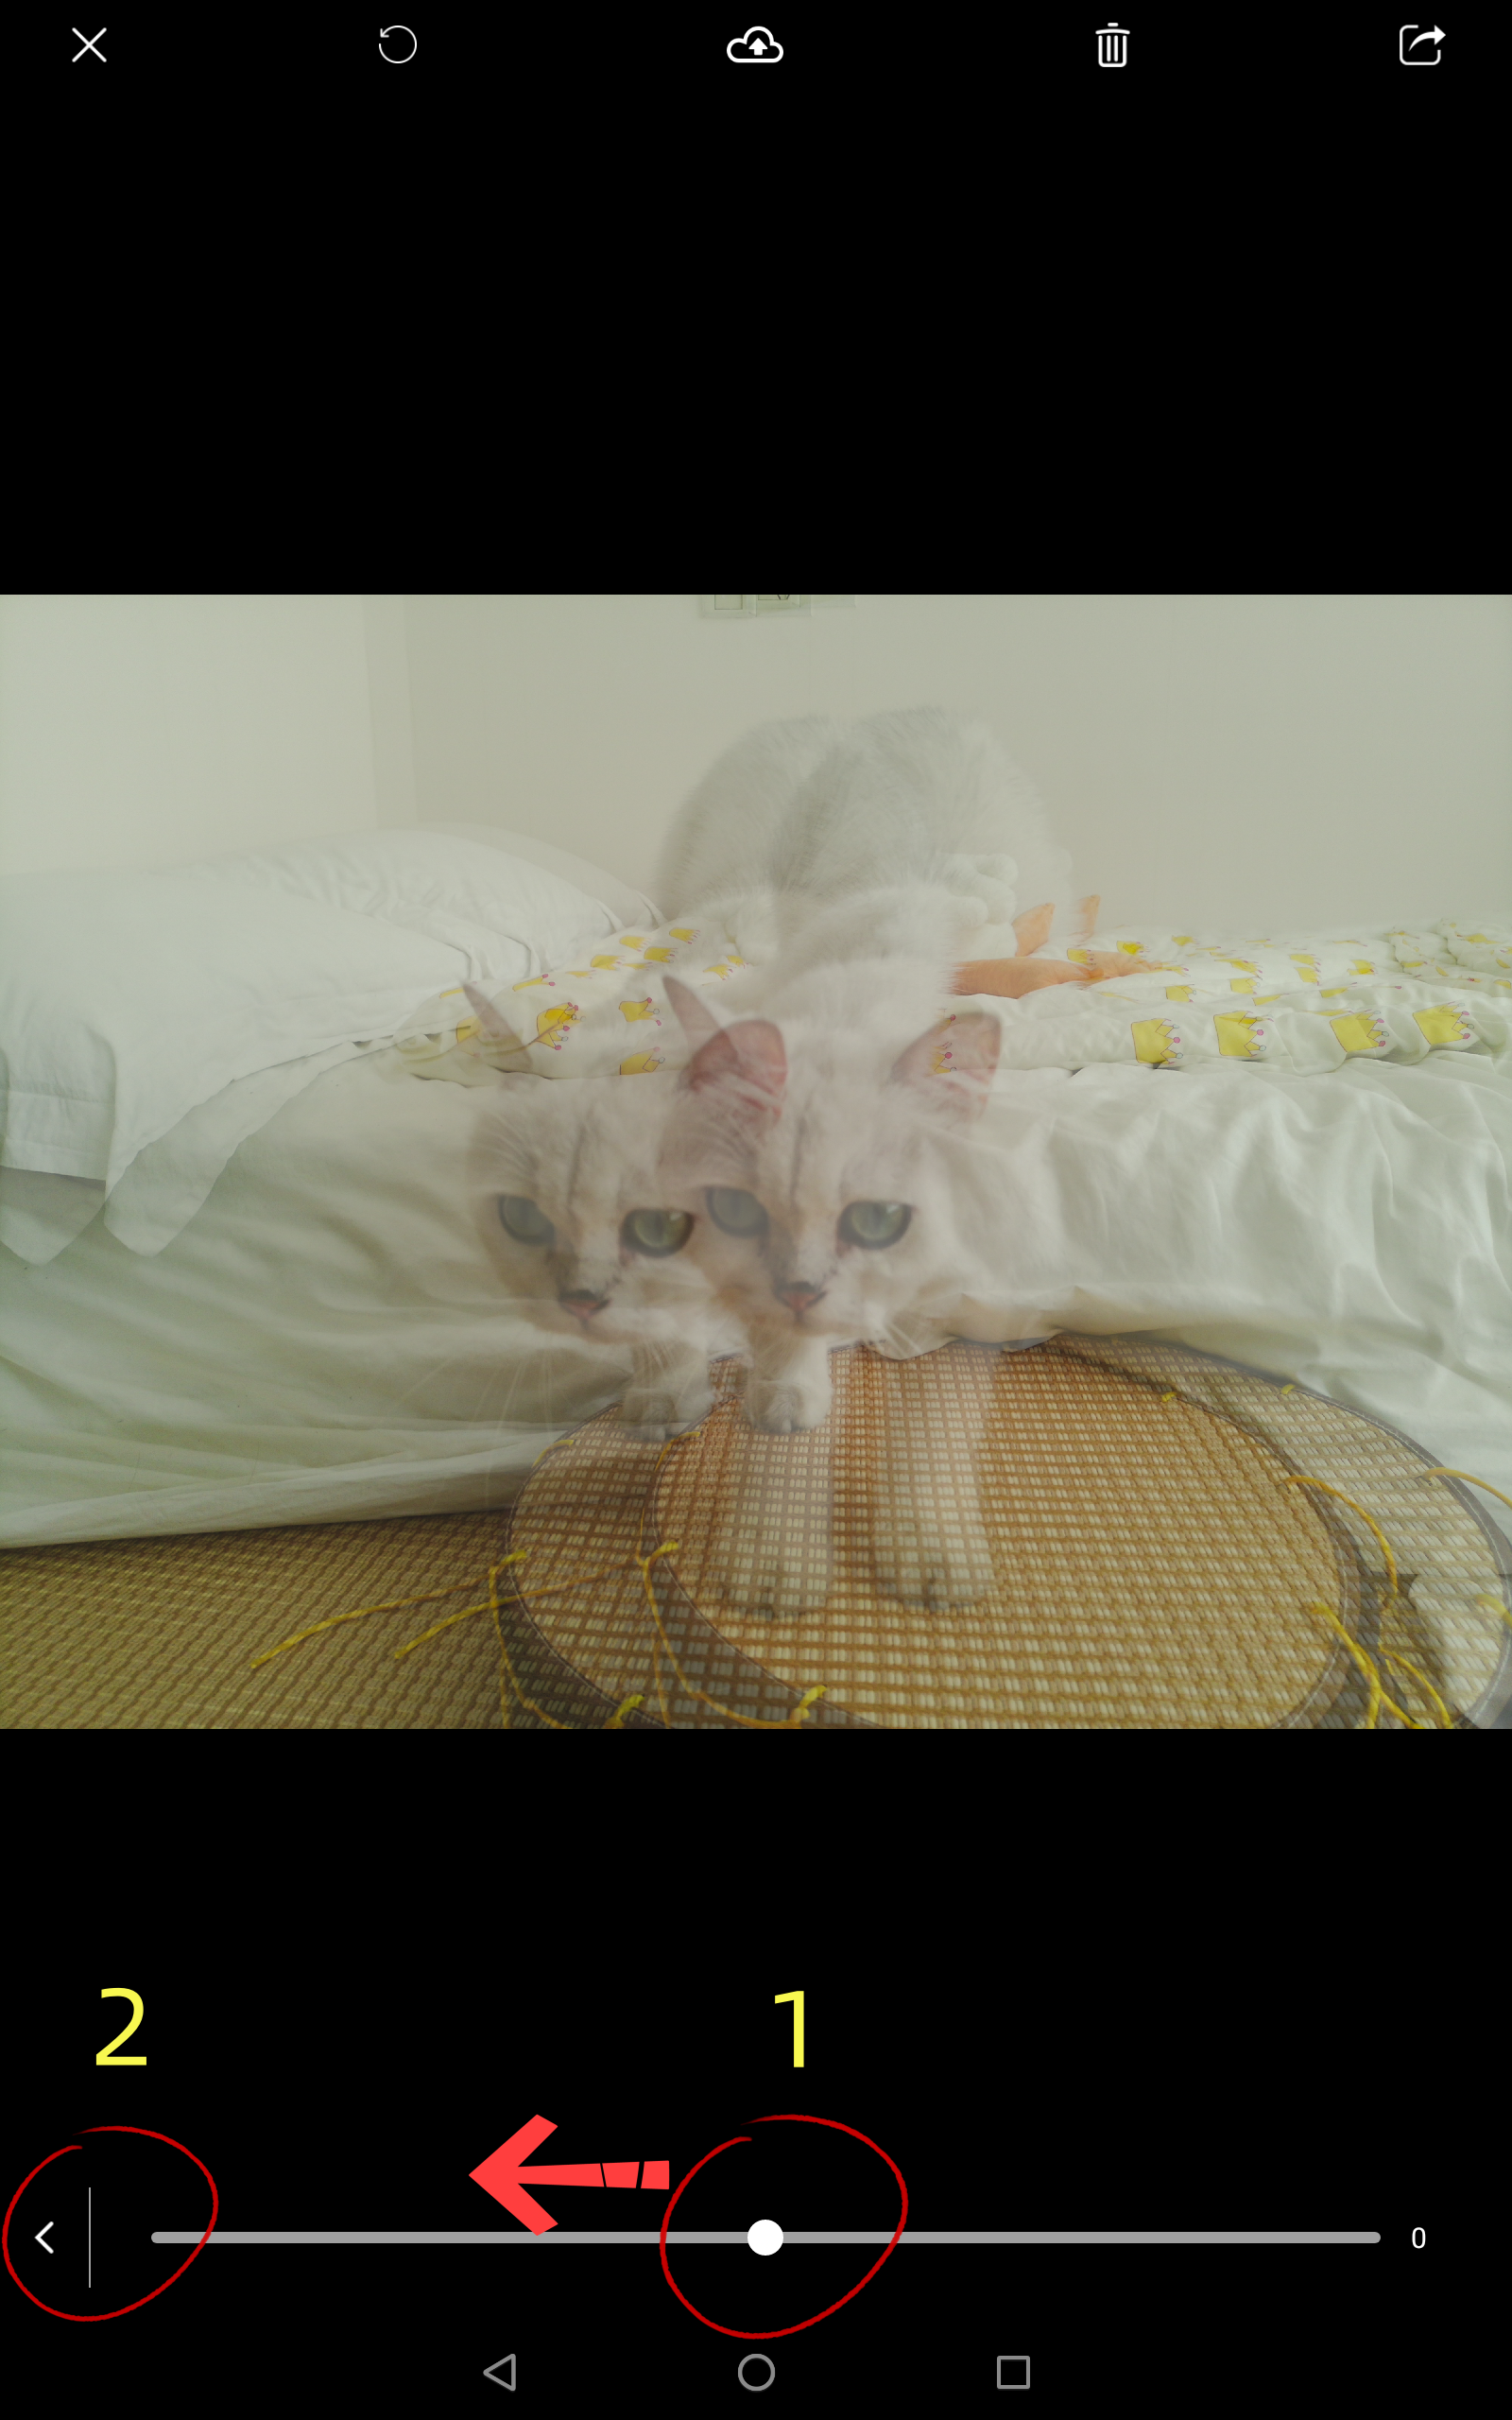
7. Click the "Convergence" icon. Reduce the horizontal parallax and then go back.
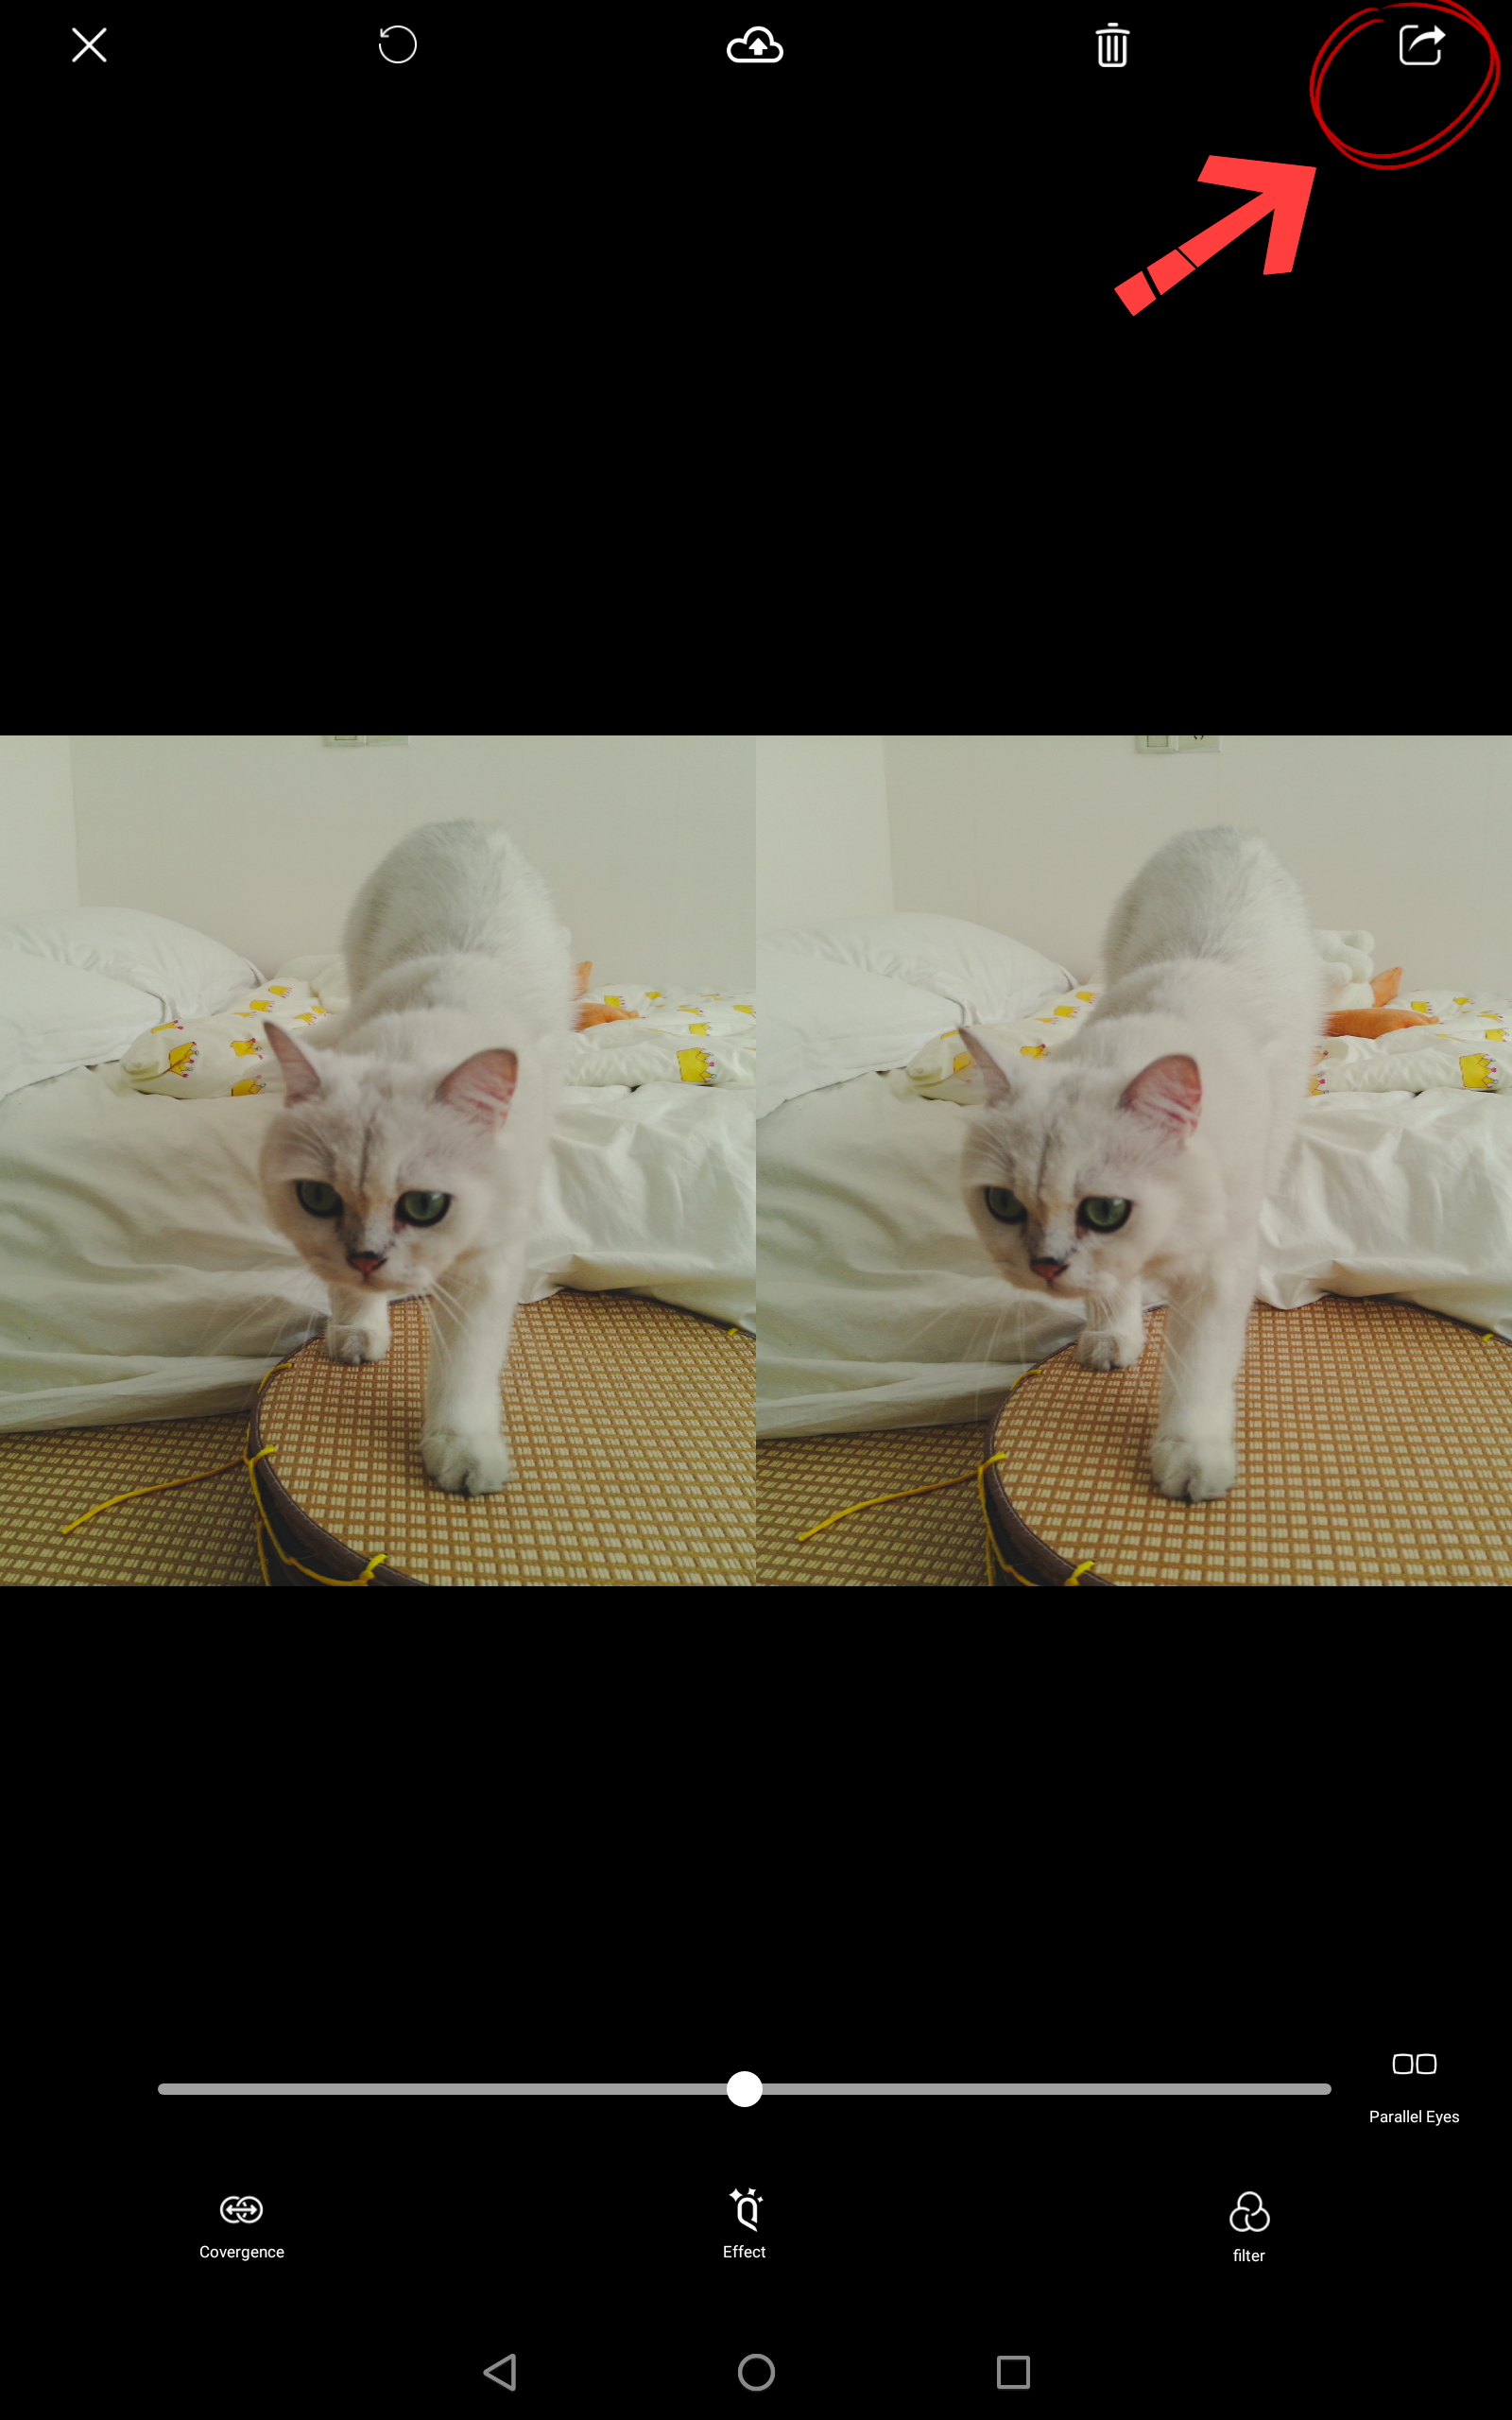
8. Click the upper right icon and select "Album".
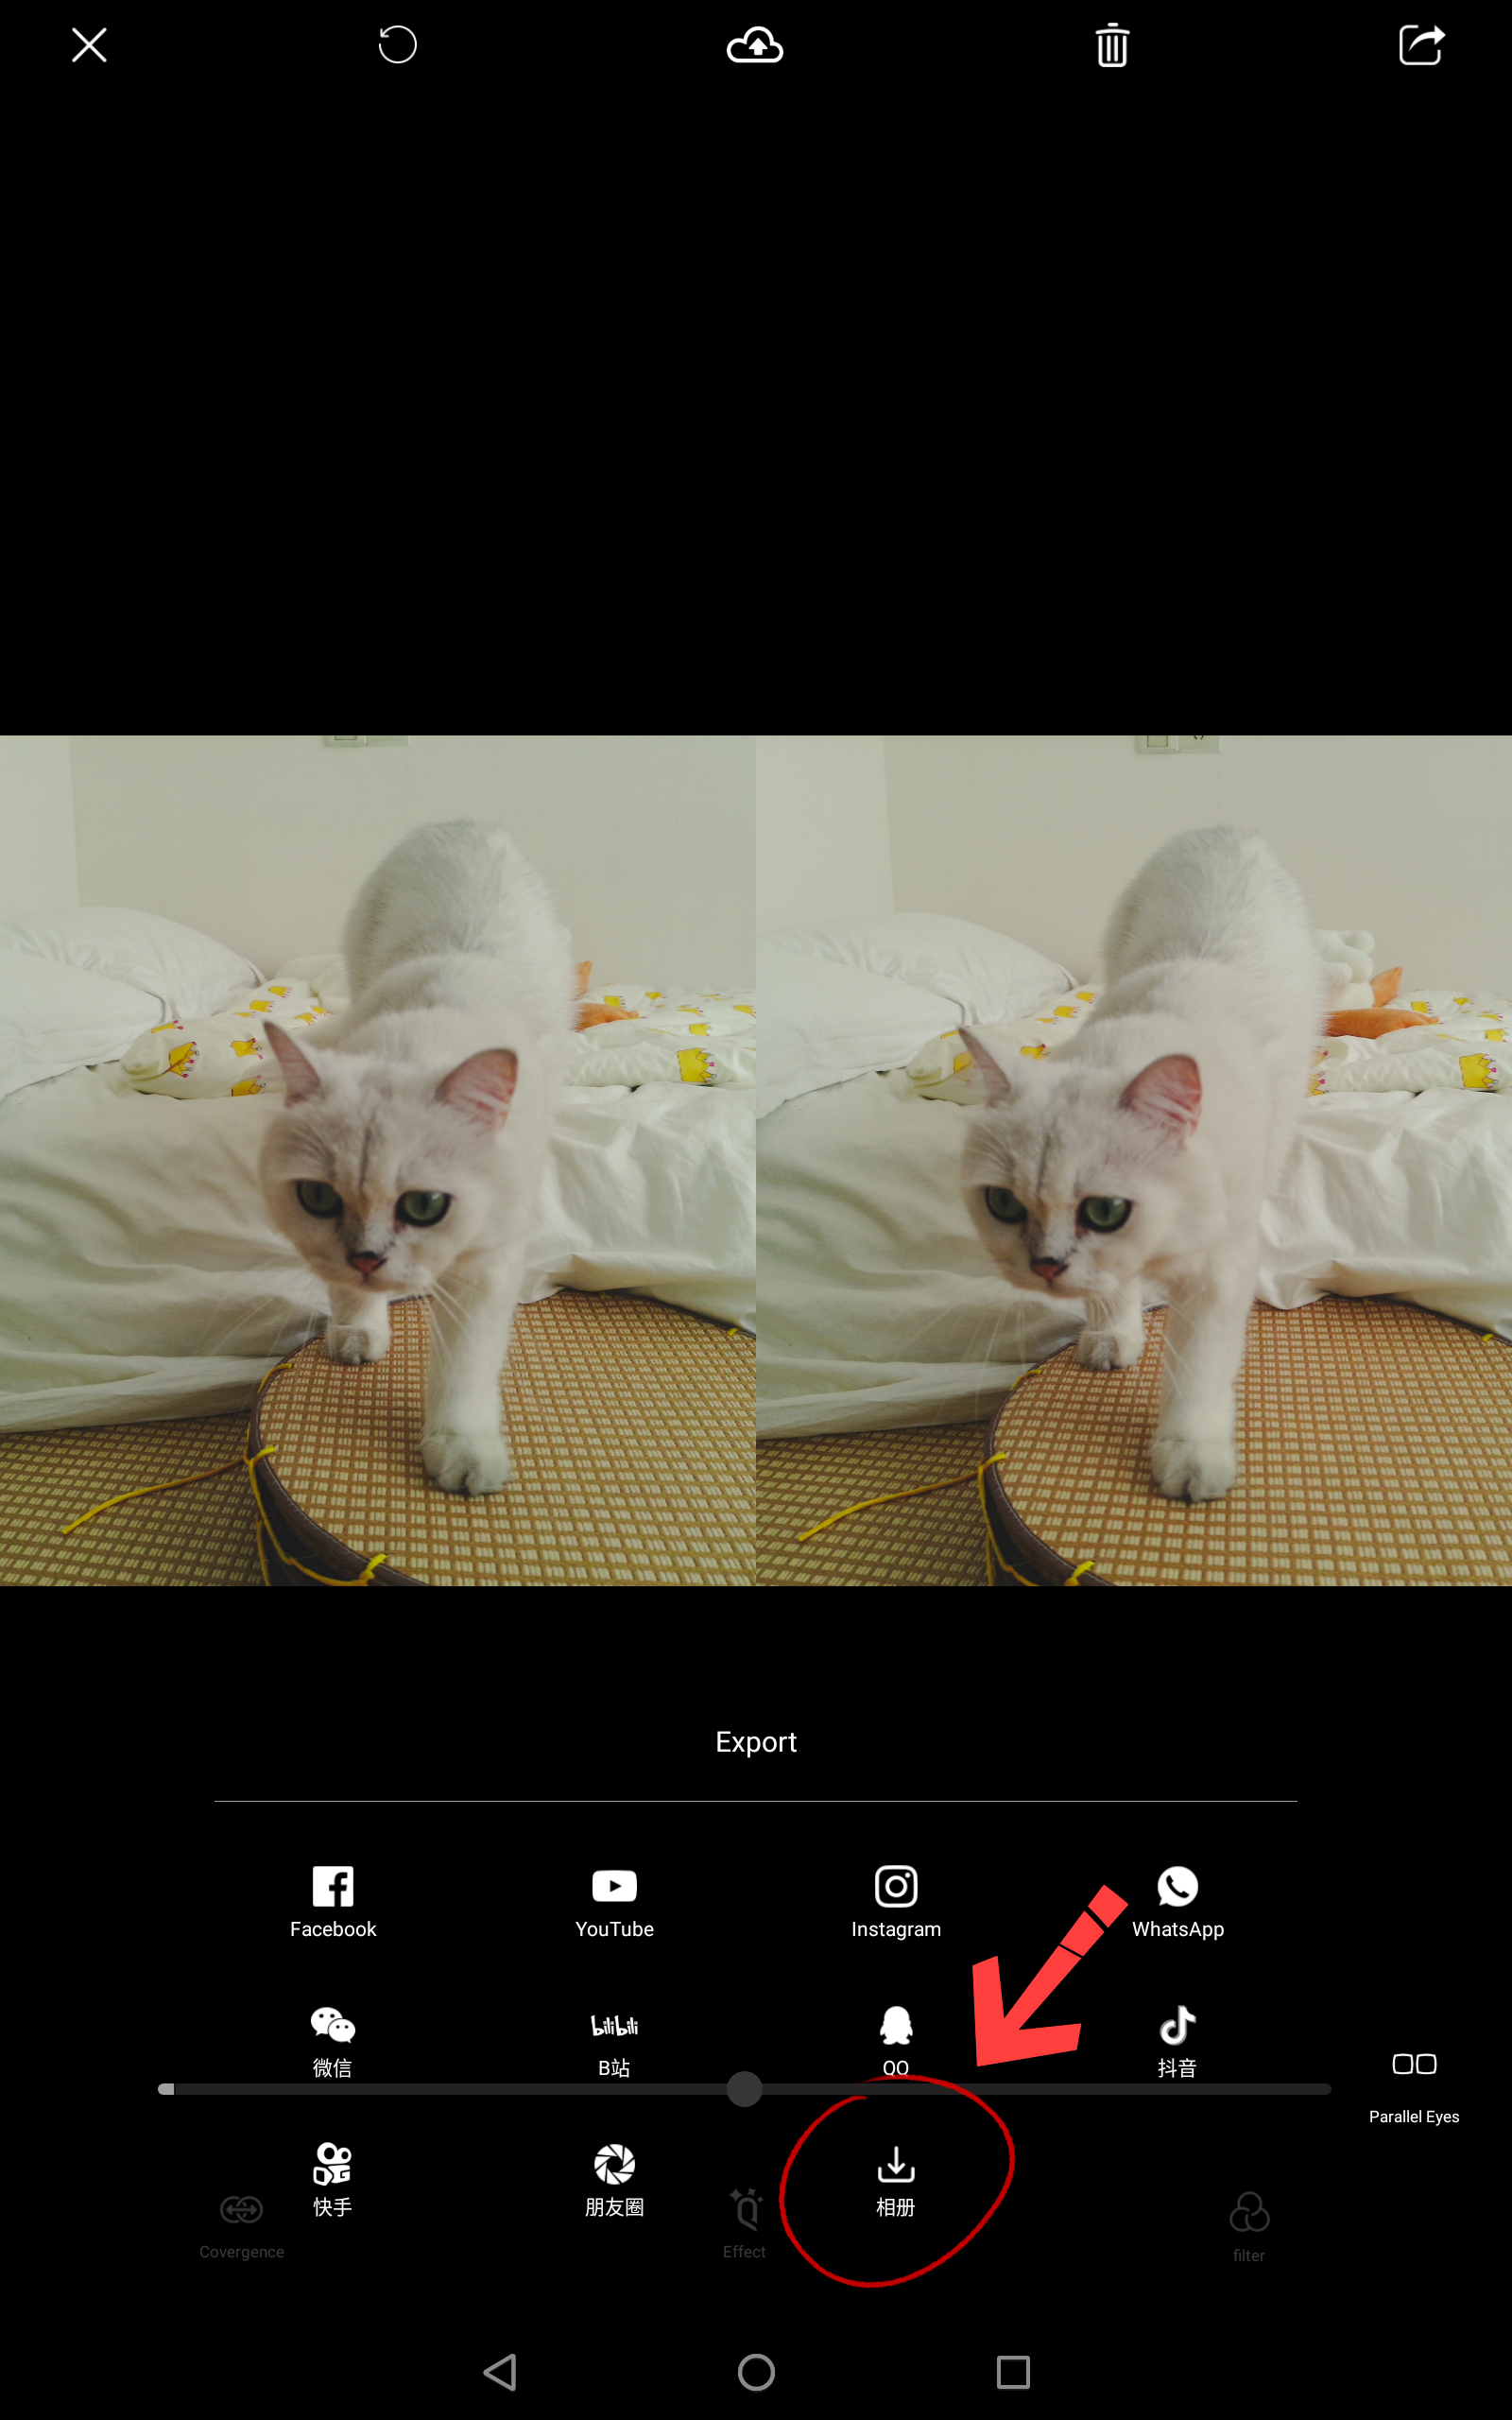
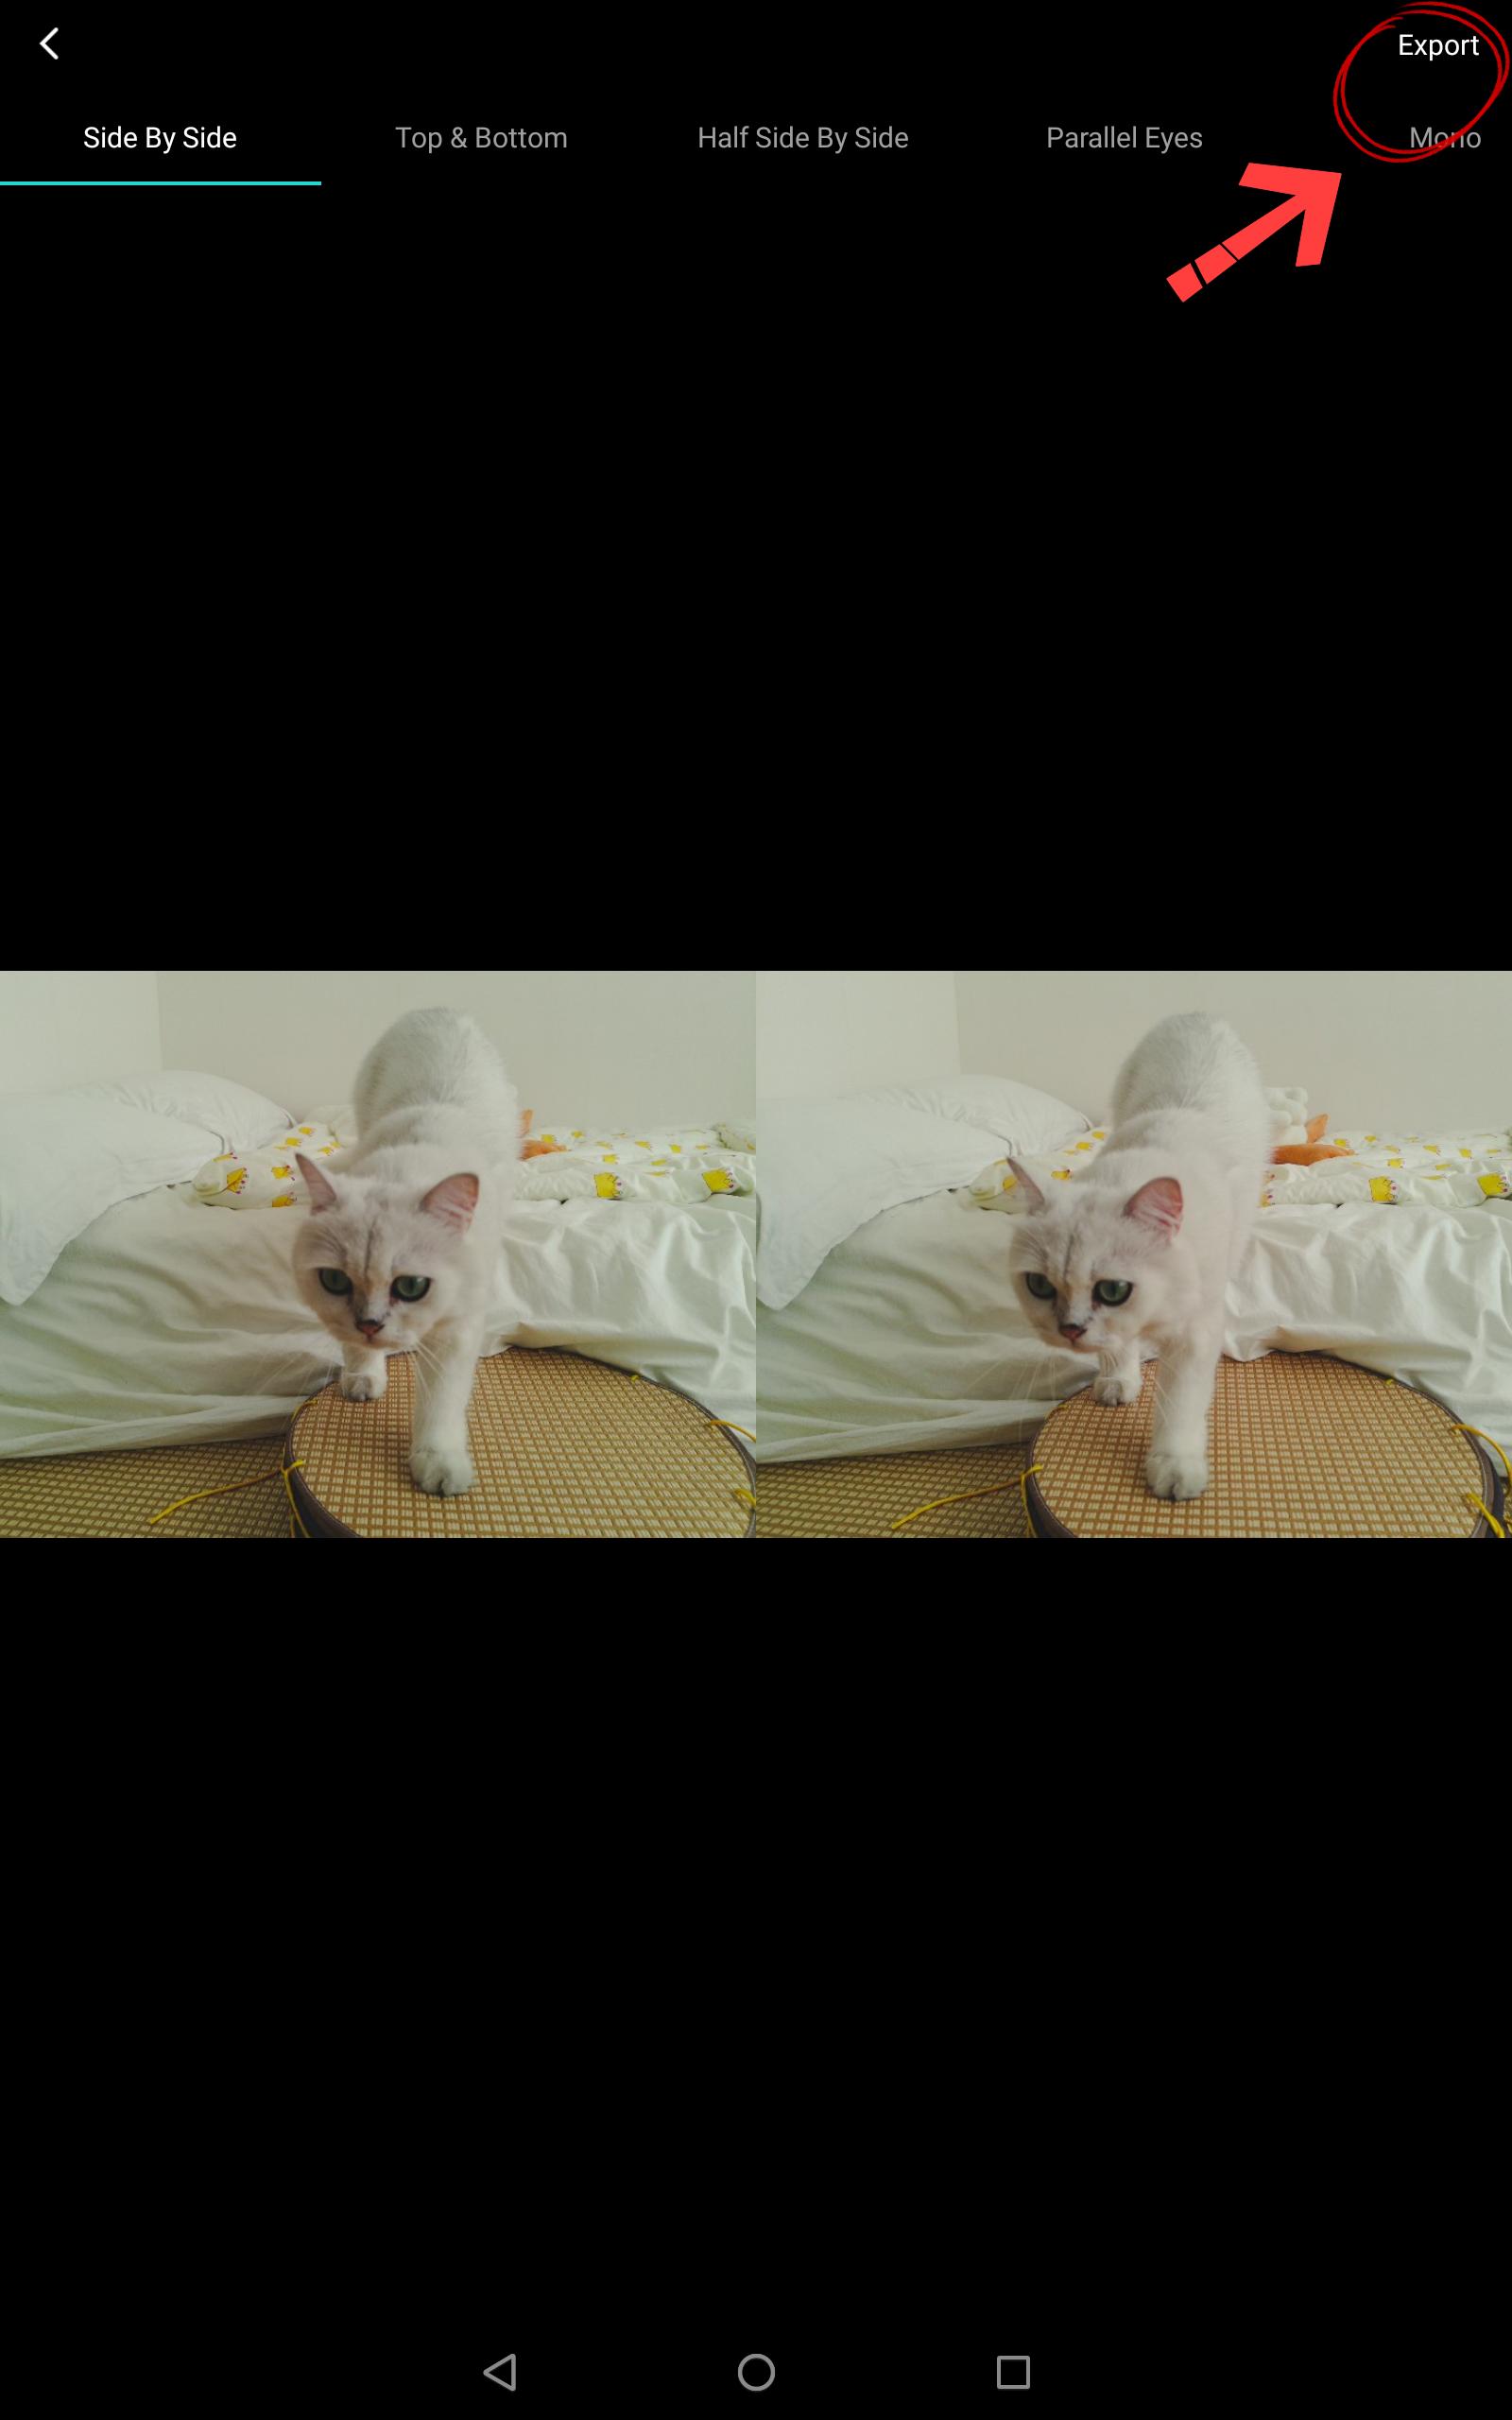
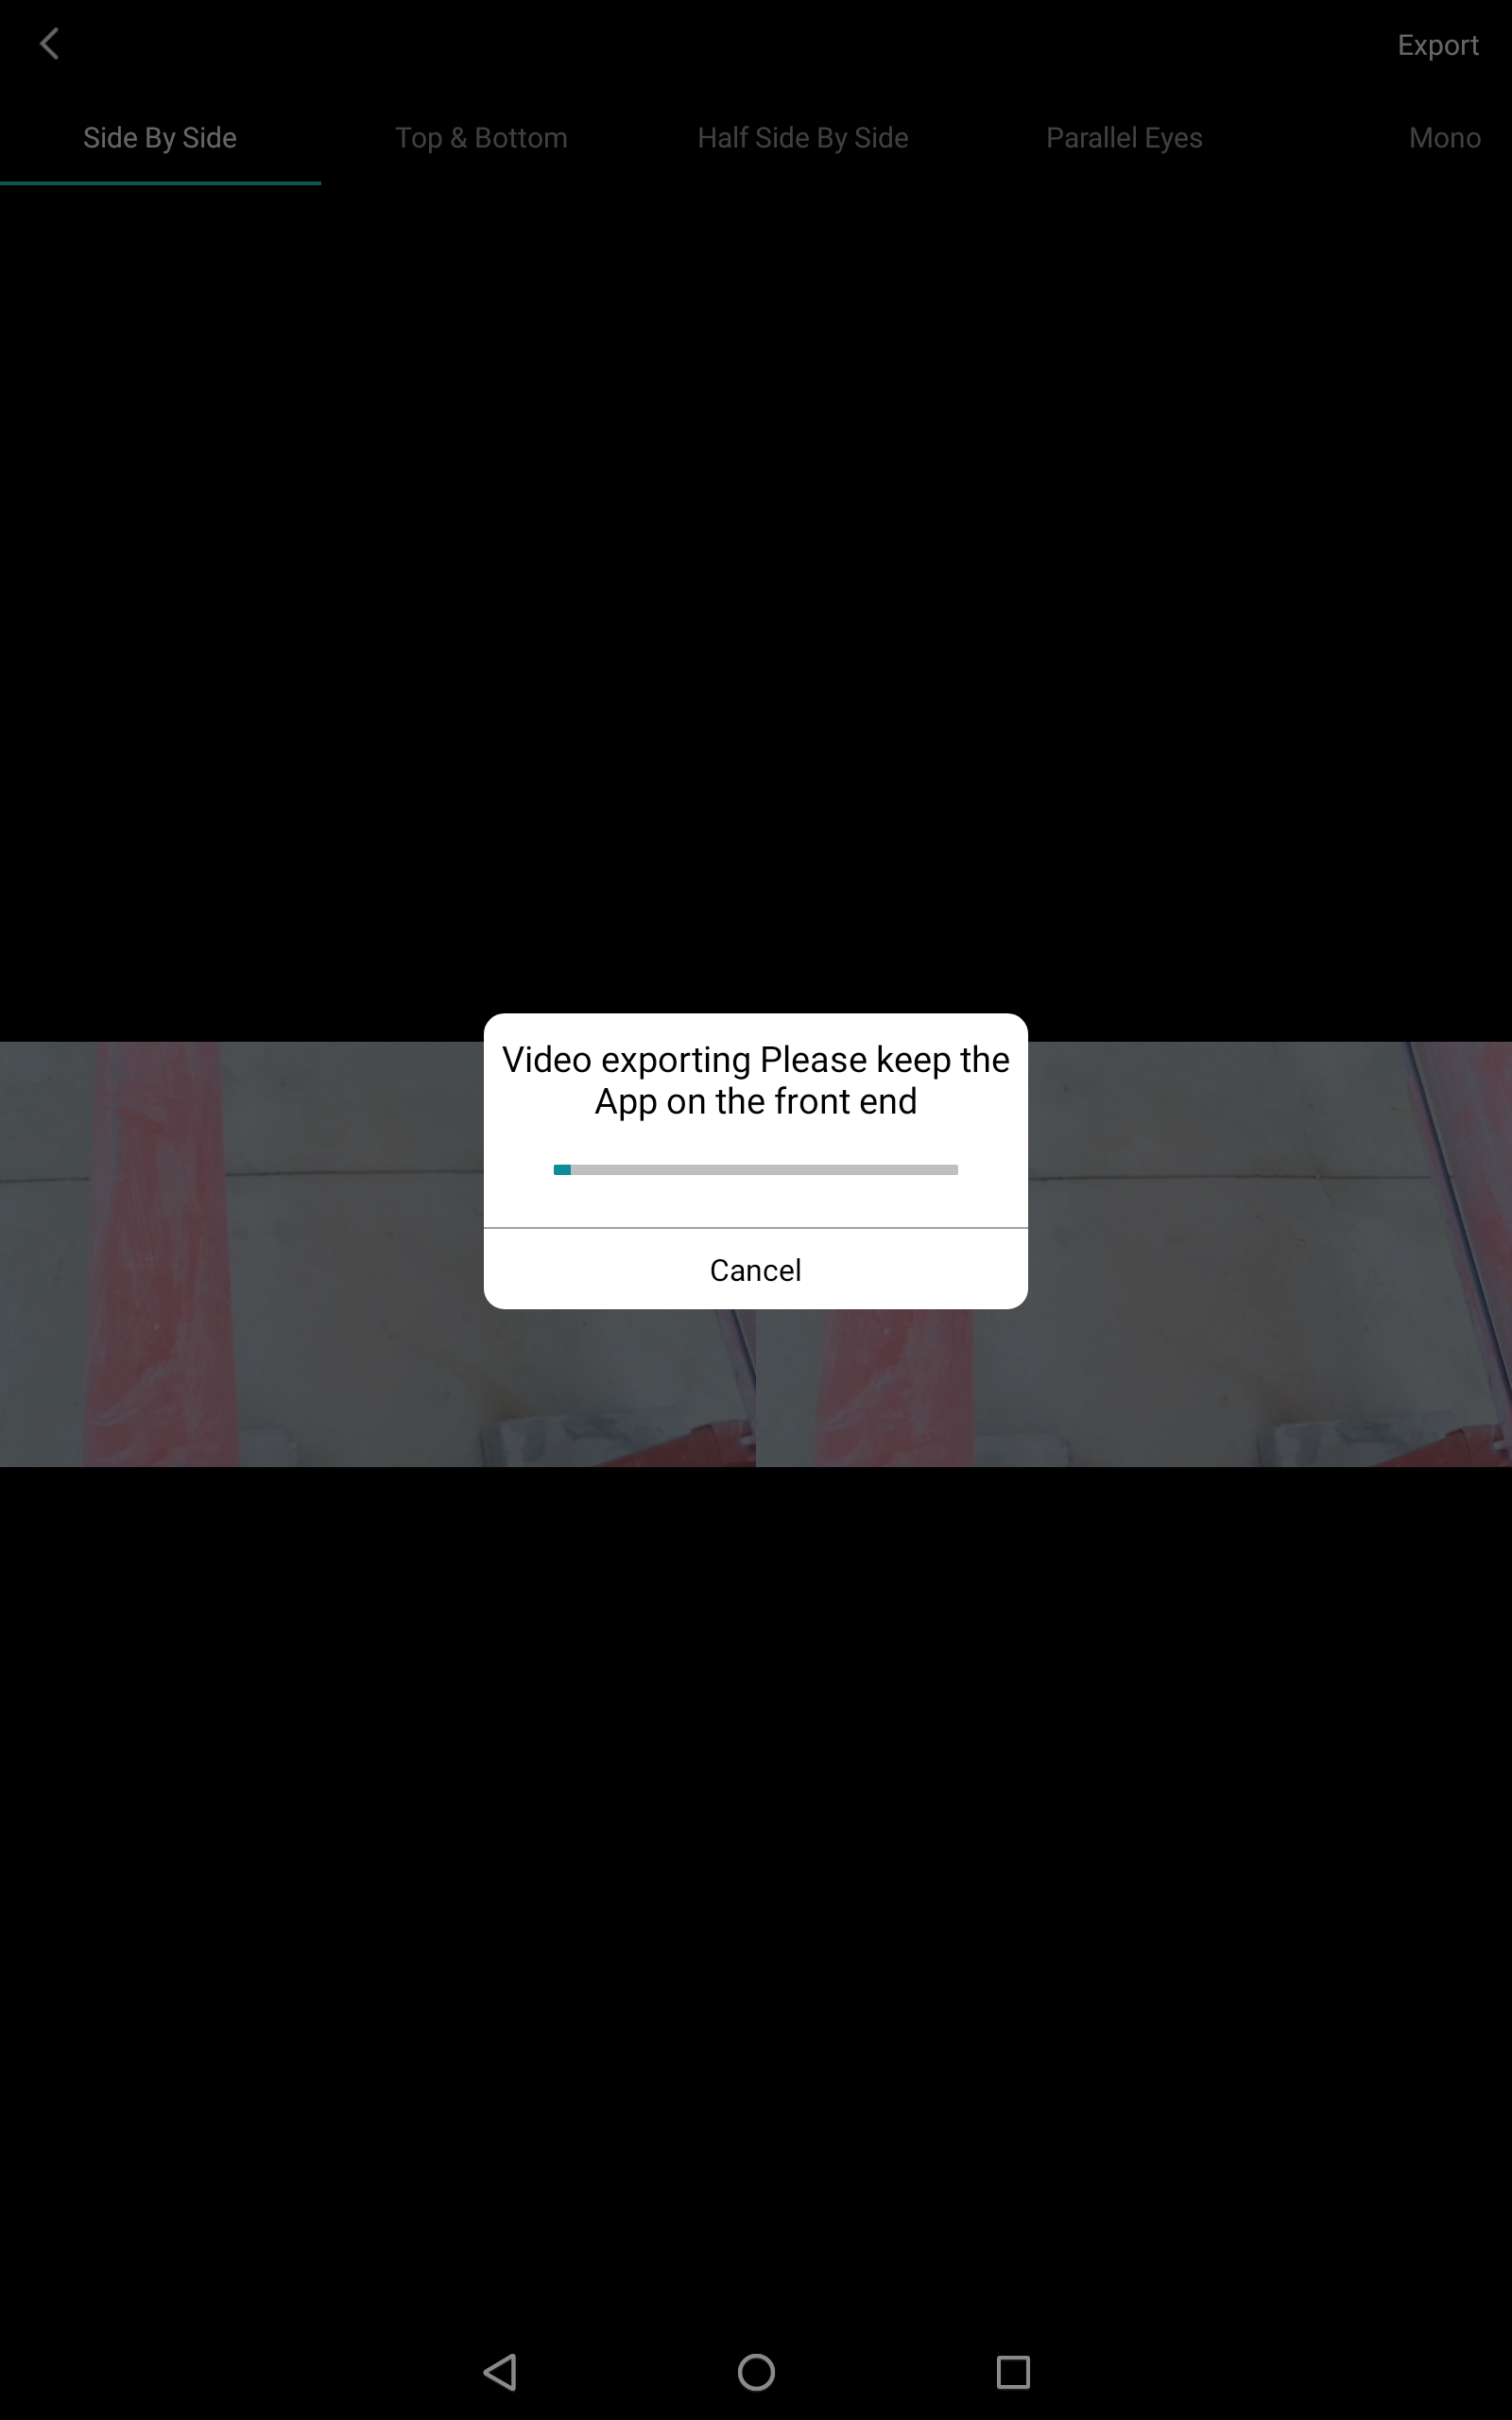
9. Export and wait til it completes.
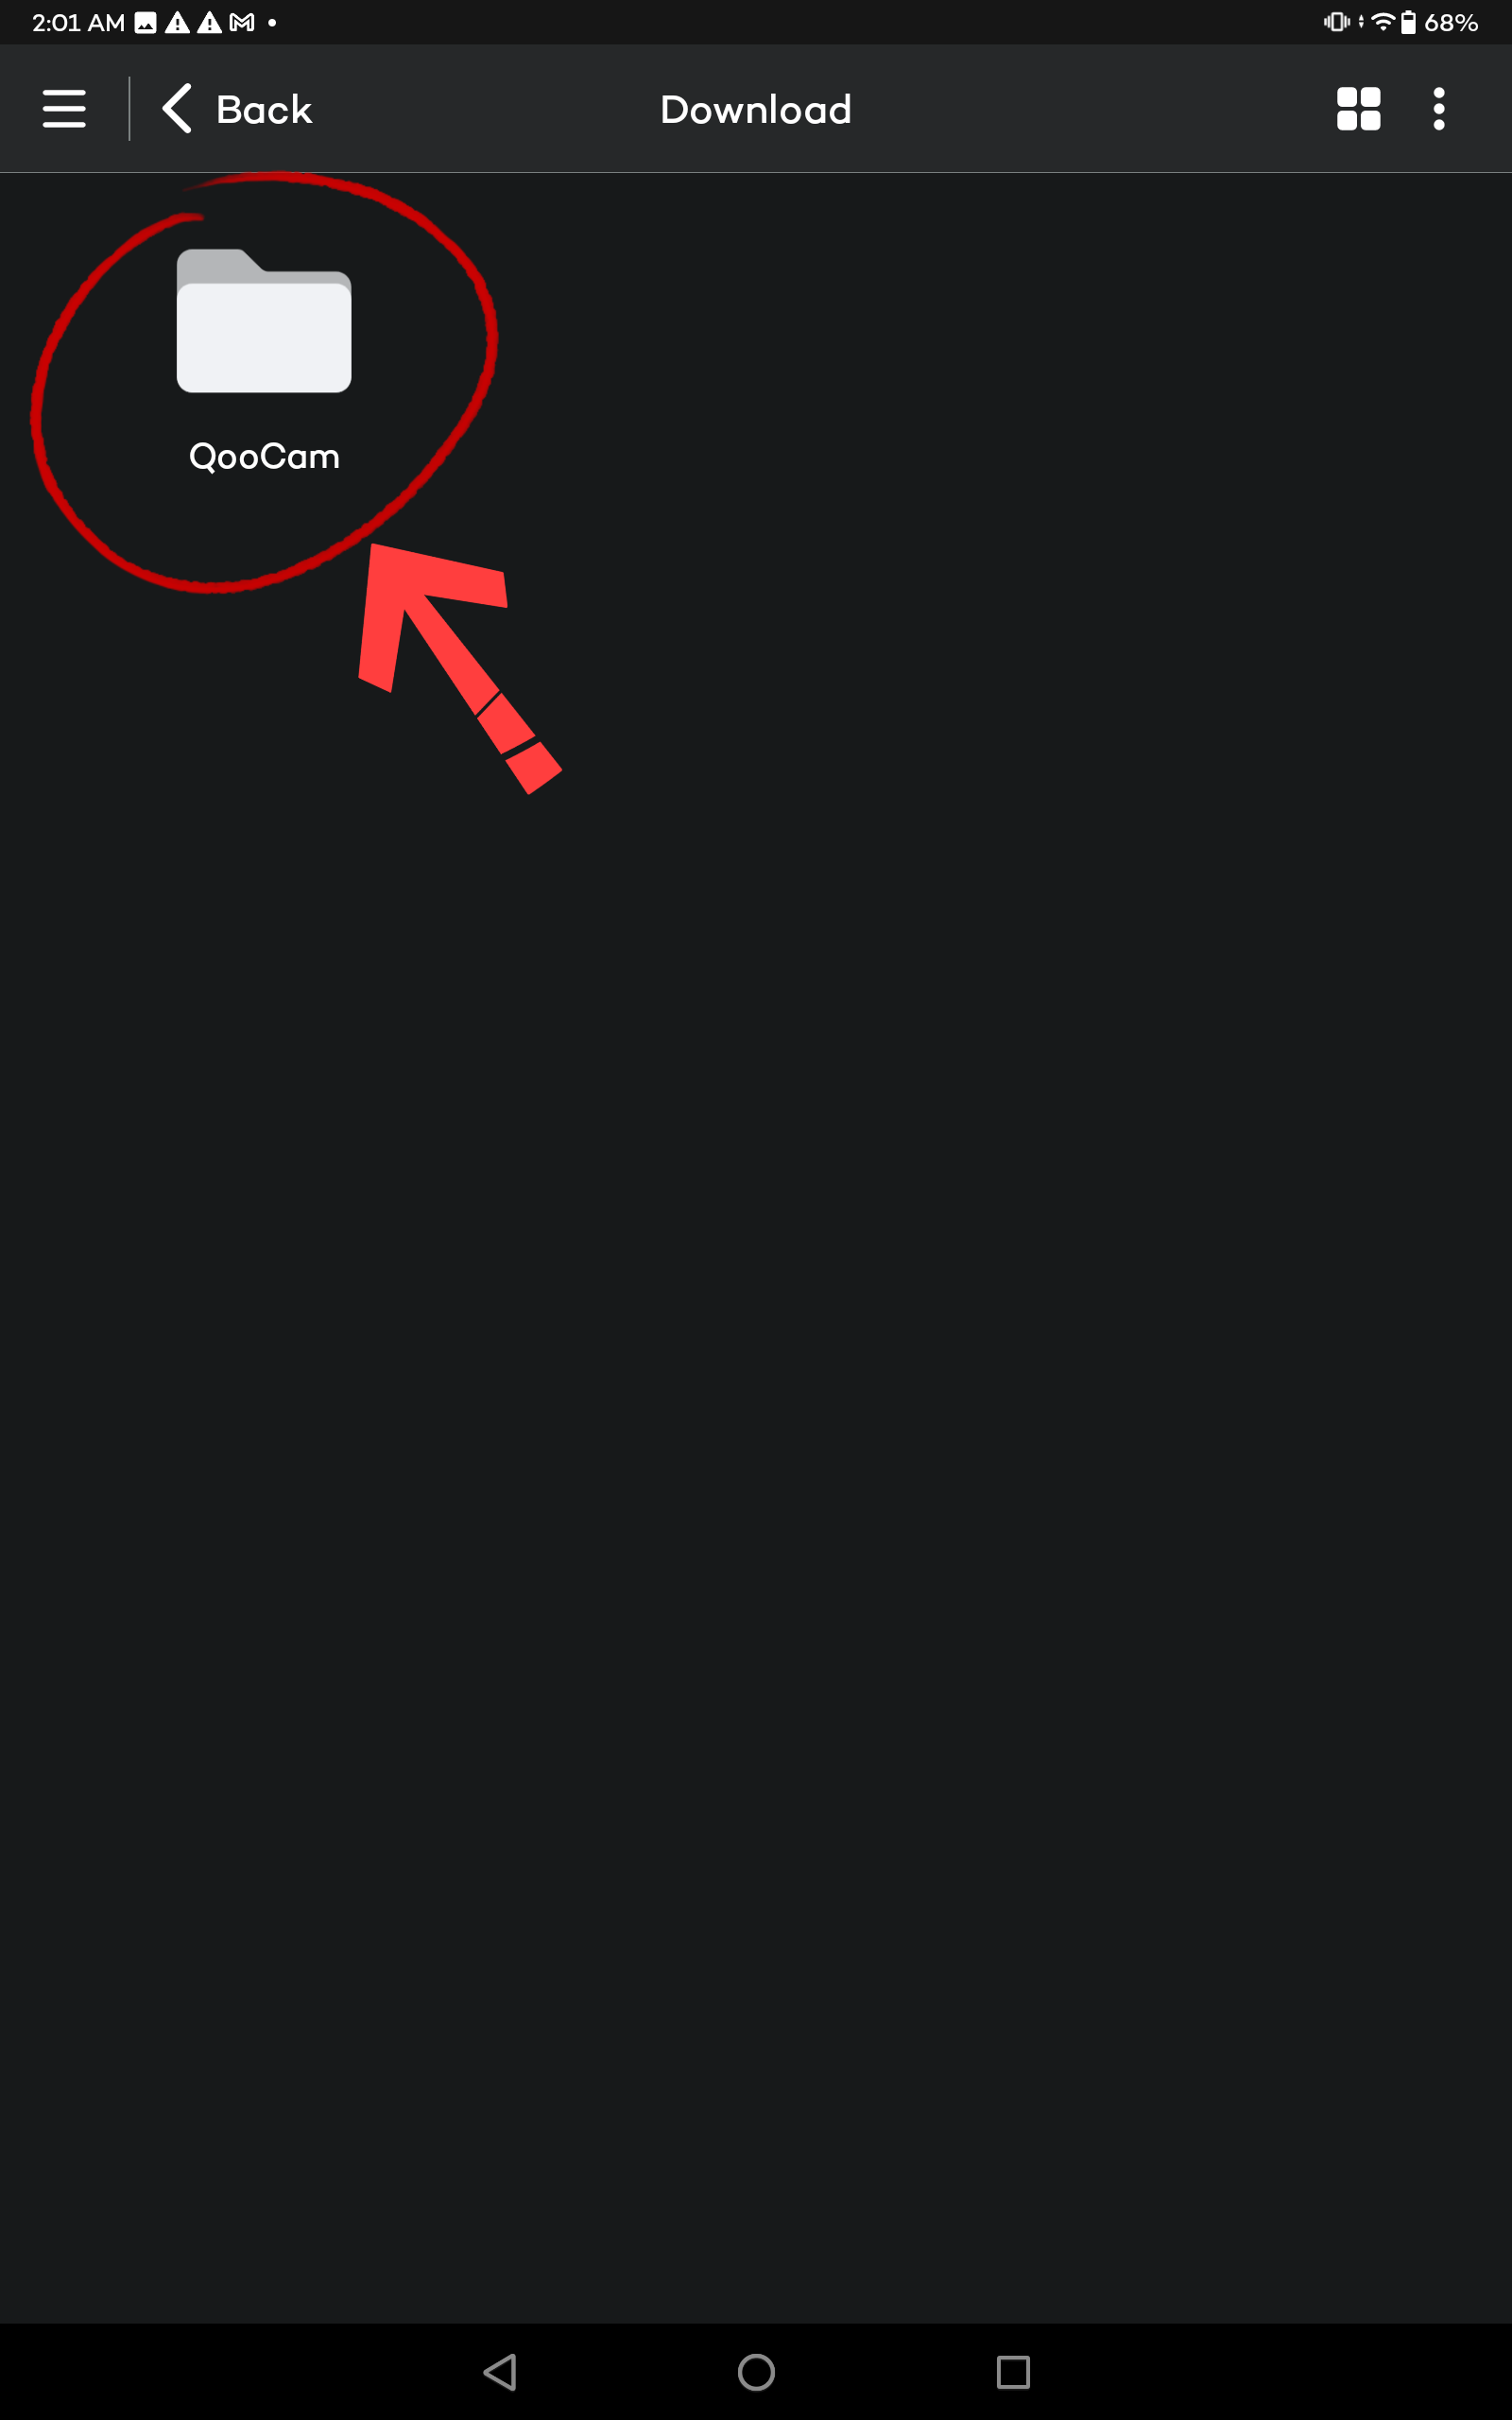
Lume Pad LeiaPlayer App Part
1. Open LeiaPlayer.

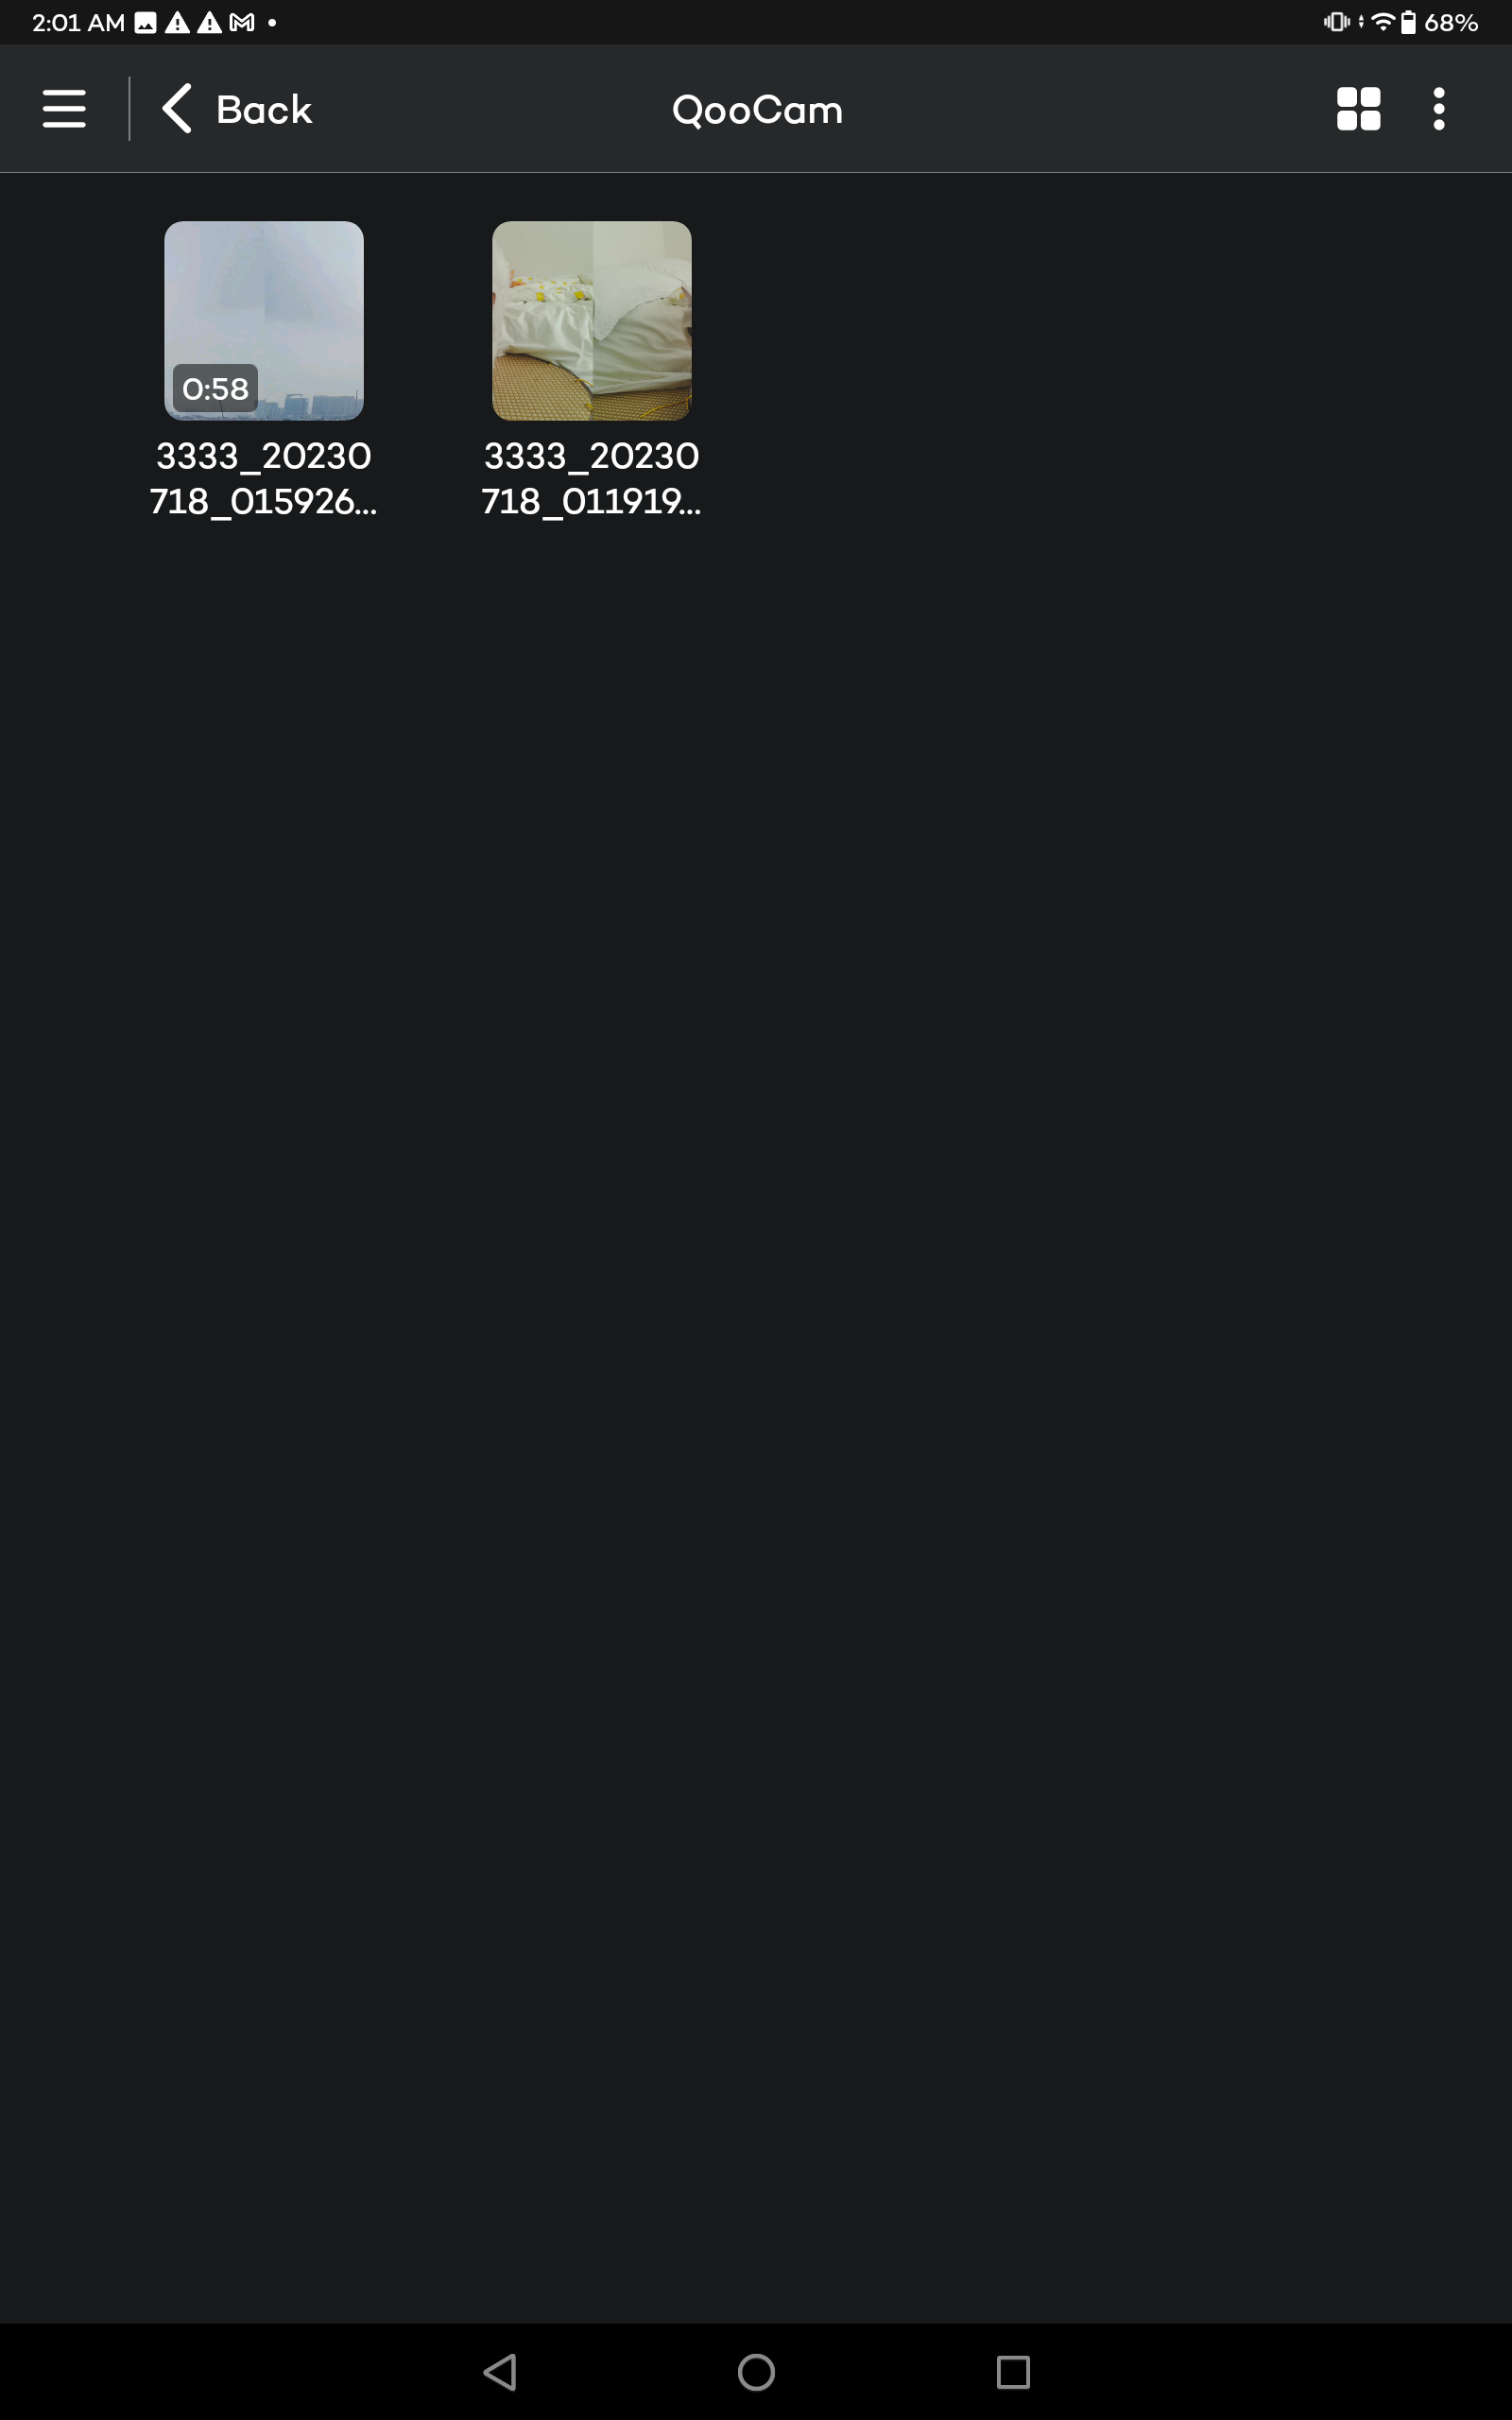
2. Select "Download"-"QooCam" to find to files to play.

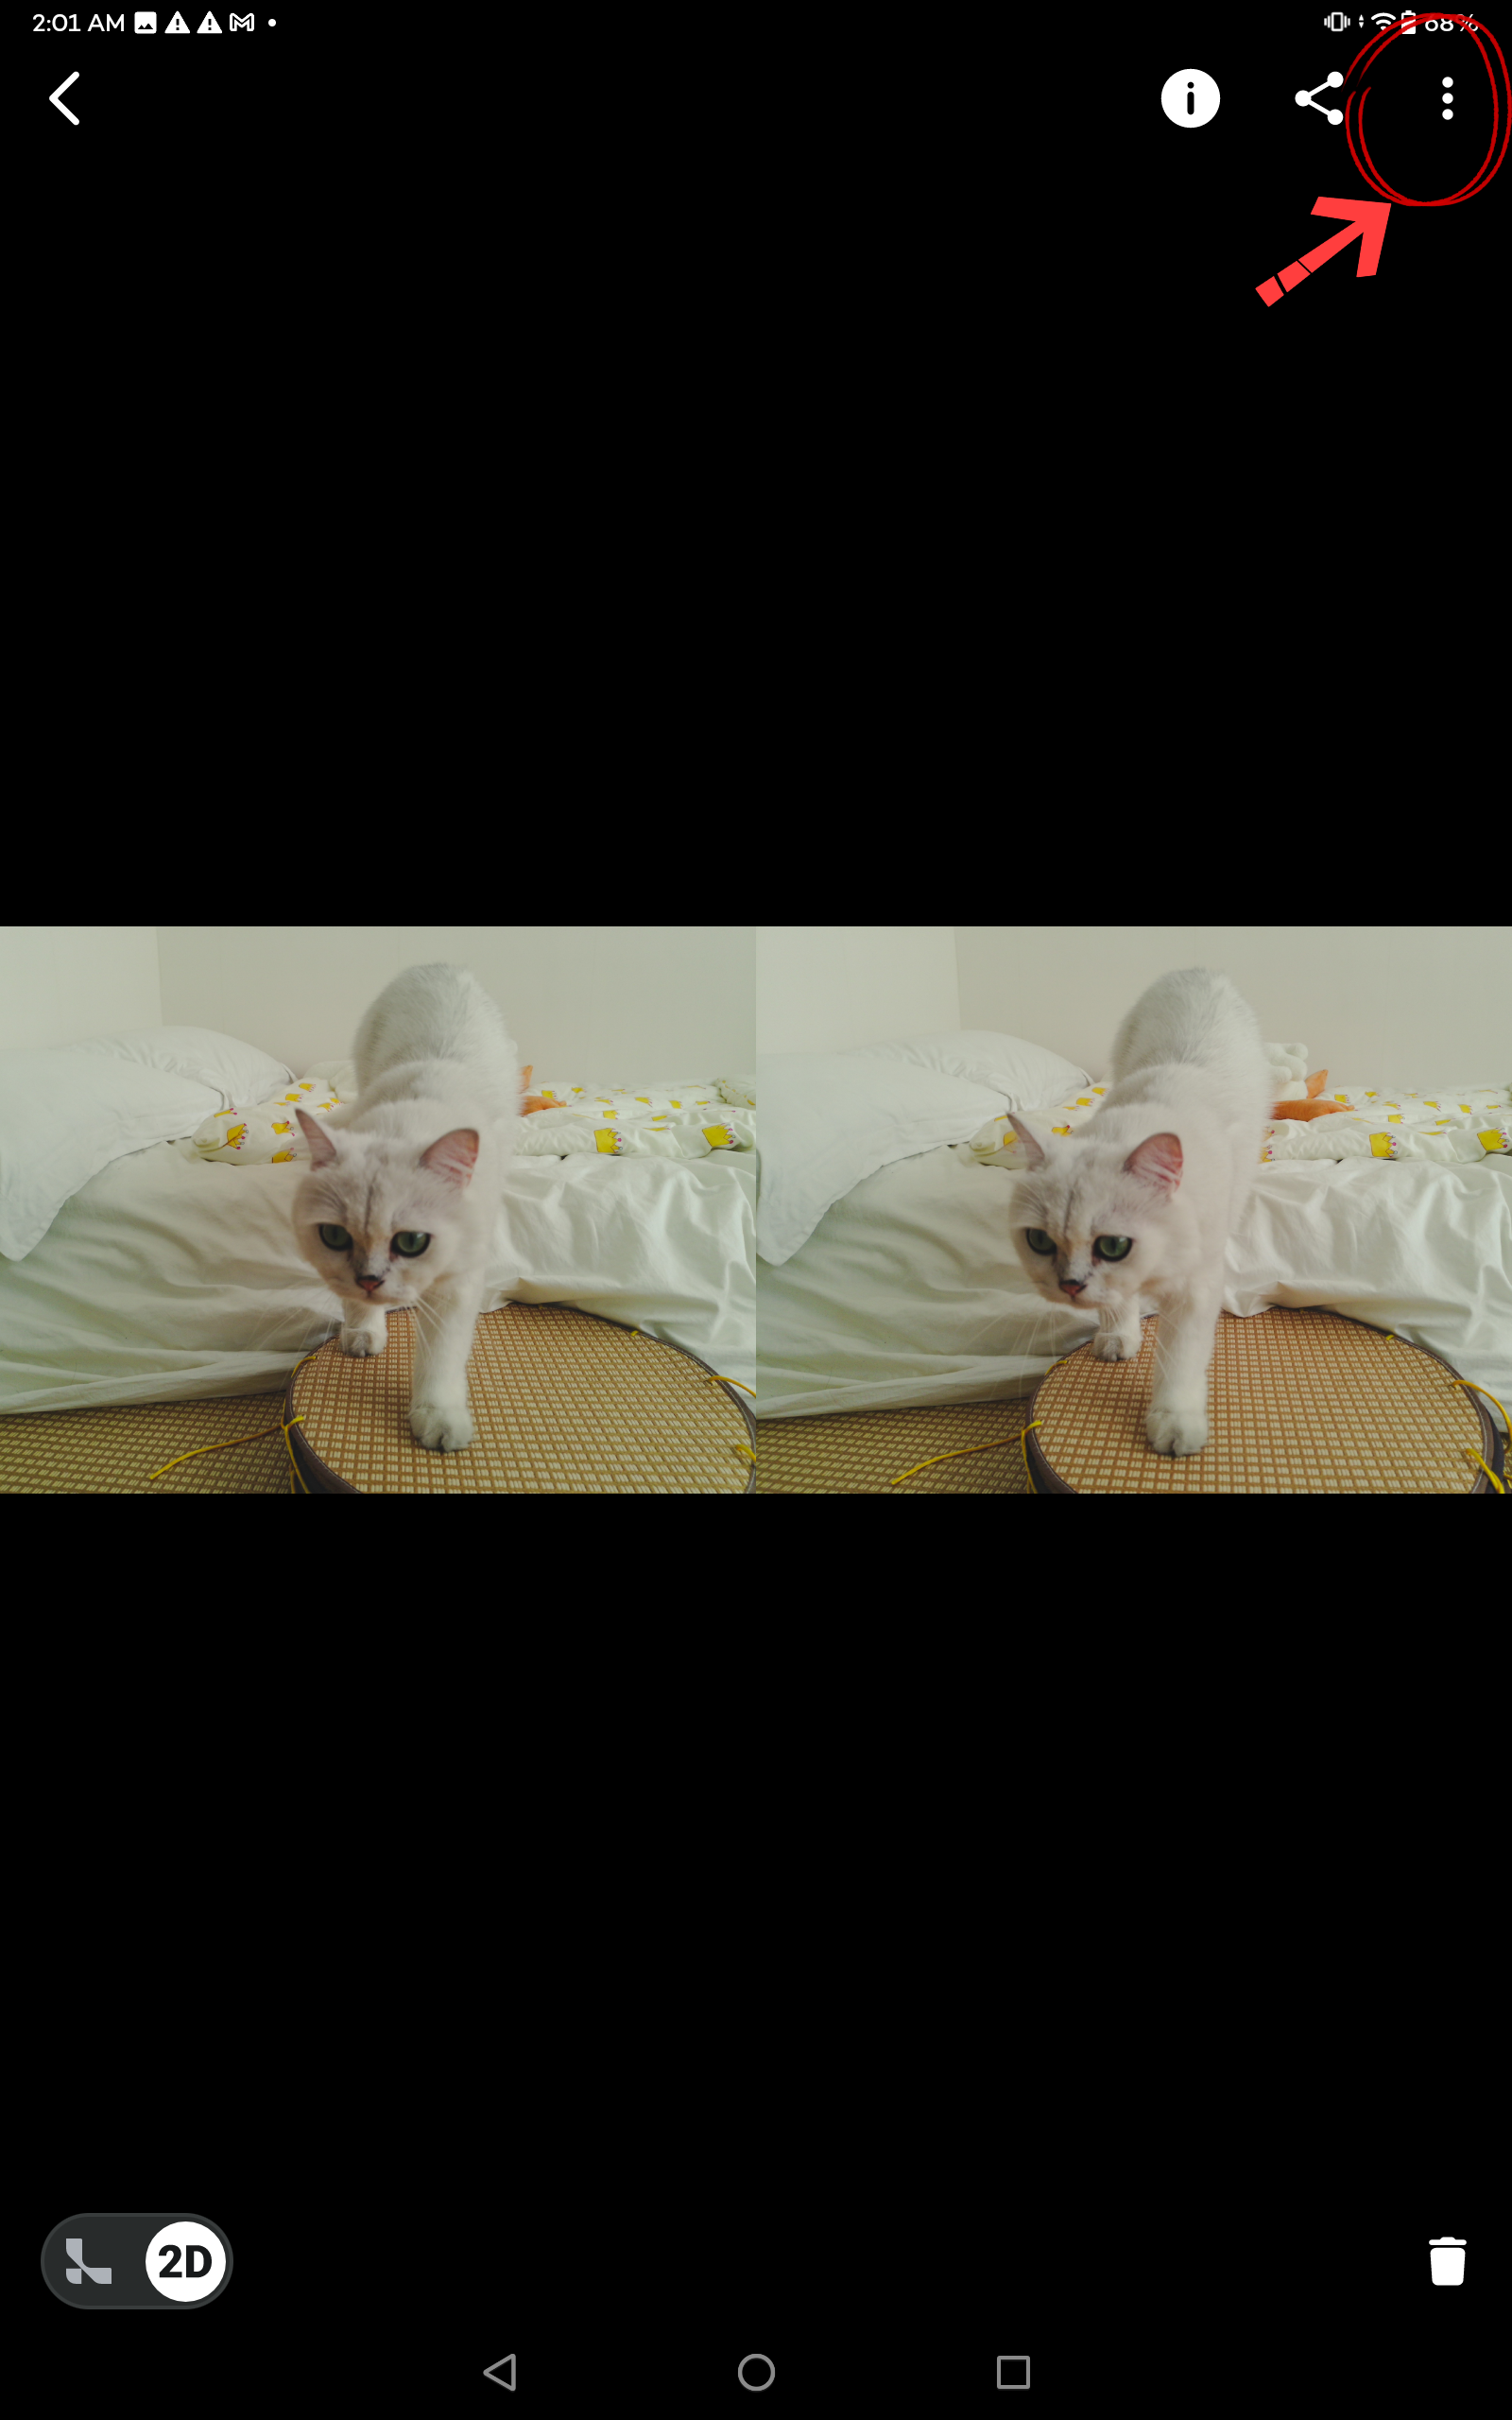
3. Click the upper-right icon to "Add 3D Tag".
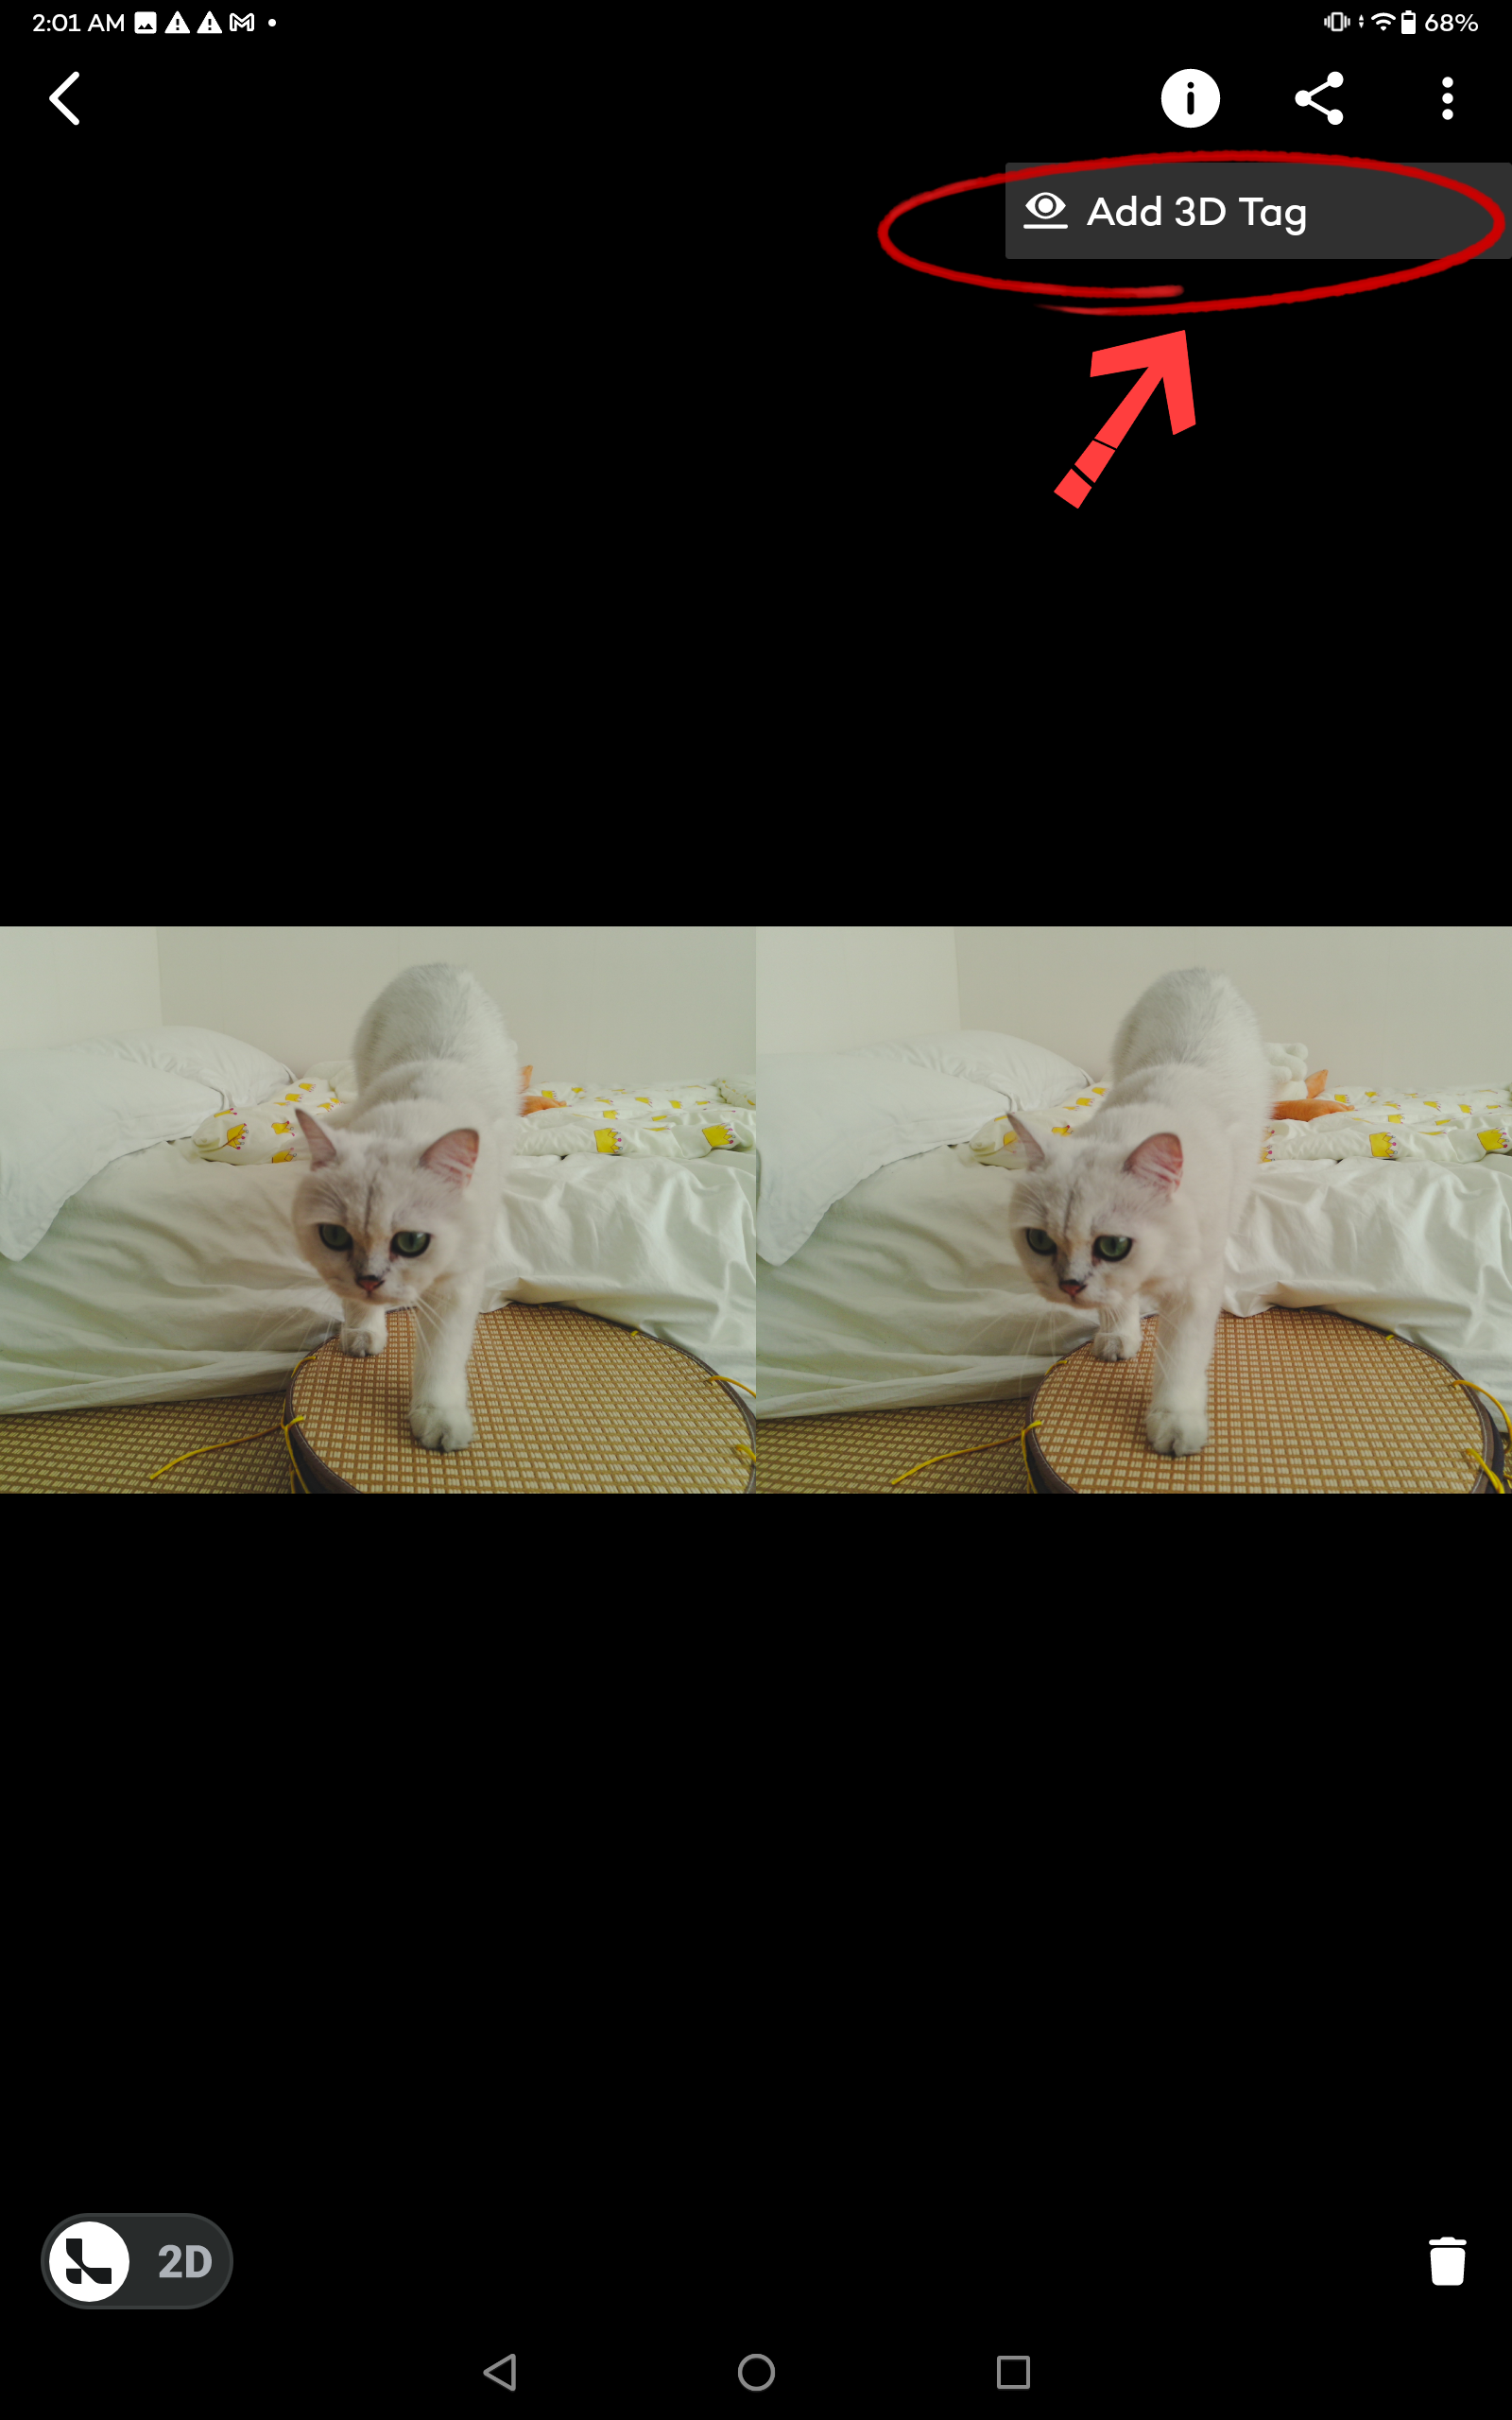
Now, you should view 3D effect of the files shot by QooCam EGO!

Well done, the tools and the pathway are well explained and will be a good resource when working in Stereoscopic 3D… Keep up the great work… the opportunities are Vast and will always be in need of better visualization tools… When you are ready… let me know I have ways to solve some of the problems that will help the platforms that Shoot 3D… Not all of them but a Big one.