


This tutorial is using DaVinci Resolve.
1. In 「Project Settings」, set the 「Color Management」 to 「DaVinci YRGB」, the [Timeline Color Space] to [Rec.2100 HLG], and the [Output Color Space] to [Same as Timeline].

2. The process typically requires about 4 nodes.

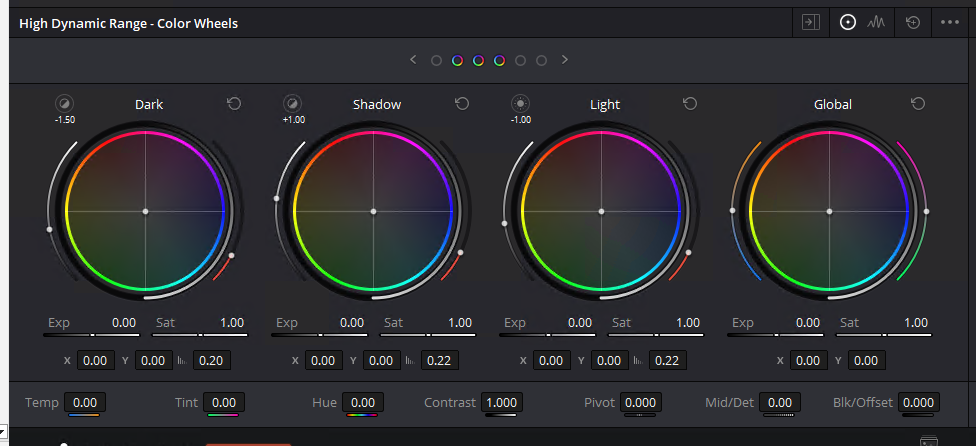
Node 1:
Adjust the brightness, using tools like「HDR – Color Wheels」. The reason that brightness adjustment is done in the first node is because different camera log gamma curves have different exposure biases, and after applying the LUT, the contrast usually changes significantly, making brightness adjustment fairly hard in later stage.
The standard HLG gamma of the 「QooCam 3 Ultra」 makes the brightness adjustment in Node 1 very precise.
Node 2:
Use the 「Color Space Transform」 effect from the 「Effects Library」 to convert HLG Rec.2100 to the target log space. In the example shown, it’s converting to 「Sony S-Log3 S-Gamut3」.
For 「Tone Mapping Method」, I personally prefer 「Saturation Mapping」.
Be sure to turn off both 「Apply Forward OOTF」 and 「Apply Inverse OOTF」

Node 3:
Apply the LUT. Here, I’m using the official 「Sony LUT」 for converting S-Log3 to personalized color.

Node 4:
This step is to export a LUT that works for both HDR and SDR in QooCam Studio. The HDR to SDR conversion in Studio is from 「Rec.2100 HLG」 to 「Rec.709 Gamma 2.2」.
Use the 「Color Space Transform」 effect from the 「Effects Library」 and set the 「Input Color Space」 to 「Rec.709」, 「Input Gamma」 to 「Gamma 2.2」, 「Output Color Space」 to 「Rec.2100」, and 「Output Gamma」 to 「Rec.2100 HLG」.
For 「Tone Mapping Method」, I prefer 「Saturation Mapping」.
Again, ensure that 「Apply Forward OOTF」 and 「Apply Inverse OOTF」 are both turned off.

For the final step, export the LUT (65-point Cube) and import it into 「QooCam Studio」. This LUT will correctly apply the desired color style in QooCam Studio, whether exporting in HDR or SDR.

Similarly, if your final output in DaVinci is an SDR video, set the 「Color Science」 in 「Project Settings」 to 「DaVinci YRGB」, the 「Timeline Color Space」 to 「Rec.709 (Scene)」, and the 「Output Color Space」 to 「Same as Timeline」, then remove Node 4.
This workflow can also be applied to HDR videos after reframing in 「QooCam Studio」
Buy QooCam 3 Ultra 8K 360 Camera Now>
If you have any question in the usage, please feel free to contact our service team at service@kandaovr.com for assistance.